SETTING UP
Connection
You
can
connect
the
Quick Printer II
directly to the TRS-80
card-
edge; to
the TRS-80
Expansion Interface
Line
Printer card-edge; or
to another
device
equipped with
an
RS-232C
Interface. There is a
separate
input
jack
for
each of
these
options, and
a switch
to
tell the
Printer
which input you
want to use.
To
a
TRS-80
1. Turn
off both
the Printer and the
TRS-80.
2. Load
printer-paper.
3. Plug
the
Printer
power cord into
a
source
of 120 VAC,
60 Hz
power.
Notice
that
the
Printer
has a
"safety" plug
with
a
built-
in
ground to
help assure reliable operation.
Do
not defeat
this
ground.
4. Slide
INPUT SELECT to TRS BUS position.
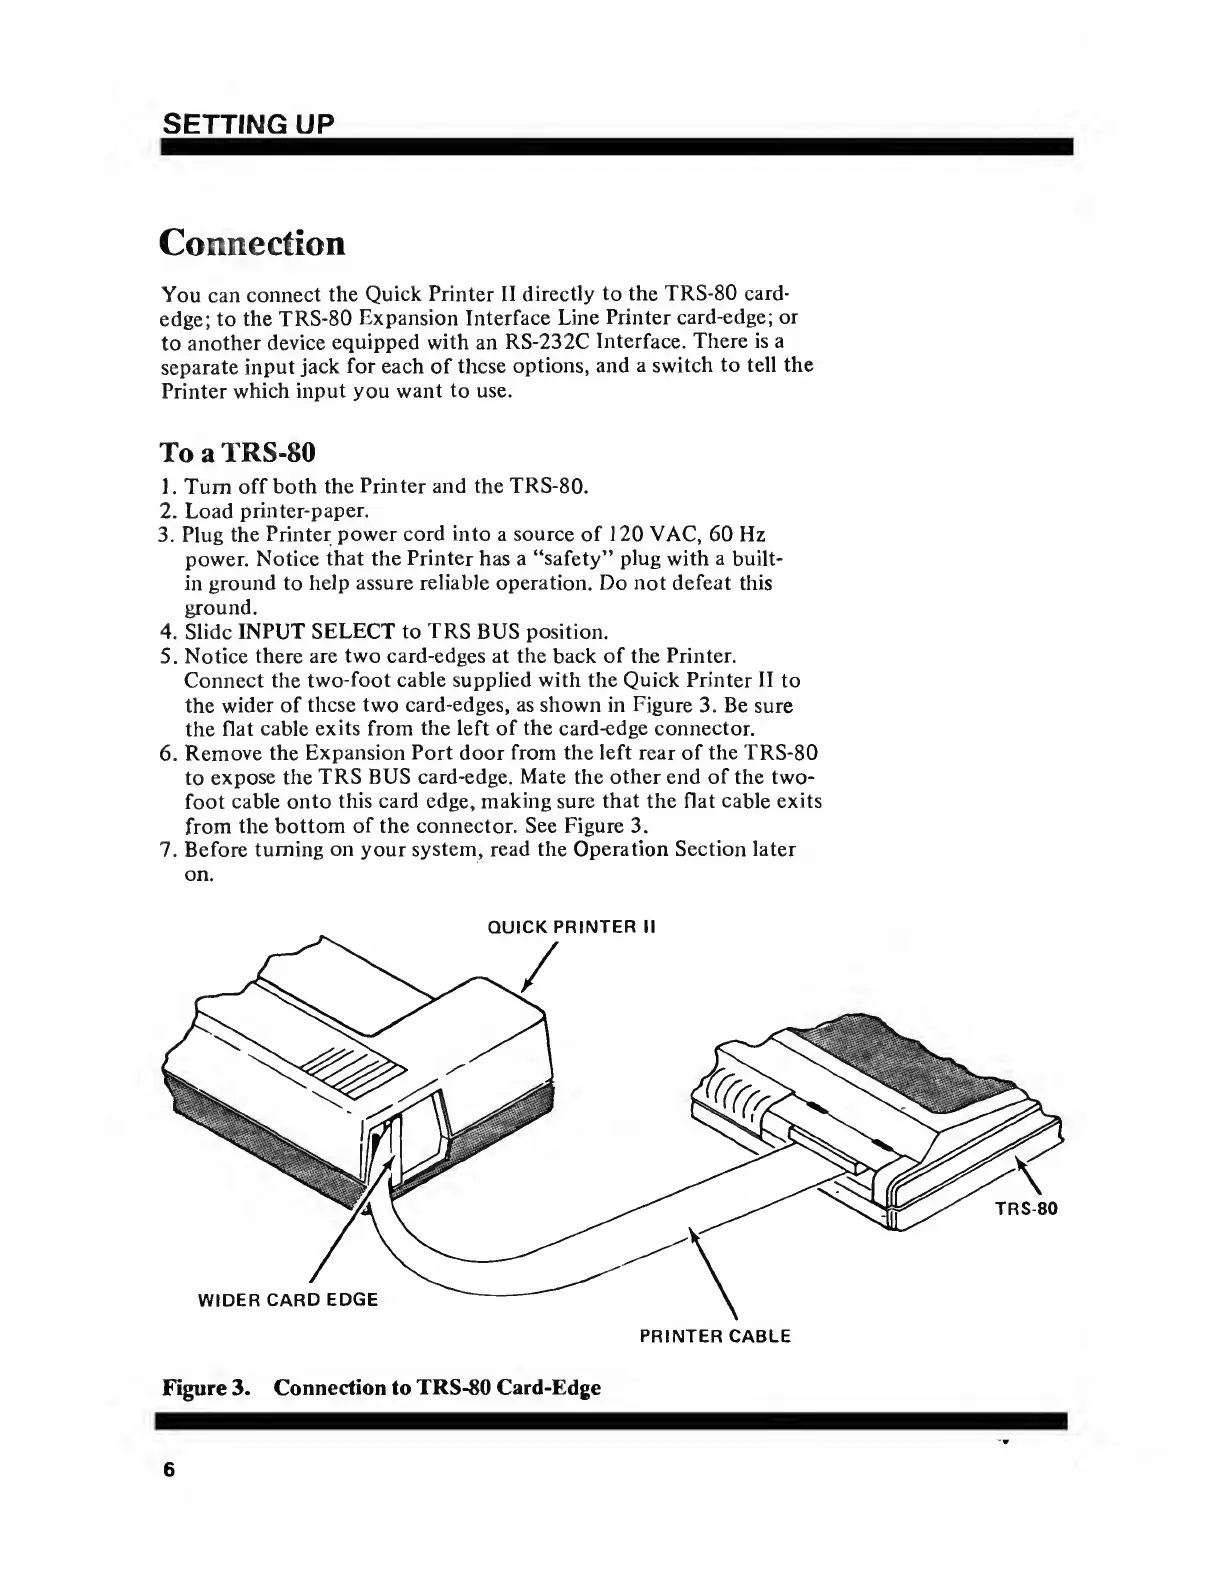
5. Notice
there are
two card-edges
at
the
back
of the Printer.
Connect the
two-foot cable supplied
with
the Quick Printer II
to
the
wider
of
these
two card-edges, as shown in
Figure 3. Be
sure
the
flat
cable
exits
from
the left of the card-edge connector.
6.
Remove
the
Expansion Port
door
from the left rear of the TRS-80
to
expose the
TRS
BUS
card-edge. Mate
the
other
end
of
the two-
foot
cable
onto this card edge,
making
sure
that
the flat cable
exits
from
the bottom
of
the connector.
See Figure
3.
7.
Before
turning on your system, read the Operation Section later
on.
QUICK
PRINTER
II
TRS80
WIDER
CARD
EDGE
PRINTER CABLE
Figure 3. Connection to
TRS-80 Card-Edge