13Completing the Installation
ˆ
Completing the Installation
TESTING THE
CONNECTIONS
Before you continue, make sure you
have securely made all connections.
Then reconnect the cable to the vehicle
battery’s negative (–) terminal.
Set
LEVEL (MIN/MAX)
on the amplifier to
its mid position (see “Adjusting the Audio
Level” on Page 14). Then turn on your
vehicle’s ignition and auto sound system
to confirm that the amplifier and auto
sound system operate properly. The am-
plifier turns on after a few seconds.
If you cannot quickly confirm whether
the auto sound system and amplifier are
working properly,
turn off your vehi-
cle’s ignition and disconnect the ca-
ble from your vehicle’s negative (–)
battery terminal.
Then recheck your
connections.
After you test the auto sound system
and amplifier and verify that everything
is properly connected and working, fol-
low the instructions in “Mounting the
Amplifier.”
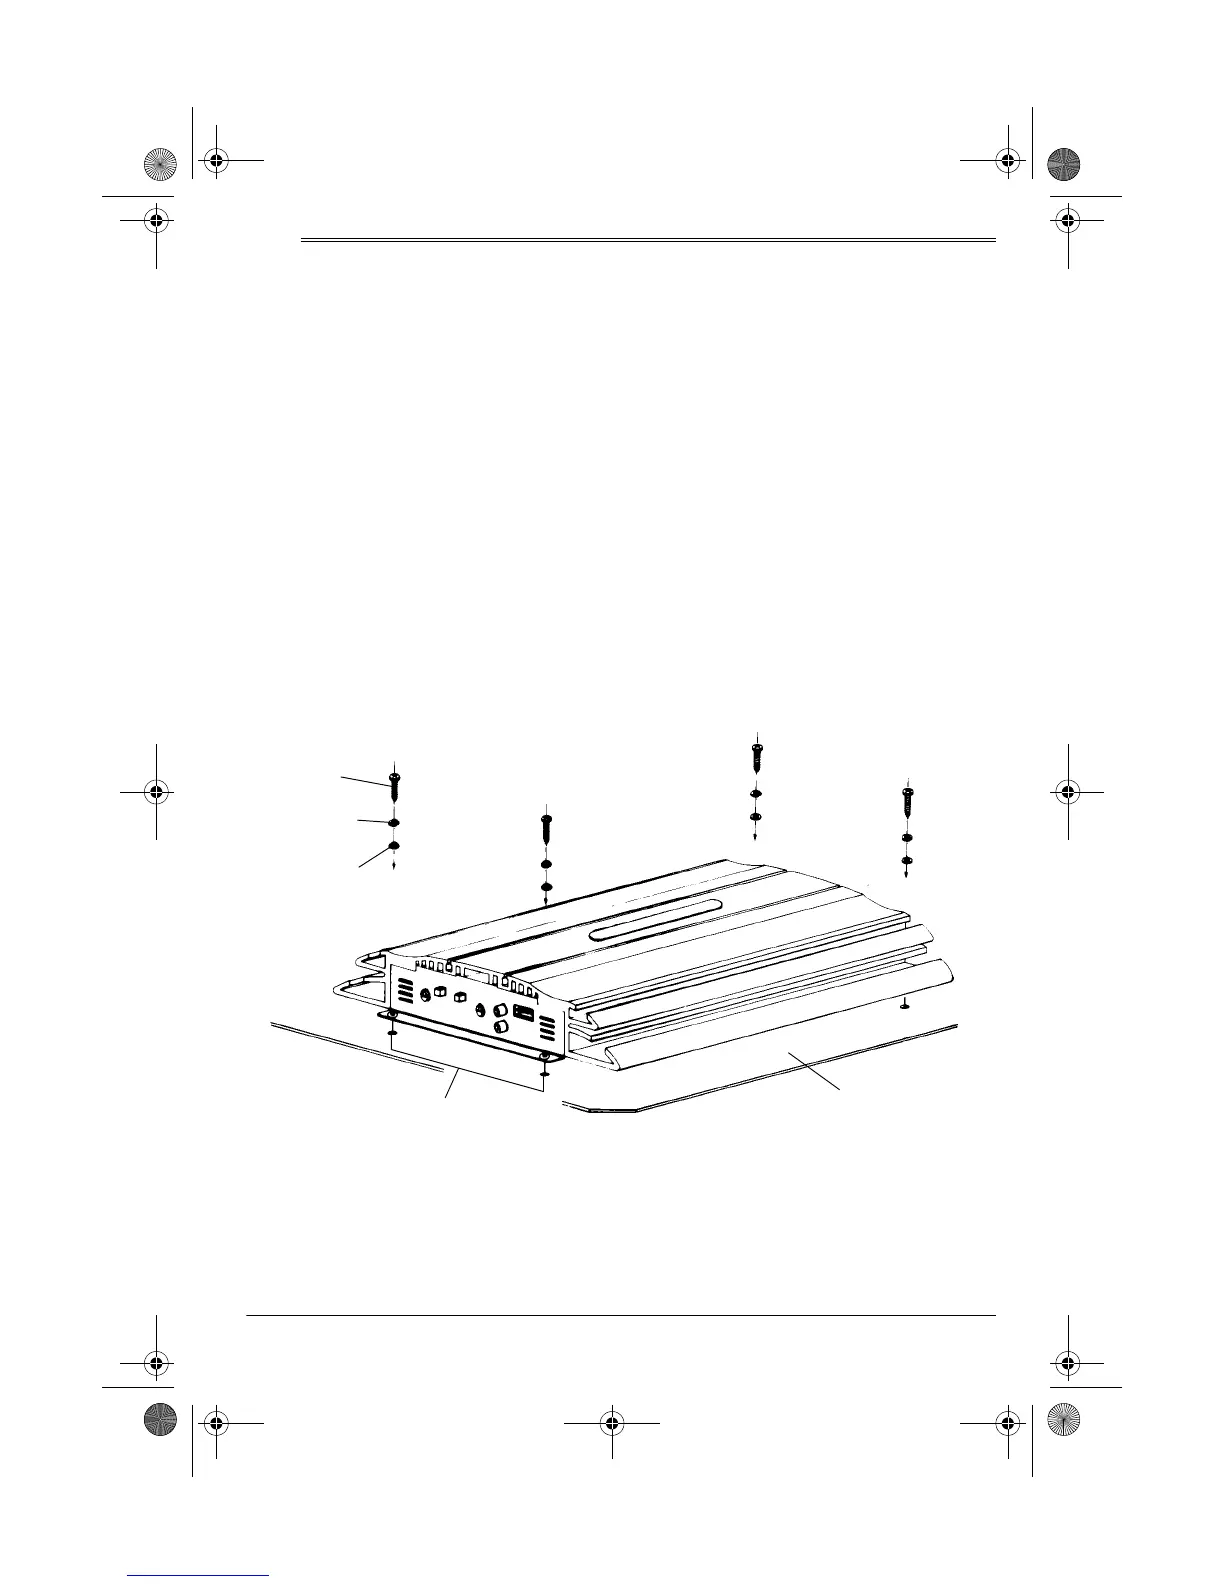
MOUNTING THE AMPLIFIER
Once you verify that the amplifier is con-
nected properly, follow these steps to
mount it.
1. Disconnect the cable from the vehi-
cle’s negative (–) battery terminal.
2. To make mounting more convenient,
temporarily disconnect the ampli-
fier’s connections (ground, primary
power, remote power, your auto
sound system’s input, and speak-
ers).
Screw
Lock Washer
Flat Washer
Chassis or Car Mat
1
/
8
-Inch
Mounting
Holes
12-2016.fm Page 13 Monday, April 10, 2000 4:33 PM
 Loading...