Wireless Operation
If your MultiRAE is equipped with a wireless
modem, its settings are controlled via the menu
items under “Wireless.” In order to save time while
operating the MultiRAE in a network, it is best to
configure the settings before taking the MultiRAE
into the field. Consult the User’s Guide for more
detailed instructions.
1. Enter Programming Mode by pressing and holding
[MODE] and [N/-] simultaneously until the password
screen appears.
2. Input the 4-digit password. (The default password
is “0000.” If you do not know the password, select
“Done.”) Then follow the instructions for individual
or multiple zero and span calibration.
3. Press [N/-] repeatedly until “Wireless” is
highlighted.
4. Press [Y/+] to select Wireless Settings.
5. Check that the radio is turned on, the PAN ID
matches the PAN ID of the network, and match the
channel of the network, too. Select Join Network if
a network is already established. You may also set
the reporting interval and turn on the off-network
alarm.
6. When you are done with the settings, press
[MODE] to go back to the programming screen,
and [MODE] again to return to the main screen.
7. Start the RAELink3 Mesh wireless modem and
ProRAE Guardian on your computer.
8. The antenna icon and signal-strength bars should be
shown on the screen’s upper-left corner.
9. Check that data is being received by ProRAE
Guardian.
WARNING
To reduce the risk of ignition of hazardous
atmospheres, recharge, remove, or replace the
battery only in an area known to be non-hazardous!
WARNING
Do not replace sensors in hazardous locations.
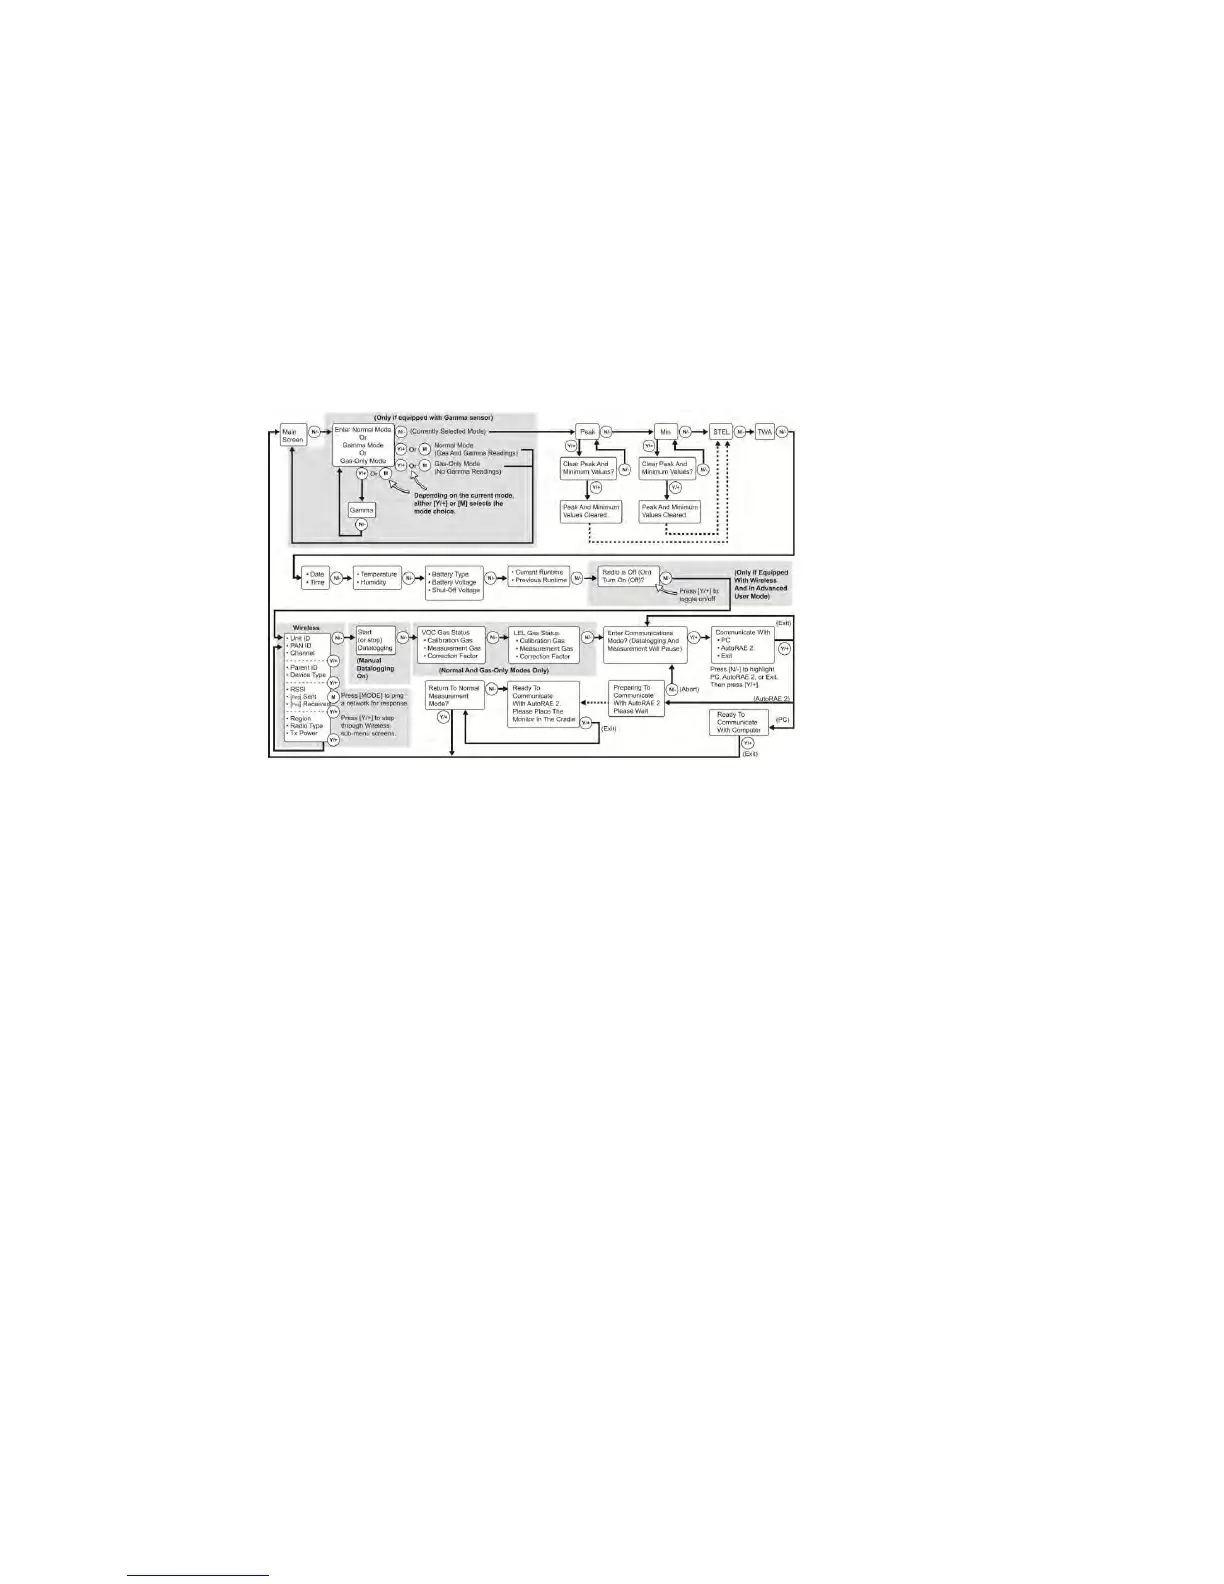
Basic Menu Navigation In Hygiene Mode
Pressing [N/-] repeatedly
allows you to step through
the screens as shown here.
Note: The first gray box only
applies if a gamma radiation
sensor is installed. The second
gray box indicates the datalog
functions when datalogging
is in Manual mode. When
datalogging is in Automatic
mode, this screen does not
appear. Refer to the User’s
Guide for information on
selecting Automatic, Manual,
or Snapshot datalogging.
Note: Dashed line indicates
automatic progression.
 Loading...