Preparing for use
R&S
®
NRT-Z14/44
15Getting Started 1443.8632.02 ─ 01
1
2
3
4
5
6
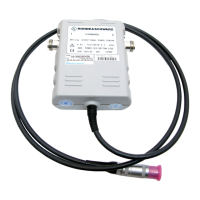
Figure 3-1: Connecting to source and load
1 = source
2 = port 1 (RF connector)
3 = R&S NRT‑Zxx directional power sensor
4 = port 2 (RF connector)
5 = load
6 = host interface connector
Connect the R&S NRT-Zxx as shown in Figure 3-1 and described in the following
step-by-step instructions to avoid damage to the power sensor and to use all
measurements.
If you want to measure an average of forward power below 30 W with high
accuracy and matching measurements are of secondary importance, you
can connect the R&S NRT-Zxx the other way around.
To connect to the DUT
1. Connect RF connector (2, port 1) to the source.
a) Insert RF connector (2) straight into the RF connector of the source. Take
care not to tilt the R&S NRT‑Zxx directional power sensor.
b) Tighten the RF connector securely by hand.
2. Connect RF connector (4, port 2) to the load.
a) Insert RF connector (4) straight into the RF connector of the load. Take
care not to tilt the R&S NRT‑Zxx directional power sensor.
b) Tighten the RF connector tightly by hand.
See "Connecting directional power sensors" on page 6.
Connecting to source and load
 Loading...