STEP 1
STEP 1
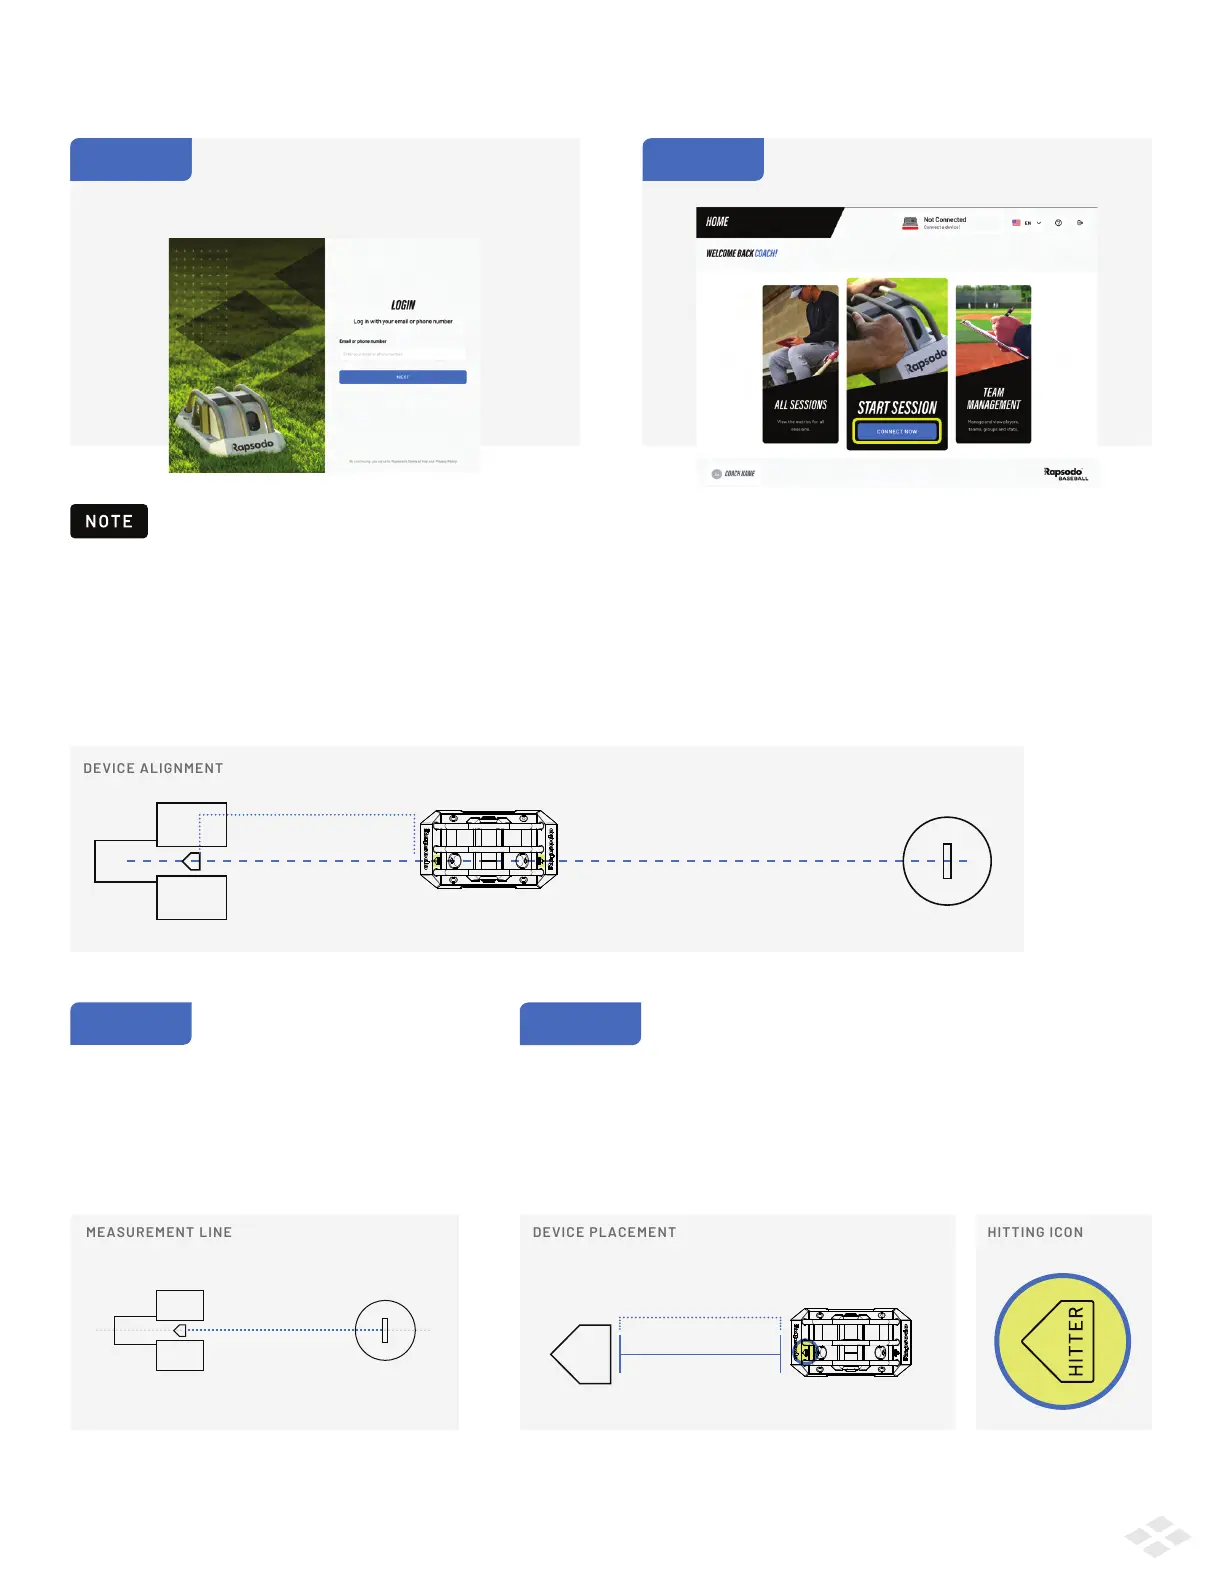
The PRO 2.0 must be placed between the pitcher’s mound and home plate, with the Hitting arrow pointed towards home plate
and the Pitching arrow pointed towards the mound. The cameras, and their respective arrows, should create a straight line
between the center of home plate and the center of the pitcher’s mound.
Measure 20 feet from the front edge of home
plate – this is where your device will be placed.
Your measurement line should be from the
middle of home plate, through the middle
of the pitcher’s rubber.
STARTING A SESSION PHYSICAL SETUP
STEP 2
The device has a hitting and a pitching side - these will be indicated by
a 'HITTER' arrow and a 'PITCHER' arrow, located on the front and back of
the device respectively. Place the hitting side edge (front) of your device
on the 20 foot mark, with the Hitting arrow pointed towards home plate
and the Pitching arrow pointed towards the mound.
20 F EET
STARTING A SESSION LOGGING IN
STEP 1
Login to the Rapsodo Baseball app using your
coach email and password. On successful
login you will see the Home Screen.
STEP 2
Click Start Session to begin.
Your iPad must be connected to an internet connection to login and sync.
20 F EET
2