40 ST4000+ Wheel & Tiller Autopilots: Owner’s Handbook
5 Installing the ST4000+
Flush mount control units
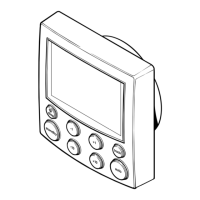
To fit a flush mount control unit:
1. Ensure that the intended mounting location is between 3 mm
(
1
/
8
in) and 20 mm (
3
/
4
in) thick.
2. Apply the flush mount template (supplied at the back of this
handbook) to the selected location. Mark the aperture into which
the control unit will sit, then remove the template.
3. Use a jigsaw to cut out this aperture.
4. Peel the protective sheet from the self-adhesive gasket, then stick
the gasket into position on the rear of the control unit surround.
5. Screw the two fixing studs into the threaded sockets on the rear of
the control unit.
6. Pass the cables (power, compass, SeaTalk, etc.) through the
bulkhead and connect them to the appropriate terminals (as
described later in this chapter).
7. Place the assembled control unit, studs and gasket into the panel.
8. Locate the bracket onto the fixing studs and secure the assembly
to the panel with the thumb-nuts. Hand-tighten the thumb nuts –
do NOT use a wrench.
D4585-3
Fixing
stud
Thumb
screw
Bracket
Aperture
cut-out
Self-adhesive
gasket
81131_7.book Page 40 Wednesday, March 17, 2004 3:59 PM

 Loading...
