23
4. Disconnect gas line from gas valve.
5. Remove (2) screws that mount burner tray to unit,
and (2) screws that secure gas valve to jacket.
6
. Disconnect wires that terminate at gas valve.
7. Disconnect hi-tension wire from igniter.
8. Remove (1) screw that mounts ground wire to
burner tray.
9. Slide out burner tray.
1
0. Reverse above procedure to reinstall.
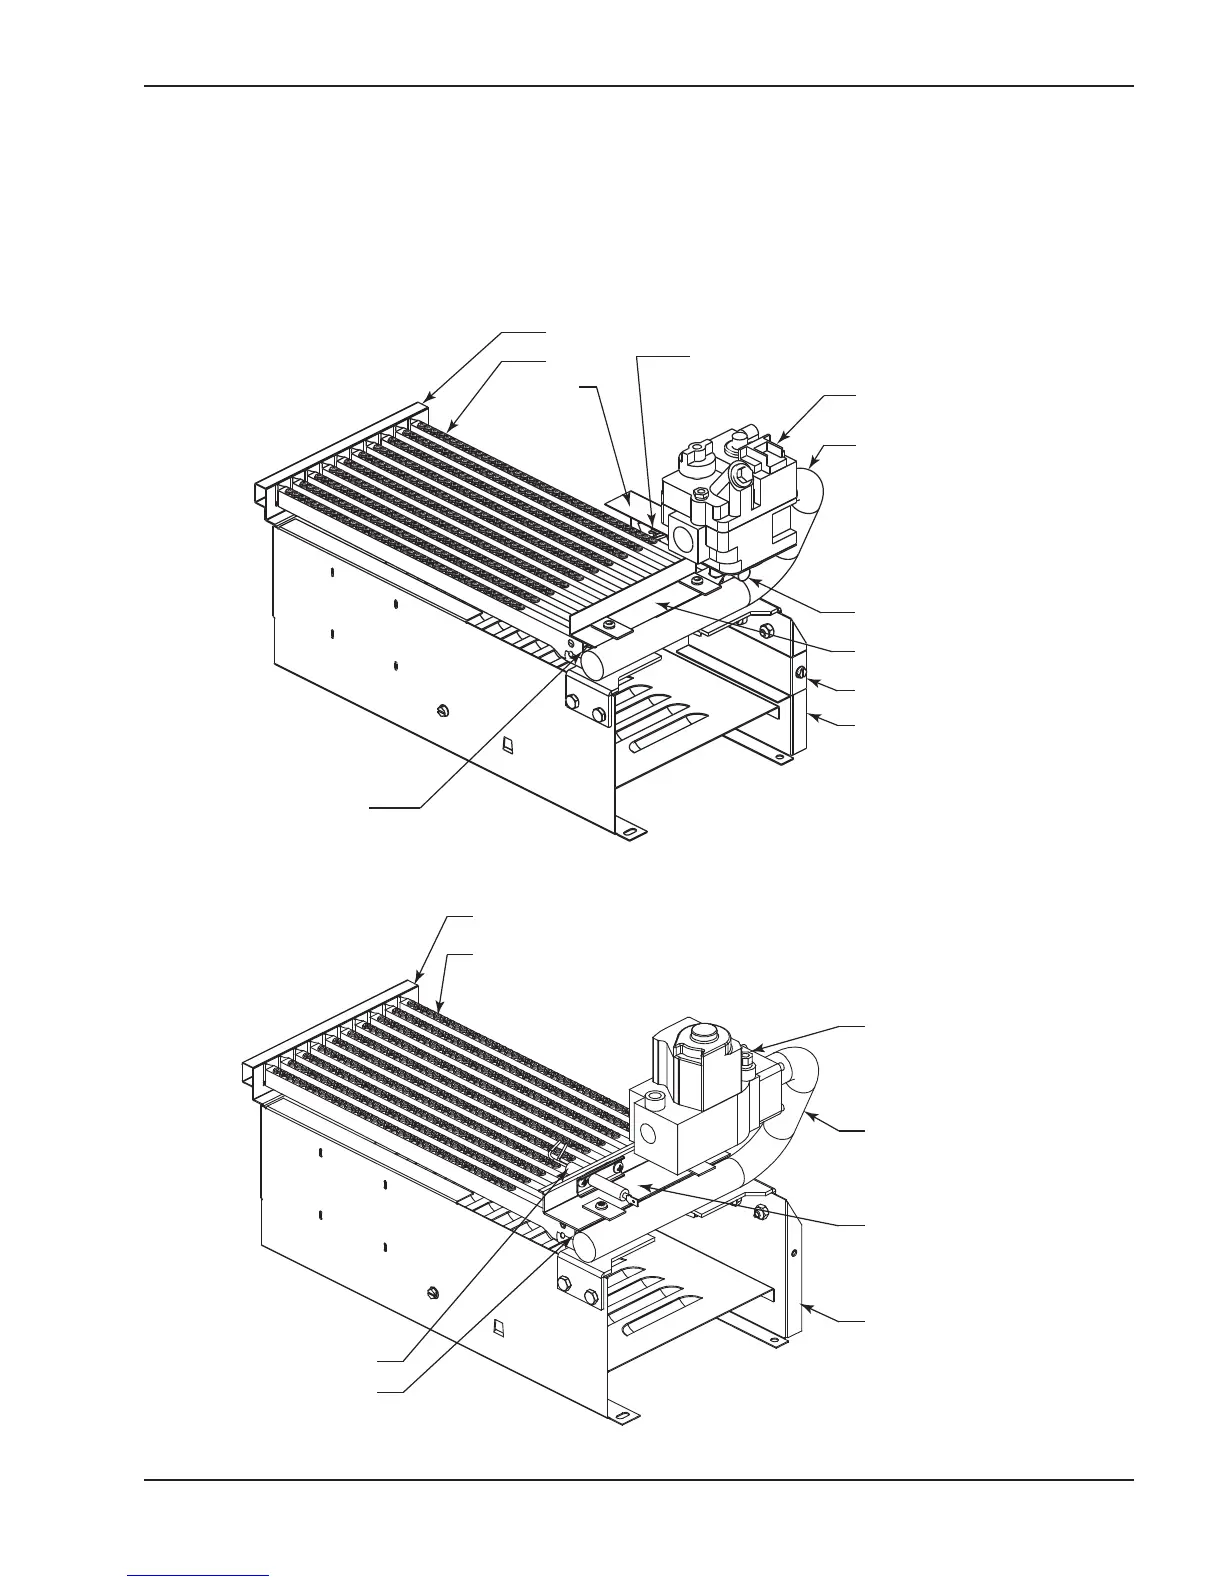
Rear Hold Down Bracket
Burner
Millivolt Pilot Assembly
(under Pilot Shield)
Millivolt Gas Valve
(Invensys shown)
Manifold
Pilot Lighter Tube
Orifice Placement Bracket
Pilot Bracket
Burner Tray Panel
Orifice
Pilot
Shield
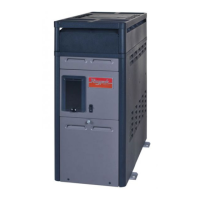
Rear Hold Down Bracket
Burner
DSI Gas Valve
(Honeywell shown)
Manifold
Orifice Placement Bracket
Burner Tray Panel
Orifice
Igniter
Fig. 29: Millivolt Burner Tray Assembly
Fig. 30: DSI Burner Tray Assembly