EasyManua.ls Logo

Raypak 185A User Manual

Raypak 185A
18 pages
To Next Page IconTo Next Page
Page #1 background imageLoading...
Page #1 background image
RAYPAK REPLACEMENT INSTRUCTIONS
IMPORTANT NOTICE
These instructions are intended primarily for use by qualified personnel specifically trained and experienced in the installation of this
type of heating equipment and related system components. Installation and service personnel may be required to be licensed in
some states. Persons not qualified shall not attempt to install this equipment nor attempt repairs according to these instructions.
P.C. BOARD, TEMPERATURE CONTROL & SENSOR (KIT #010253F) FOR ALL
DIGITAL GAS POOL HEATERS (SEE “SCOPE” FOR APPLICABLE MODELS)
DANGER - SHOCK HAZARD
Make sure electrical power to the heater is disconnected to avoid potential serious injury or damage to components.
SCOPE:
This version of the temperature control board has the capability of an integrated ignition module plus 3-wire temperature sensor.
The kit includes a gasket and a plastic shield that is mounted to the back side of the control panel to eliminate moisture
accumulation on the LCD display. It is a direct replacement for the following models: 185A, 185B, 206A, 207A, 265A, 265B, 266A,
267A, 335A, 335B, 336A, 337A, 405A, 405B, 406A, 407A.
Page 1
DANGER - PROPANE HAZARD
Make sure to determine if unit is propane and see special instructions on page 6.
P/N 241169 Rev.-3
MODELS
206A, 207A, 266A, 267A,
336A, 337A, 406A, 407A
PRODUCED OCT. 2004-
THROUGH CURRENT
SERIAL # 0410 - CURRENT
2151 Eastman Ave., Oxnard, CA 93030 805-278-5300 Fax 800-777-7026 www.raypak.com
Technical support is available M-F, 5:30 AM to 5:00 PM PST, at 800-947-2975 or 800-627-2975
MODELS
185B, 265B, 335B, 405B
PRODUCED NOV. 2003
THROUGH OCT. 2004
SERIAL # 0310 TO # 0410
MODELS
185A, 265A, 335A, 405A
PRODUCED NOV. 1998
THROUGH OCT. 2003
SERIAL # 9811 TO # 0310
(1) Instructions(2) Screws #10 X 1/2"(6) Screws #8 X 1/2"
(4) Screws #6 X 3/8"(1) Hi tension wire extension(1) Remote wire harness
(1) LCD Gasket(6) Plastic #8 washer(1) Temperature sensor
(2) Brackets (1) PC board plastic shield(1) P.C. control board
This kit includes
Th
e
n
e
w
s
t
y
l
e
b
o
a
r
d
i
s
l
a
r
g
e
r
t
h
a
n
t
h
e
o
l
d
s
t
y
l
e
b
o
a
r
d
Question and Answer IconNeed help?

Do you have a question about the Raypak 185A and is the answer not in the manual?

Raypak 185A Specifications

General IconGeneral
Model185A
CategorySwimming Pool Heater
Heating Capacity185, 000 BTU/hr
Fuel TypeNatural Gas or Propane
Thermal Efficiency82%
Ignition TypeElectronic
Heat ExchangerCopper
Water Connections2 inches
Warranty1 Year

Summary

General Information, Safety, and Scope

Important Notices and Warnings

General safety and operational warnings for qualified personnel.

Critical Hazard Warnings

Crucial safety warnings for electrical shock and propane hazards.

Scope of Replacement Kit

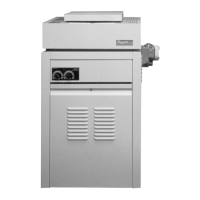
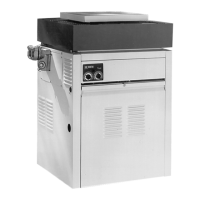
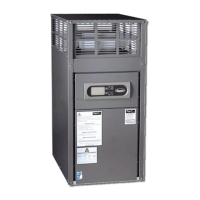
Defines the applicability of the replacement kit to specific Raypak heater models.

Applicable Raypak Models

Lists specific Raypak heater models covered by the replacement kit.

Accessing and Removing the Control Board

Accessing Control Board - Older Models

Step-by-step guide to access the control board for models 185A/B, 265A/B, 335A/B, 405A/B.

Accessing Control Board - Newer Models

Step-by-step guide to access the control board for models 206A, 207A, 266A, 267A, 336A, 337A, 406A, 407A.

Removing Circuit Board - Older Models

Detailed steps for removing the circuit board from models 185A/B, 265A/B, 335A/B, 405A/B.

Removing Circuit Board - Newer Models

Detailed steps for removing the circuit board from models 206A, 207A, 266A, 267A, 336A, 337A, 406A, 407A.

Specific Model Configurations and Component Replacement

Disconnecting Ignition Control

Instructions for disconnecting the ignition control for specific models.

Propane Heater Configuration

Specific procedure for propane heaters to break a tab on the circuit board.

Low NOx Models Configuration

Instructions for configuring Low NOx models 185, 265, 335, 405 and 207A, 267A, 337A, 407A.

Circuit Board & Gasket Installation

Guides for installing new circuit board, gasket, and bezel for older and newer models.

Sensor Replacement Procedure

Detailed steps for removing and replacing the temperature sensor on specific models.

Plastic Shield & Bracket Installation

Instructions for installing the plastic shield and brackets on specific models.

Pilot Hi-Tension Wiring

Steps for connecting pilot wires and extensions for different model groups.

Thermostat Operation, Diagnostics, and Remote Control

Digital Thermostat Operation

Explanation of how the digital thermostat controls pool/spa temperature and its interface.

Thermostat Programming and Settings

Details on thermostat programming, settings, and conversions.

System Diagnostics and Fault Codes

Information on reading and interpreting system faults and diagnostic codes.

Remote Control Installation and Operation

Overview of installing and operating external remote controls with the heater.

Remote Control Wiring Configurations

Instructions for wiring 2-wire and 3-wire remote control systems.

Related product manuals