Installation
Marathon MR Rev. E2 04/2011 19
5
5.1 Mechanical Installation
After all preparations are complete, you can install the sensor.
How you anchor the sensor depends on the type of surface and the type of bracket you are using. As
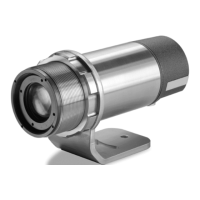
noted before, all sensors, whether standard or with the air/water-cooled housing option, are supplied
with an adjustable bracket and mounting nut. You can also mount the sensor through a hole, on a
bracket of your own design, or on one of the other available mounting accessories, see section
8 Accessories, Seite 39. If you are installing the sensor in a ThermoJacket accessory, you should use the
appropriate mounting device. (Refer to the ThermoJacket manual for further details.) If you do not
have the focusing tool accessory, the sensor must be focused before mounting inside a ThermoJacket
or before attaching an air purge collar.
5.1.1 Distance to Object
The Standard Focus sensor can be focused from 600 mm (24 in) to infinity, and the Close Focus sensor
can be focused from 300 mm (12 in) to 600 mm (24 in), so sensor placement can be varied to suit the
application. The following sections show sensor placement and the various conditions where 2-color
temperature measurements can be taken.
When installing the sensor, check for any high-intensity discharge lamps or heaters that
may be in the field of view (either background or reflected on a shiny target)! Reflected
heat sources can cause a sensor to give erroneous readings.
5.1.2 Sensor Placement (1-Color Mode)
Sensor placement for one-color temperature measurements is more critical than two-color
measurements. The sensor must have a clear view of the target. There can be no obstructions on the
lens, window, or in the atmosphere. The distance from the target can be anywhere beyond the
minimum requirements, as long as the target completely fills the field of view. The following figure
illustrates proper placement when using the one-color mode.
Figure 9: Proper Sensor Placement in 1-Color Mode