HEADLINE
10
REPAIR AND MAINTENANCE
10
Before you begin, carefully turn product upside down for easier access.
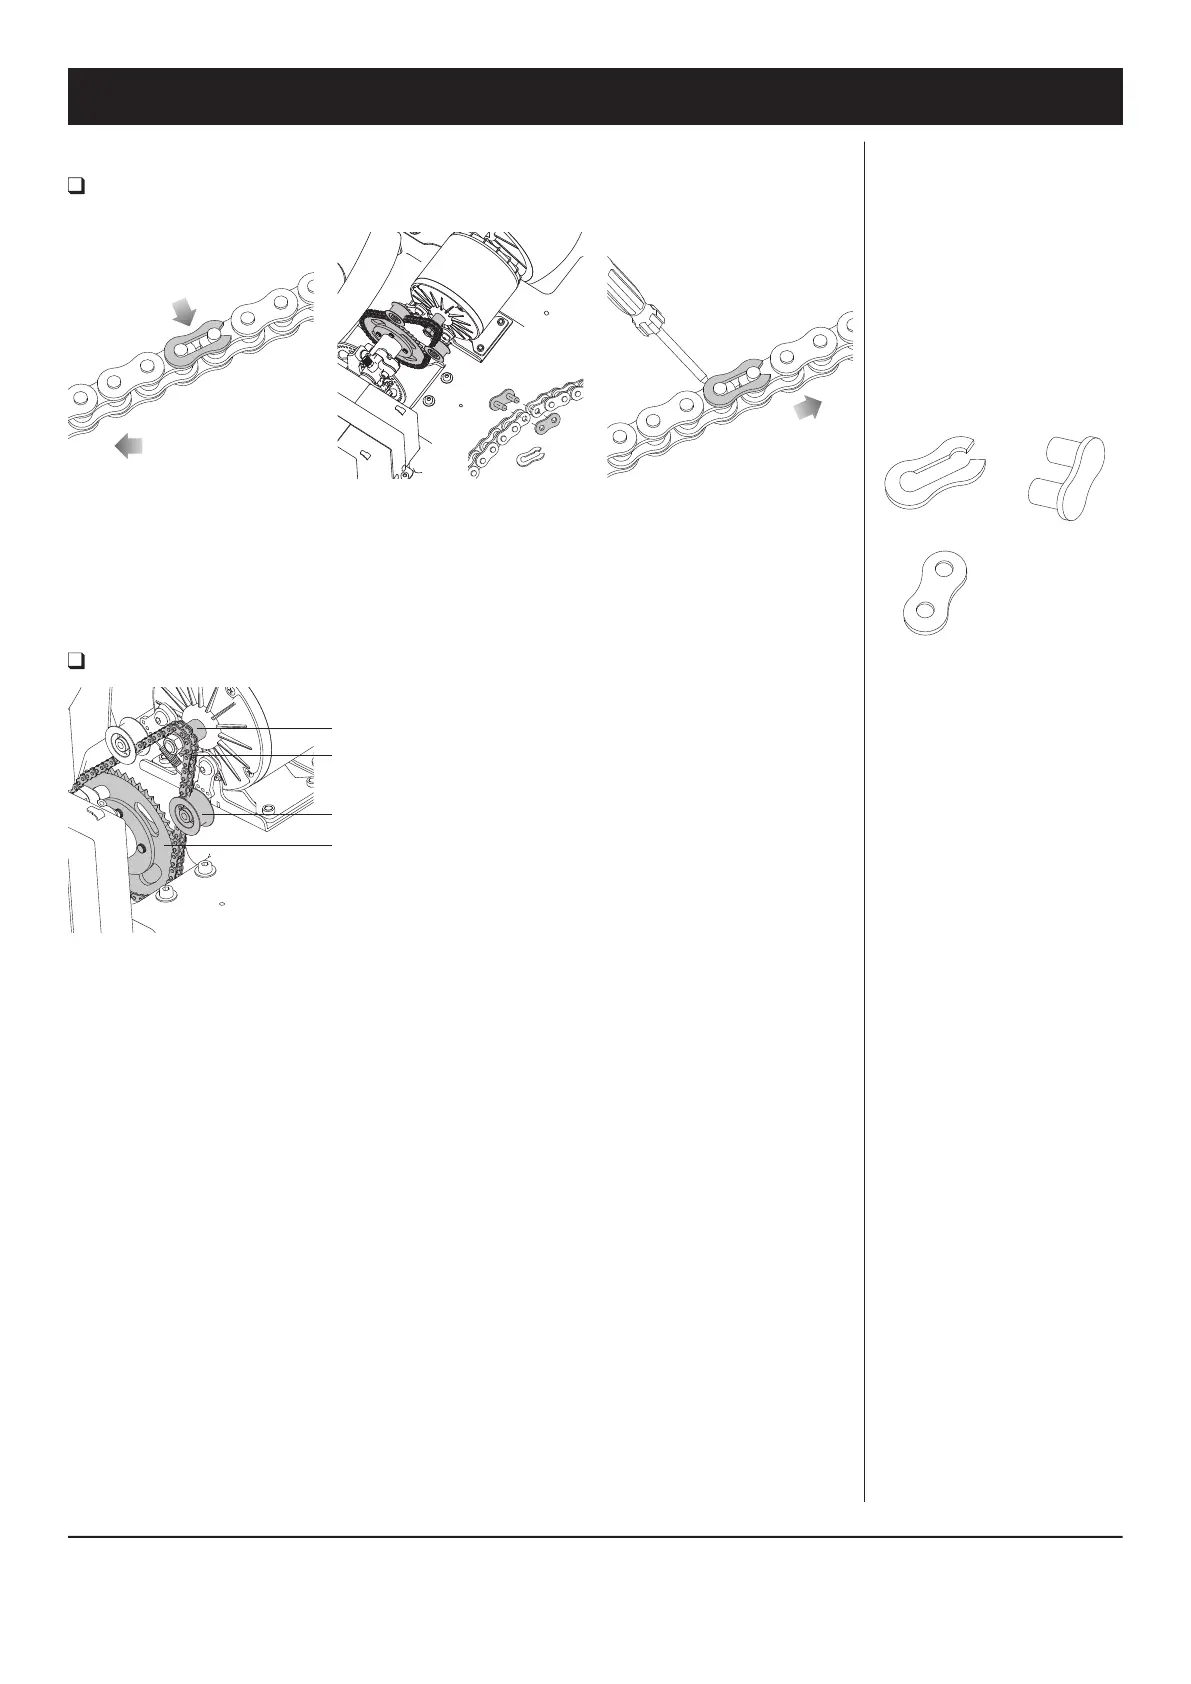
Replacing the Chain
Required Tool: Flat Head Screwdriver (not included)
1 Locate the master link on the
replacement chain and with a
flat head screwdriver carefully
disengage the clip from the chain
to remove the link plate and
connector link.
2 Wrap the chain around both
sprockets and tension idler. Insert
the connector link all the way
through the chain and fit the link
plate over the connector link.
3 Using a flat head screwdriver,
carefully re-attach the secure clip
on to the link plate. The secure clip
must point in the drive direction of
chain rotation.
Drive Direction
Master Link
Drive Direction
Note: Chain should be periodically
checked for grime build-up.
If necessary remove any dirt
and/or debris in and around the
chain and re-lubricate with a bicycle
chain lubricant.
Master Link:
Secure Clip
Link Plate
Connector Link
Self-Adjusting Chain Tensioner
Motor-shaft sprocket
Roller chain
Fixing bolt
Drive-shaft sprocket
Note: Proper alignment of the
chain must be maintained. If the
chain is adjusted properly, but
is noisy or rough running, check
alignment of the sprockets. The
drive-shaft sprocket can be adjusted
slightly from side-to-side by
loosening the set screw. Note that a
key way maintains the drive position
to the shaft.
Need Help? Visit our website for replacement parts, product support, a list of authorized service centers in the US and customer service contact information
at www.razor.com. Please have the product I.D. code (located on the white label of your product) available for better assistance. Additional Customer
Service contact information is listed at the back of this manual.
 Loading...