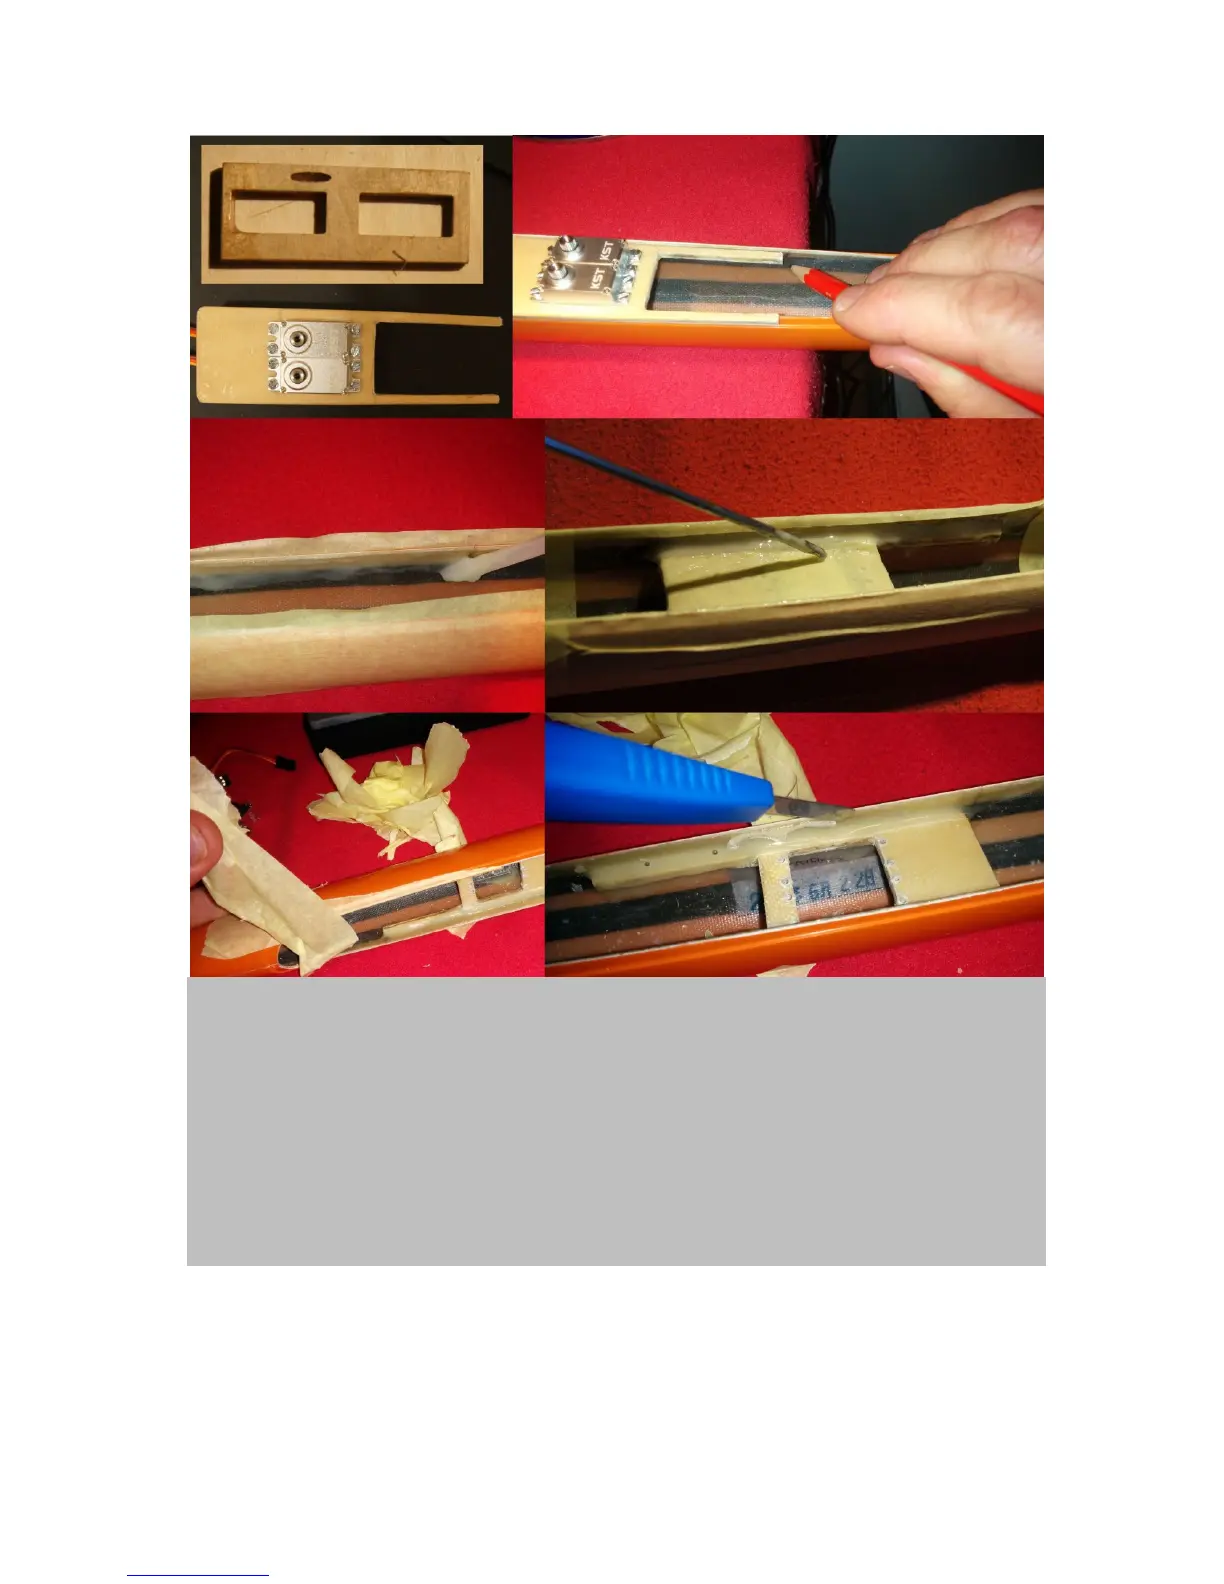
Figure 16. The servo board: To save precious space in the fuselage cut out your own servo board from 4 mm
plywood using the supplied one as rough template (upper left). I used 3mm plywood and laminated one
layer of 80g glass on top and bottom. Make sure the board fits perfetly but thightly in the fuselage at your
desired position. The servos should be mounted in the board when you test fit it in the fuselage. Thereby,
you can estimate how deep in the fuselage you may mount it. Mark servo board positioning in fuselage
(upper right). Cover outside of fuselage with masking tape to protect from epoxy. Now mix UHU Endfest
epoxy and smear a thick layer into the fuselage where the board should sit (middle left). The servo board
itself is also covered by masking tape. Just leave about half a cm blank on the sides for good attachement to
fuselage by the epoxy. Smear epoxy on bottom and top of the sides of the board and press it into marked
position in the fuselage (middle right). After about 4-6h of curing at room temperature, when the epoxy has
hardened but isn’t yet bullet proof, remove masking tape and if there are any unwanted epoxy residues cut
off with stanley knife (see lower images).
V-Tail linkage
The V-Tail linkage installation is really a straight forward process. It is no different from what you
would do for most RC planes, except that the linkage system here is made up entirely from carbon