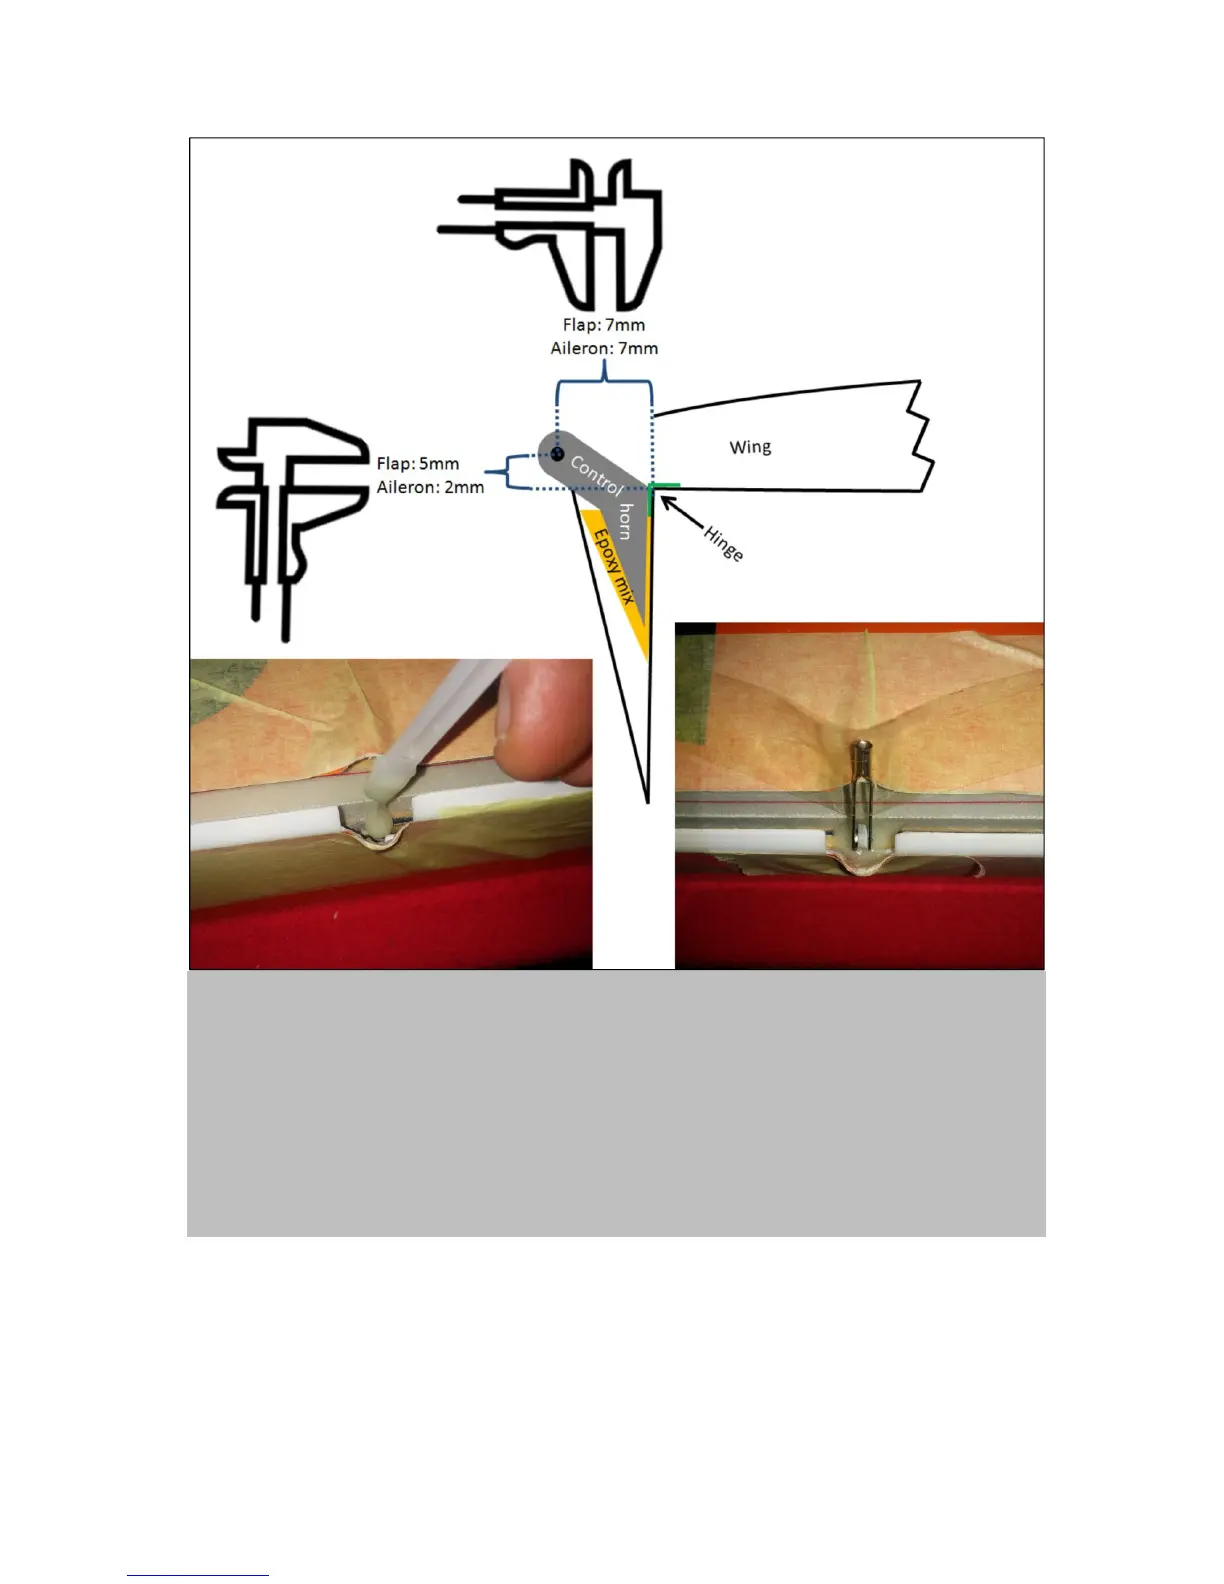
Figure 5. Mount the control horns: it is best to fix the control surfaces in a 90˚ angle to the wing using
masking tape, first. Now have a look at the upper panel. This describes exactly how to fix the control horns
respective to the hinge of each control surface. Note the different positioning for flaps and ails. To glue the
horns in you can use the same epoxy resin that was prepared for impregnating them. Just add some cotton
flakes or microballoons for higher viscosity. Let the thickened resin drop into the holes (that you prepared)
in the flaps’ and ails’ shear webs (lower left panel). Subsequently insert the control horns exactly as
described (in the upper panel) using a caliper for measuring their positions. Essentially you can stick the
control horn into the embedded epoxy, adjust it and fix it with tape (lower right panel). However, and this is
very important, come back about 2-4 hours later, when the epoxy is sticky but not hard, and re-adjust the
position to a perfect fit. The slow curing type of epoxy will allow for enough time (several hours) for
adjustment. Eventually, after over night curing you can remove the positioning tape and the clevises.
Installation of the wing servos
The cross-wise linkage system demands that the servo control horns are as short as possible.
Therefore, extra holes have to be drilled in the horns and the clevises need to be tuned. Figure 6 will
guide you through the preparation of servo horns and clevises for the wing servos.