MPAX PERSONALITY MODULE SELECTOR GUIDE FOR LPAX
Our large displays have various input options, determined by the installation of a MPAX personality module. These MPAX
modules are based on standard PAX panel meters, and use the same data sheet as the PAX meter for specifications and wiring.
About the MPAX Input Modules
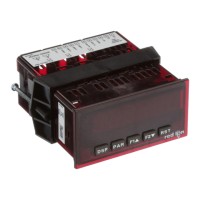
The MPAX Module serves as the input to the LPAX Display. There are several different modules to cover a variety of inputs. The
MPAX module provides input scaling which allows the LPAX to display most any engineering unit. Once the MPAX is inserted into
the LPAX, the unit has the same functions and capabilities of our PAX Series Intelligent Panel Meters. A full set of PAX
programming instructions will be included with the MPAX Module.
Note: The MPAX provides the operating power for the LPAX, therefore you must select either the AC or DC MPAX corresponding
with your application and available power.
Selecting Your Display Components
To build a complete display unit, you will need an LPAX and an MPAX Input Module. The LPAX is only a display and will not
operate without an MPAX Module. Please use the following chart to identify the appropriate MPAX Module (including supply
power) and LPAX Display that will satisfy your application.
MPAX Modules for LPAX5 (Analog units)
MPAX Modules for LPAX6 (Digital units)
MPAX MODULES *
SIGNAL TYPE INPUT RANGES
85-250 VAC
11 to 36 VDC/ 24 VAC
LPAX DISPLAYS
Universal DC Inpu ts
DC Voltage 200 m V, 2 V, 20 V, 300 V
DC Current 200 µA, 2 mA, 20 mA, 200 mA, 2 Amp
Resistance 100 ohm, 1000 ohm, 10 K ohm
MPAXD000 MPAXD010 LPAX0500
Process Inpu ts 0-20 mA or 0-10 VDC MPAXP000 MPAXP010 LPAX0500
Temperature Inpu ts MPAXT000 MPAXT010 LPAX0500
Strain Gage/Load Cell 24 mV or 240 mV MPAXS000 MPAXS010 LPAX0500
True RMS AC
Voltage/Current
AC Voltage 200 m V, 2 V, 20 V, 300 V
AC Current 200 uA, 2 mA, 20 mA, 200 mA, 5 Amp
MPAXH000 N/A LPAX0500
SETPOINT
YES
MPAX MODULES*
YES
YES
SIGNAL TYPE
YES
85-250 VAC
11 to 36 VDC / 24 VAC
LPAX
DISPLAYS
Count/Rate/Serial Slave
COMMS
MPAXI000
†
MPAXI010
†
LPAX0600
Count
YES
MPAXC000 MPAXC010 LPAX0600
Rate
-
MPAXR000 MPAXR010 LPAX0600
Clock/ Timer
-
MPAXCK00
††
MPAXCK10
††
LPAXCK00**
YES
ANALOG
YES
-
-
-
REAL-TIME
CLOCK
-
-
-
YES
OPTIONAL PLUG-IN CARD COMPATIBILITY
YESTime r
MPAXTM00
††
MPAXTM10
††
LPAXCK00**
YES - -
MPAX Modules for LPAXDA (Dual Analog Unit)
MPAX MODULES *
SIGNAL TYPE INPUT RANGES
85-250 VAC
11 to 36 VDC/ 24 VAC
LPAX DISPLAY
Dual Process Inputs 0-20 mA or 0-10 VDC MPAXDP00 MPAXDP10 LPAXDA00
Thermocouples -T , E, J, K, R, S, B, N, C,
or Custom Scaling RTDs - 100 ohm Pt (platinum) 385/392,
120 ohm Nickel 672, or 10 ohm Copper 427