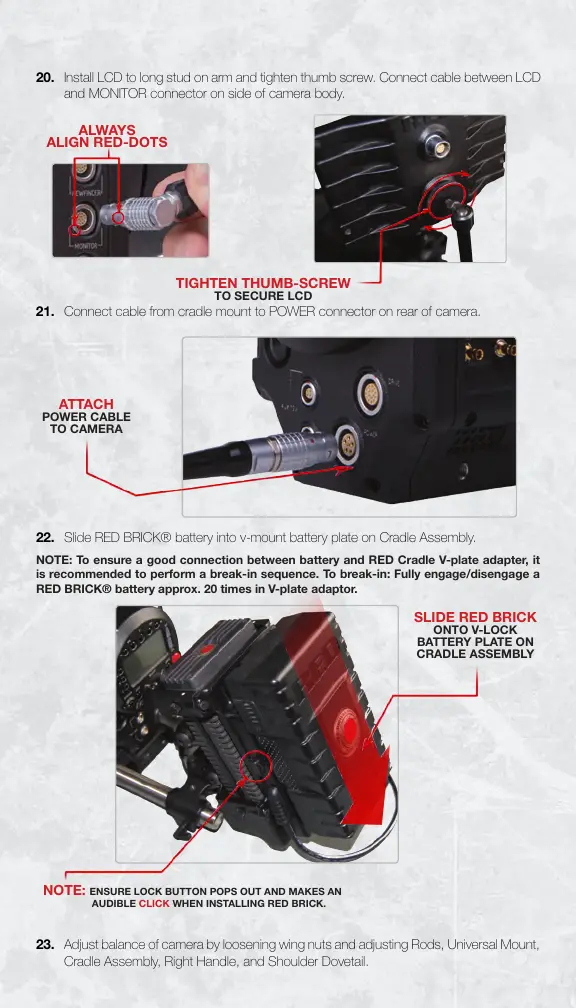
20. Install LCD to long stud on arm and tighten thumb screw. Connect cable between LCD
and MONITOR connector on side of camera body.
21.
Connect cable from cradle mount to POWER connector on rear of camera.
22. Slide RED BRICK® battery into v-mount battery plate on Cradle Assembly.
NOTE: To ensure a good connection between battery and RED Cradle V-plate adapter, it
is recommended to perform a break-in sequence. To break-in: Fully engage/disengage a
RED BRICK® battery approx. 20 times in V-plate adaptor.
23. Adjust balance of camera by loosening wing nuts and adjusting Rods, Universal Mount,
Cradle Assembly, Right Handle, and Shoulder Dovetail.
SLIDE RED BRICK
ONTO V-LOCK
BATTERY PLATE ON
CRADLE ASSEMBLY
ATTACH
POWER CABLE
TO CAMERA
TIGHTEN THUMB-SCREW
TO SECURE LCD
ALWAYS
ALIGN RED-DOTS
NOTE:
ENSURE LOCK BUTTON POPS OUT AND MAKES AN
AUDIBLE CLICK WHEN INSTALLING RED BRICK.