Page 5
Ceiling Bracket Installation Guide
4x Torx 30 screws (6x60)2x Ceiling brackets
Ceiling height:
These brackets are suited for ceiling
heights between 220 cm (7’2”) and
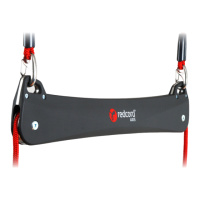
260 cm (9’6”). Test the installation by
doing the Ceiling Bracket Safety Test.”
(see page 7).
Concrete ceiling:
Make sure that the ceiling is concrete
and not made of a porous material with
a poor load bearing capacity such as
Siporex, Ytong or Leca.
Wooden ceiling:
Make sure that the installation occurs
in the ceiling joists and NOT only in
panel boards or plates.
Draw a line perpendicular to the wall
Mark the screw holes for the second
bracket as before
If concrete ceiling: Carefully hammer in the
included M6x65 through bolt wedge anchor,
taking care not to strike the nut as this may
damage the thread. Ideally, use a plastic or
wooden mallet.
Perform the
Ceiling Bracket Safety Test
Drill pilot holes at these marks
(A 6mm diameter hole and
approximately 70mm deep). Use
a concrete drill bit.
Concrete ceiling:
(Masonry bit)
Ø 6 mm
Drill length:
70 mm
Mount the brackets.
Use 2 screws/bolts per bracket.
Tighten all screws/nuts firmly.
M6
475mm
40mm
4X
4X
2X
Pre-drilling ONLY for
concrete ceilings!
Hold the first bracket in position and
mark the screw holes (40mm distance)
1
3
5
7
2
4
6
8
4x Through bolt wedge anchor (M6x65)
Ceiling bracket installation guide
If you have problems with installation, contact your local dealer; see www.redcord.com.
(See page 6)
.
.
.