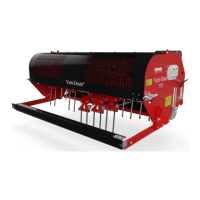
10
5.0 WORKING DEPTH ADJUSTMENT.
The working depth can be adjusted when the machine is lifted from the ground as follows, see fig. 4:
Unscrew nuts 1 at each side of the machine one turn. Screw spindle 3 in or out. Every revolution is 4 mm
(0.160"). The decall 2 at each side of the machine shows the actual depth. When the correct depth is reached,
tighten the nuts 1 at each side.
@ Never adjust one side more than 4 turns. Compensate the other side first before proceeding.
@ The adjustment can be done with a special tool in the machine tool box.
@ The value at the decalls is only true when 400 mm (16") long tine are used. When shorter
tines are used, deduct the length difference to the 400 mm (16") from the actual decall reading.
@ Clean and spray the spindle and nut with anti-sticking grease oil every 100 hours, to prevent dirt
sticking on the nut.
6.0 TINE ANGLE ADJUSTMENT.
The adjustment of the angle of all tine holders is centrally located at the right side of the machine, see fig.5..
Raise the machine above the ground, slacken the nuts 2 at each side of the machine and nuts 3 at the center of
the machine, one turn each.
Adjust the tine angle by rotating the lever 1. The angle-value can be read from the decall 4 next to the handle.
After the correct angle is set, tighten all nuts.
@ An angle of 90 degrees means almost no tine movement in the ground. This is required for hollow coring
tines and advised for thinner tines.
@ From 90 to 75 degrees means more "kick action". This is advised for solid tines, depending on ground
conditions, tine size and customer requirements.
@ The angle of 90 degrees means that the tines penetrate perpendicular into the ground. This is only true if the
machine is correctly set, see fig.1. If this isn't correct a push force F, see fig 5. is applied, which can seriously
damage the machine.
Fig.4.
Fig.5.
5
6
0
.
0
0
1
3
.2
4
3
3
.1
2