IMPORTANT!! The mounting of the pressure relief valve supplied with
the water heater is Compulsory. It must be installed on the cold water
supply pipe.
Exception: If local regulations (norms) require the usage of another
protection valve or mechanism (in accordance with EN 1487 or EN 1489),
then it must be bought and fitted separately. For mechanisms operating in
accordance with EN 1487, the rated operational pressure must be no
more than 0.7 Mpa (7 Bar). For other protection valves, the pressure at
which they are calibrated must be 1 Bar lower than the one marked on the
appliance.
NB- In the circumstances above only, the safety valve which the appliance
is supplied with should not be used.
ATTENTION! Any other type of device should not be fitted between
the pressure relief valve and the appliance.
ATTENTION! Fixing the pressure relief valve to threads longer than
10 mm should not be attempted as this could damage
the valve.
ATTENTION! The pressure relief valve and the pipe between the valve
and the water heater must be protected from freezing.
During valve discharging - its free end must be always
open to the atmosphere (not immersed in water). we
recommend the use of a tundish.
The boiler is filled with water by opening the isolation valve on the cold water
supply system and the hot tap on the sink. After the filling process is complete, a
constant stream of water should flow from the hot tap. Now you can shut the hot
water tap on the sink.
If emptying the water heater, you must first isolate the power supply then close the
service valve and open the hot tap to de-pressurize the system before removing
the unit from the wall.
MAINTENANCE
Sacrificial Anode
In order to obtain the best performance from the heater, the sacrificial anode must
be checked every year.
Themagnesiumanodeprotectsthewatertank‘sinner surfacefromcorrosion.It
undergoeswearandtearandis shouldbereplacedperiodicallybytheuser.
Redringrecommendperiodicinspectionsofthe magnesiumanode’sconditionby
aqualifiedtechnician andreplacementwheneverrequiredtokeepyour
applianceworkingcorrectly.
9
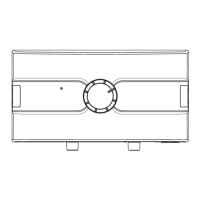
Not enough pipe work for
expansion (1.7m required)
Stop-cock, non-return valve
or pressure reducing valve
has been fitted within the
distance required for
expansion (see page 8,
diagram 5).
If an expansion vessel has
been fitted, the charge may
have failed

 Loading...