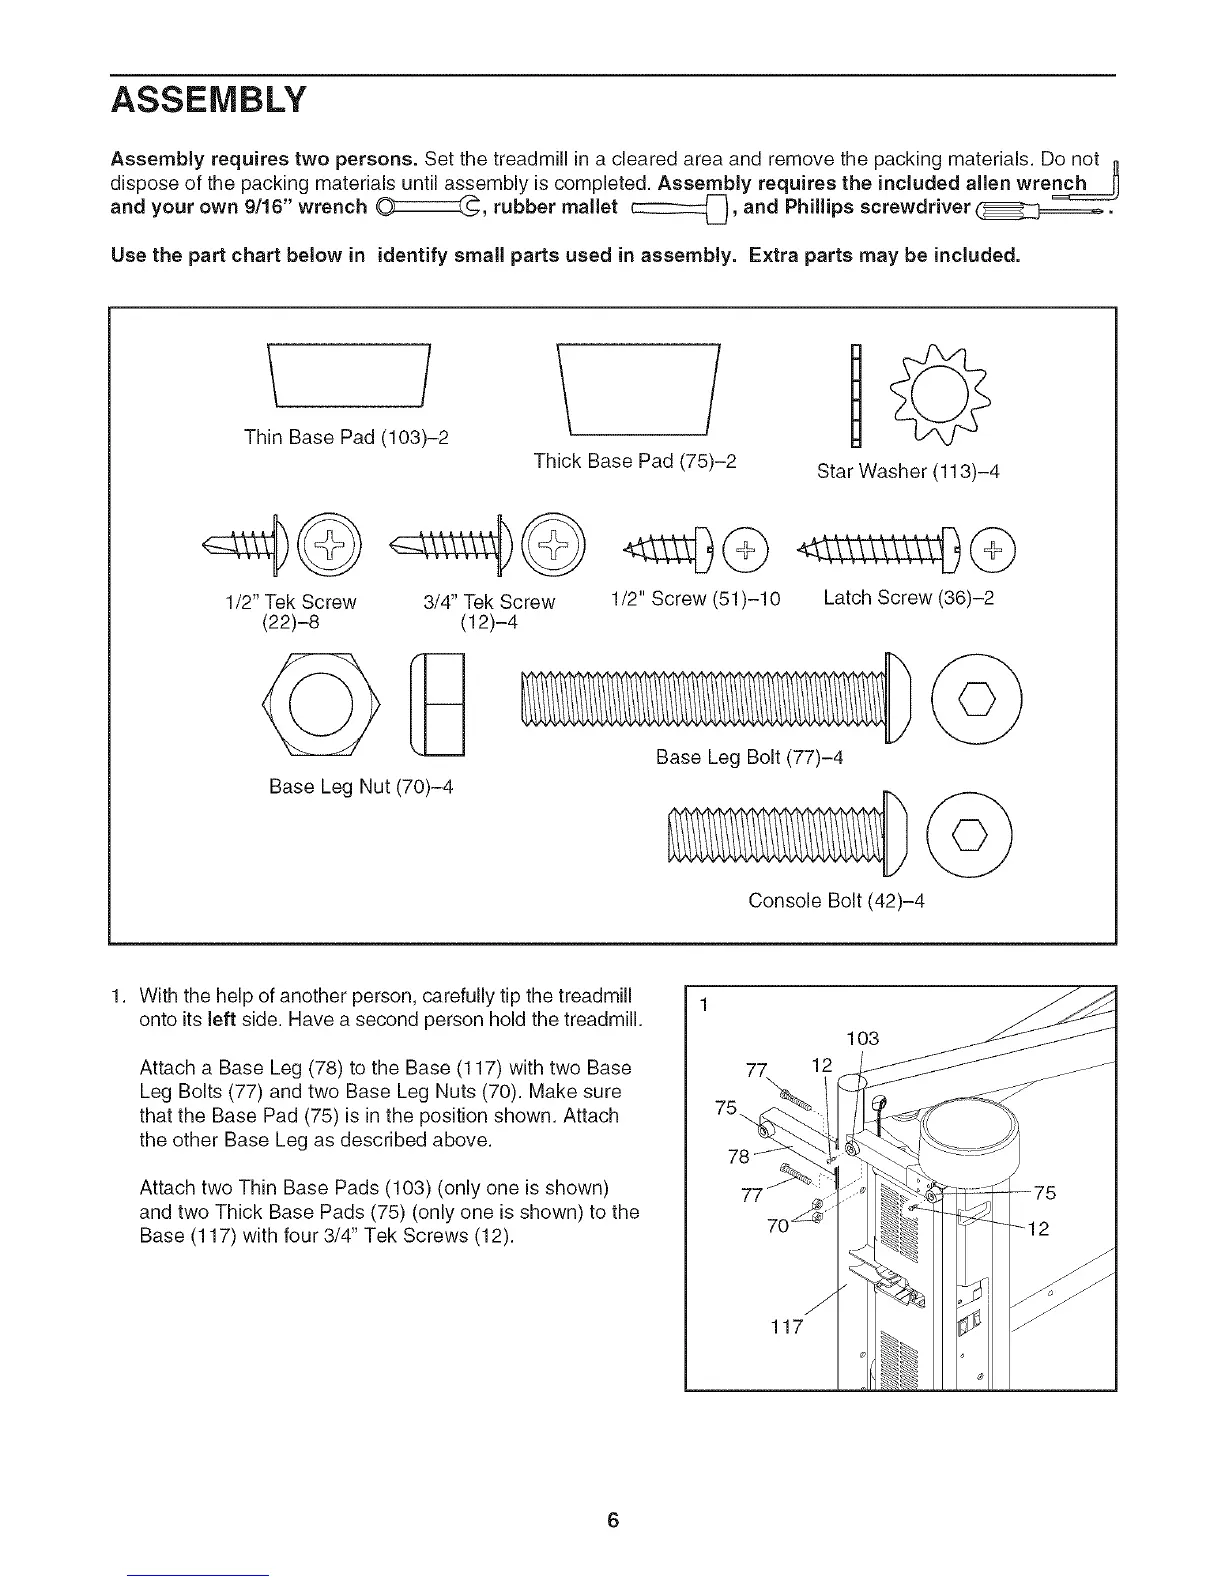
ASSEMBLY
Assembly requires two persons. Set the treadmill in a cleared area and remove the packing materials. Do not II
dispose of the packing materials until assembly is completed. Assembly requires the included allen wre_
and your own 9/16" wrench O:::::::::::::_, rubber mallet c:::z:::::z:_, and Phillips screwdriver ([__.
Use the part chart below in identify small parts used in assembly. Extra parts may be included.
Thin Base Pad (103)-2
Thick Base Pad (75)-2
Star Washer (113)-4
1/2" Tek Screw
(22)-8
3/4" Tek Screw
(12)-4
Base Leg Nut (70)-4
1/2" Screw (51)-10 Latch Screw (36)-2
Base Leg Bolt (77)-4
Console Bolt (42)-4
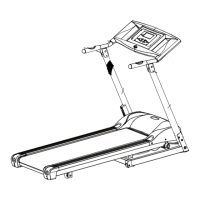
With the help of another person, carefully tip the treadmill
onto its left side. Have a second person hold the treadmill.
Attach a Base Leg (78) to the Base (117) with two Base
Leg Bolts (77) and two Base Leg Nuts (70). Make sure
that the Base Pad (75) is in the position shown. Attach
the other Base Leg as described above.
Attach two Thin Base Pads (103) (only one is shown)
and two Thick Base Pads (75) (only one is shown) to the
Base (117) with four 3/4" Tek Screws (12).
117
103
12
6