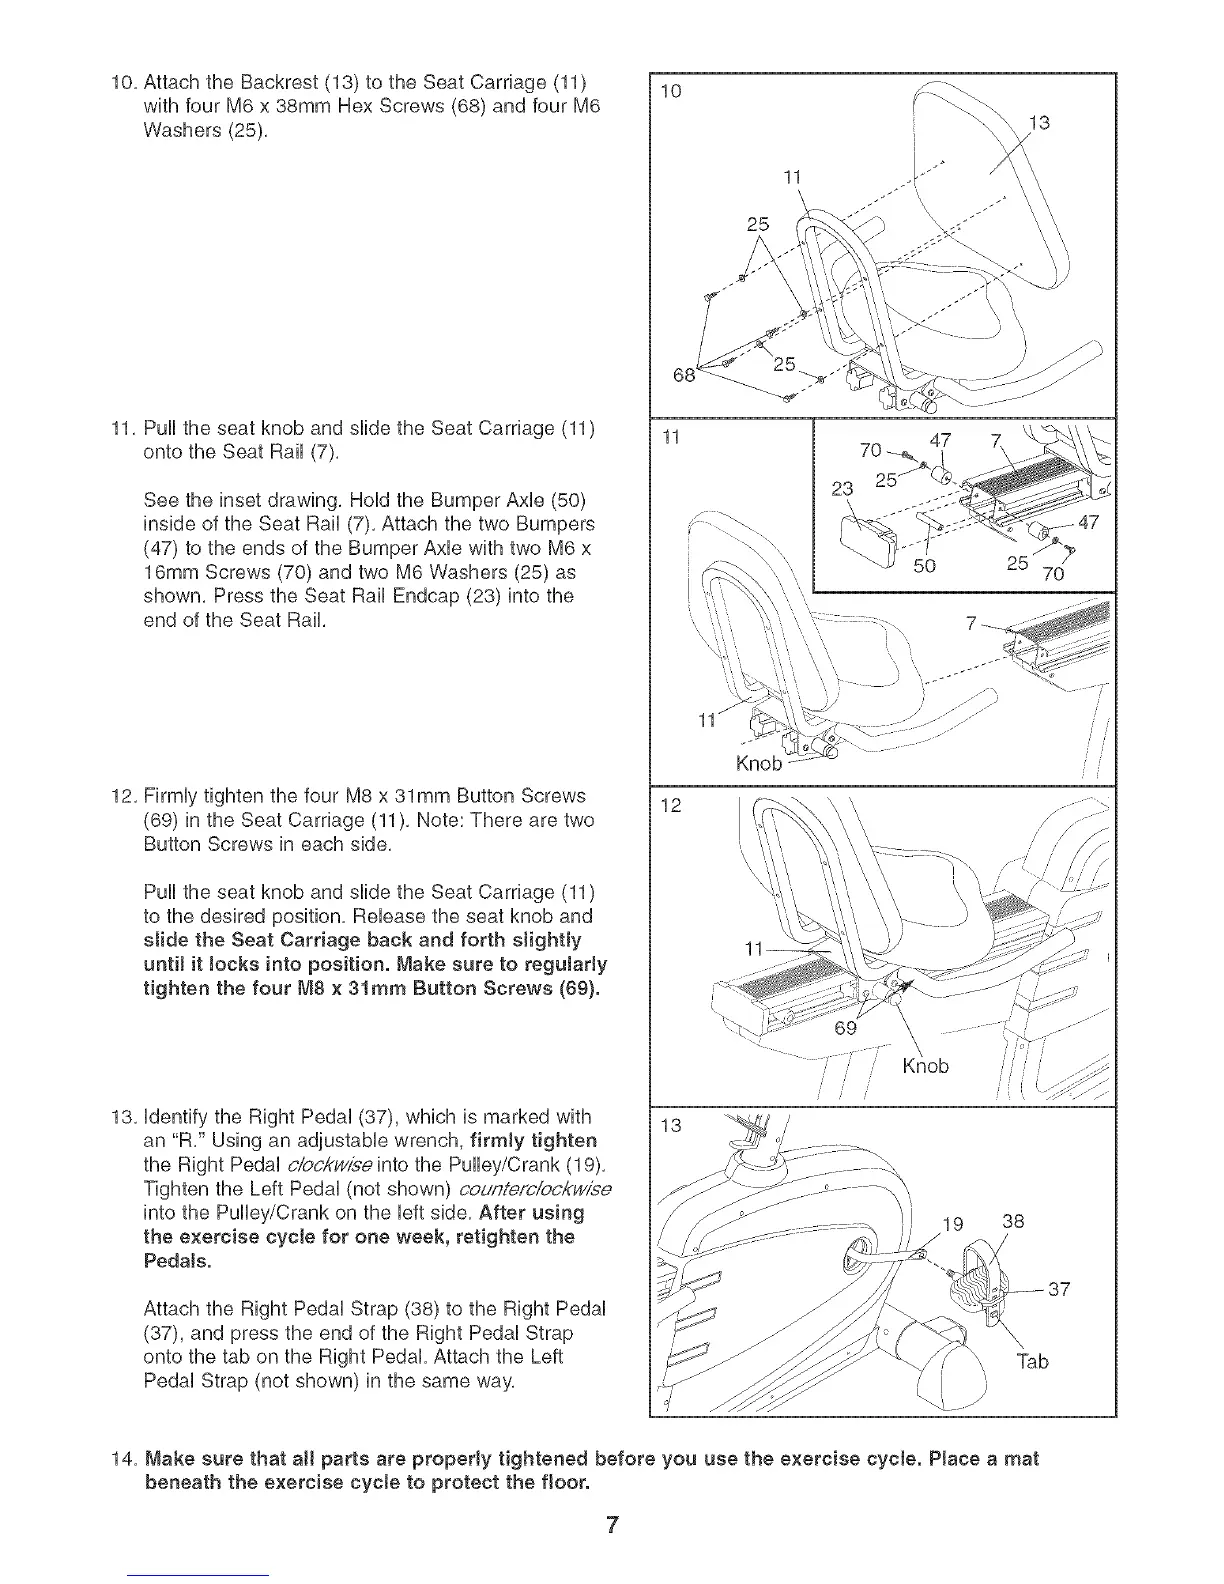
10,AttachtheBackrest(13)totheSeatCarriage(11)
withfourM6x38mmHexScrews(68)andfourM6
Washers(25),
11,PuHHtheseatknobandslidetheSeatCarriage(11)
ontotheSeatRail(7),
Seetheinsetdrawing,HoHdtheBumperAxHe(50)
insideoftheSeatRail(7),AttachthetwoBumpers
(47)totheendsoftheBumperAxHewithtwoM6x
16mmScrews(70)andtwoM6Washers(25)as
shown,PresstheSeatRailEndcap(23)intothe
endoftheSeatRail,
12,FirmHytightenthefourM8x 31mmButtonScrews
(69)intheSeatCarriage(11),Note:Therearetwo
ButtonScrewsineachside,
PuHHtheseatknobandslidetheSeatCarriage(11)
tothedesiredposition,ReHeasetheseatknoband
slidetheSeatCarriagebackandforth slightJy
untilit Jocksintoposition.Makesureto reguJarJy
tightenthefourM8x 31ramButtonScrews(69}.
13, Hdentify the Right PedaH(37), which is marked with
an "R," Using an adjustabHe wrench, firmly tighten
the Right PedaHciock_{_e into the PuHHey/Crank(19),
Tighten the Left PedaH(not shown) couf_,te,_od_w/:_e
into the PuHHey/Crankon the Heftside, After using
the exercise cycle for one week, retighten the
Pedals.
Attach the Right PedaHStrap (38) to the Right PedaH
(37), and press the end of the Right PedaHStrap
onto the tab on the Right Pedal Attach the Left
PedaHStrap (not shown) in the same way,
10
25
11
Knob
12
11
/
13 /
13
11
47
70
23
25
70
69
/
/ / /
Knob
19 38
14, Make sure that aH parts are properly tightened before you use the exercise cycle. Place a mat
beneath the exercise cycle to protect the ftoor.
7
 Loading...