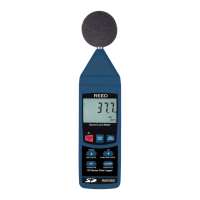
7
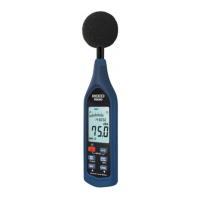
Operating Instructions
1. Turn the meter on by pressing the Power Button. To turn the meter
off, press and hold the Power Button.
2. Press the Time Weighting Button to select the desired Response
Time. If the sound source consists of short bursts, set the
response to FAST. To measure average sound level, select SLOW
3. Press the Frequency Weighting Button to select the Frequency.
Select "A" Weighting for a general noise sound level, or "C"
Weighting for measuring high level noise. "C" Weighting is a stan-
dard weighting of the audible frequencies commonly used for the
measurement of Peak Sound Pressure Level. If the "C" Weighted
Level is much higher than the "A" Weighted Level then there will be a
large amount of low-frequency noise.
4. Press the Level Range Button to select the desired dB range.
Choose a dB range in which the measured level is registering
approximatelyinthemiddleofthebargraph.Iftheoverrange
indicator appears during your measurement, the upper limit of the
selecteddBrangehasbeenexceeded.AdjusttheselecteddBrange
until the over range indicator disappears from the screen. Further-
more, if the under range indicator appears during your measurement,
the lower limit of the selected dB range is too high to register your
measurement.AdjusttheselecteddBrangeuntiltheunderrange
indicator disappears.
5. Holdtheinstrumentcomfortablyinonehand(awayfromyourbody)
or position it on a tripod for long-term monitoring. Point the micro-
phone in the direction of the noise to take a measurement.
NOTE: Direct contact with strong winds or blowing air on the microphone
may cause measurement errors. These effects can be reduced by using
the included windscreen.
MIN/MAX
Press the MIN/MAXbuttontodisplaytheMaximumandMinimumsound
level values recorded during the measurement process.
continued...
REED Instruments
1-877-849-2127 | info@reedinstruments.com | www.reedinstruments.com