www.rega.co.ukEN
AMPLIFIER SETUP
The io will work well on most surfaces, such
Ideally, position the amplifer as far as the
tonearm lead will allow. It is recommended
WARNING: Never place it on fabric or carpet.
WARNING: CASE CAN GET HOT.
CONNECTIVITY
• Input 1:
• Inputs 2 and 3:
SHORT CIRCUIT
PROTECTION
In the event that the speaker leads are
accidentally shorted, a short circuit protection
is activated in the io
the output stage from excessive currents.
IMPORTANT: ALWAYS TURN OFF THE AMPLIFIER
WHEN CHANGING LEADS AND SPEAKER
CABLES.
10
16 17 18 19 20
15
11 12 13 14
AMPLIFIER CONTROLS
16. ON/OFF BUTTON
To turn the io on, press the black power button.
After a few seconds, you will hear a relay ‘click’
and the io will be operational.
17. USING HEADPHONES
The io
jack located on the front panel (17). The
headphone circuit has been optimised to
match most commonly used headphones.
When a headphone is inserted into the socket,
the speakers will automatically be turned
the volume of the io before connecting any
headphones to ensure they are not damaged
and prevent any hearing damage.
WARNING: THE io IS CAPABLE OF GENERATING
HIGH SOUND PRESSURE, POSING A HEARING
DAMAGE RISK. TO PREVENT POSSIBLE HEARING
DAMAGE, DO NOT LISTEN TO HEADPHONES AT
HIGH LEVELS FOR LONG PERIODS OF TIME.
18. INPUT SELECT
To change between inputs, press the small
black button located next to the row of input
digits to cycle through 1-3. The selected input
is highlighted in red. Input selection can also be
changed with the supplied remote.
AMPLIFIER CONTROLS (CONT.)
19. MUTE
To mute the io amplifer press MUTE on the
highlighted on the io front panel.
20. VOLUME CONTROL
The volume control has a minimum and
maximum value which is indicated by the notch
on the volume knob. The volume does not reset
after each use. Before plugging in headphones,
make sure the volume is reduced. This can also
be adjusted via the supplied remote.
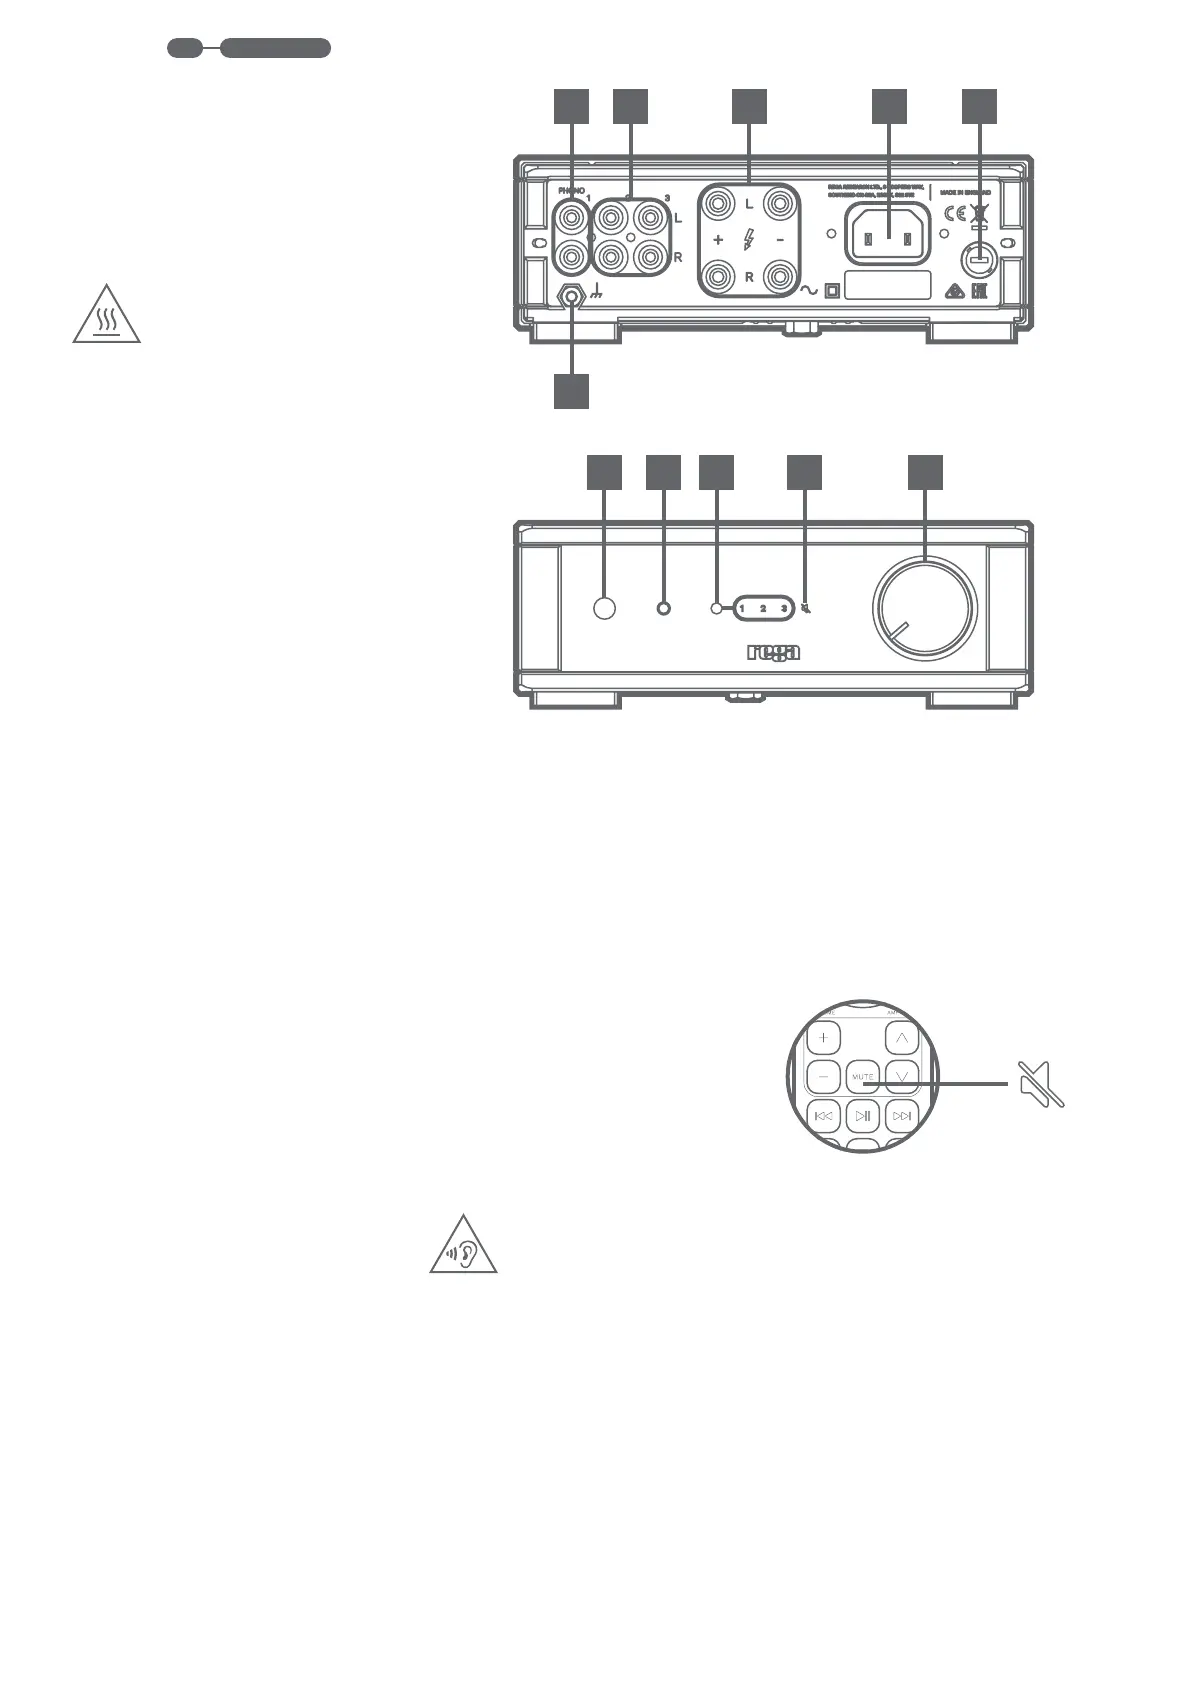
REAR CONNECTIVITY
10. PHONO STAGE INPUT 1 (TURNTABLE)
phono stage designed to be used with the
Planar 1 turntable.
IMPORTANT: Only ever connect a turntable to
this input.
11. LINE LEVEL INPUT 2 & 3
Line inputs enable the connection of any
streamers.
12. LOUDSPEAKER OUTPUT
(+) and Black (-)
(+) and Black
(-)
13. MAINS INPUT
with the corresponding mains supply stated on
ratings label.
14. FUSE
15. GROUNDING NUT
TM
.