Regency
®
P121-2/P121LC-2/P121RC-2/P131-2 Zero Clearance Direct Vent Gas Fireplace
38
12) Lift the entire assembly out.
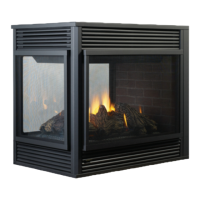
8) Remove the Side Base Brick Panels and
fi nally the Long Base Brick Panels.
MAINTENANCE
Remove Left & Right Side Base
Brick Panels
Remove the 2 Long Base Brick Panels
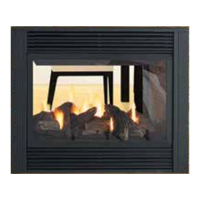
9) Disconnect the inlet gas line.
10) Disconnect the 2 TP wires and the 2 TH
wires from the valve.
11) Remove the 16 Phillips head screws
securing the valve tray.
13) Undo the pilot tube from the valve with a
7/16" wrench.
14) Undo the quick drop out thermocouple nut
on the valve with a 9mm (metric) wrench.
15) Remove the Piezo igniter wire and push
button assembly.
16) Undo the "gas out" fl are nut with a 13/16"
wrench.
17)
Undo the "gas out" fl are fi tting with an
11/16" wrench.
18) Remove the 6 Phillips head screws from
the sides of the valve bracket and remove
valve.
Hint: If you are using black pipe, ensure
that there is a union by the valve,
otherwise removal will be almost
impossible.
REMOVING VALVE
1) Shut off the gas supply.
2) Remove the louvers and trim kit. Remove
the front door.
3) Remove the logs, embers.
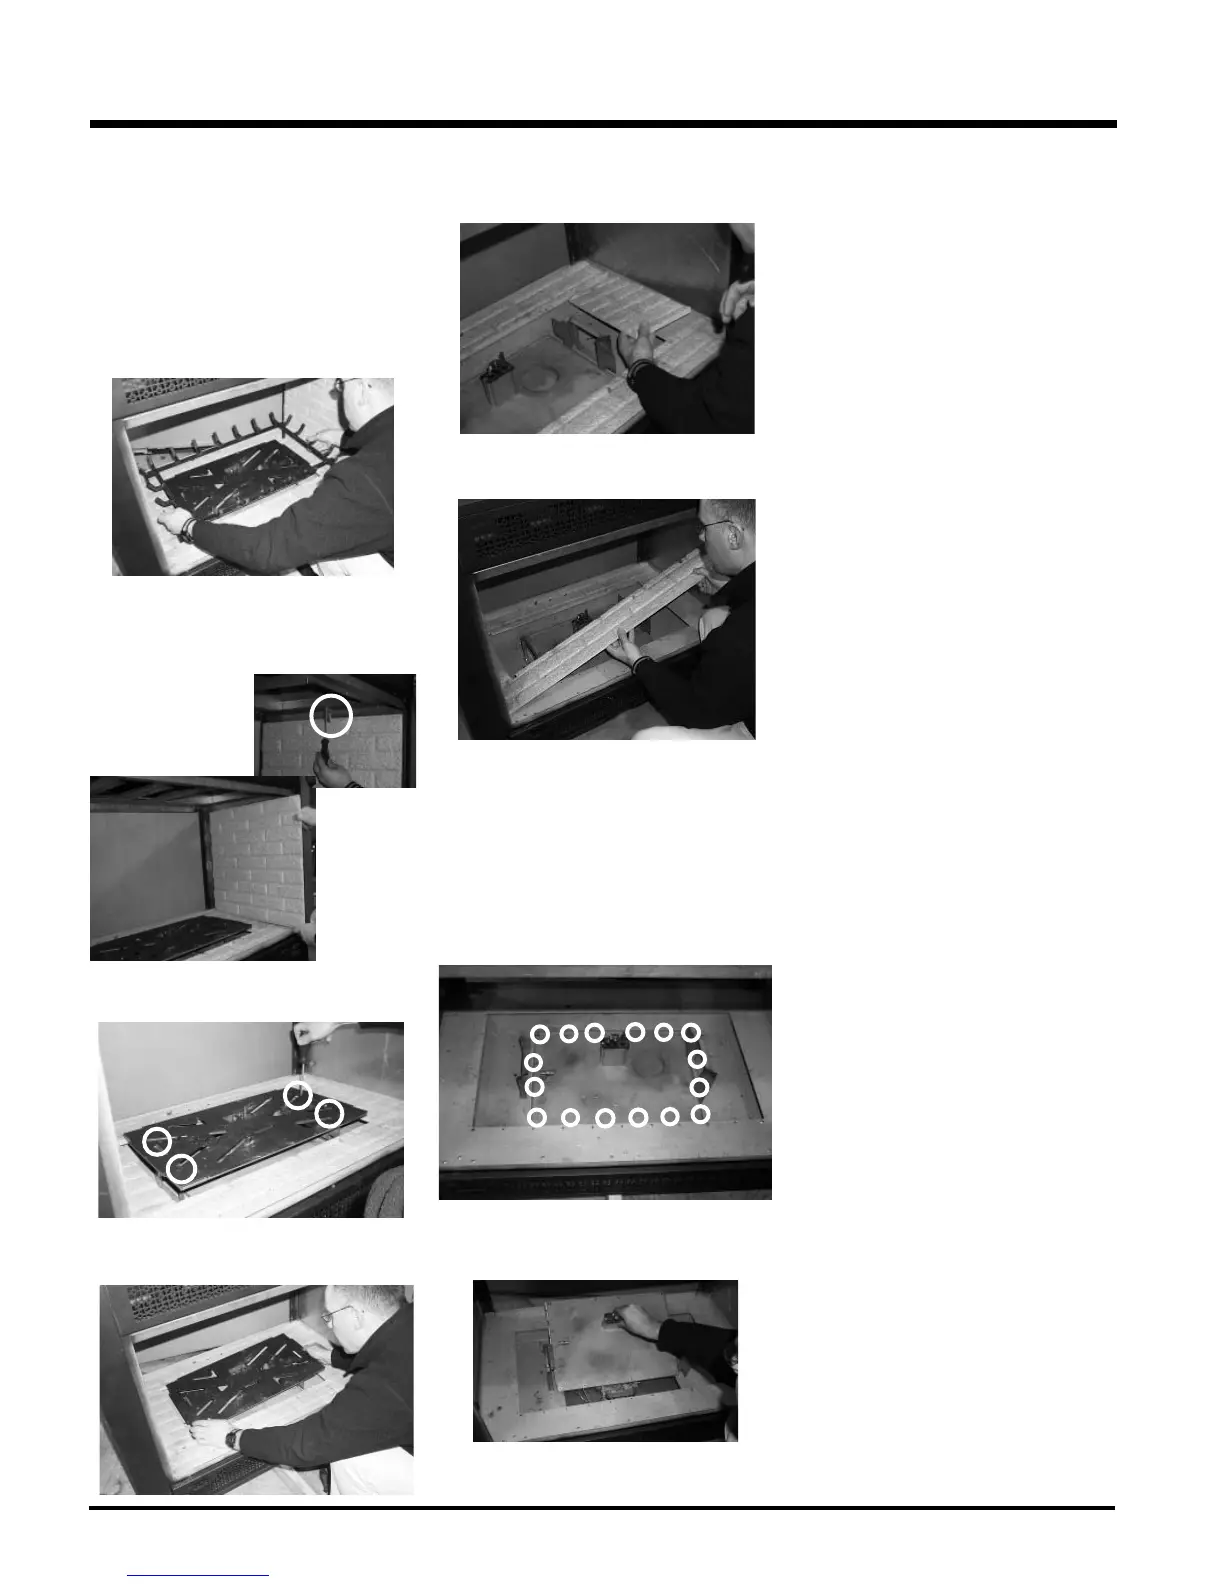
4) Remove the grate by lifting straight up.
7) Slide the burner assembly away from the
orifi ce and lift out.
5) Remove the side brick clip in the top of the
fi rebox and then slide the Side Brick Panel
out. The brick panels are very fragile
- handle with care.
6) Remove the burner by removing the 4
screws.