11
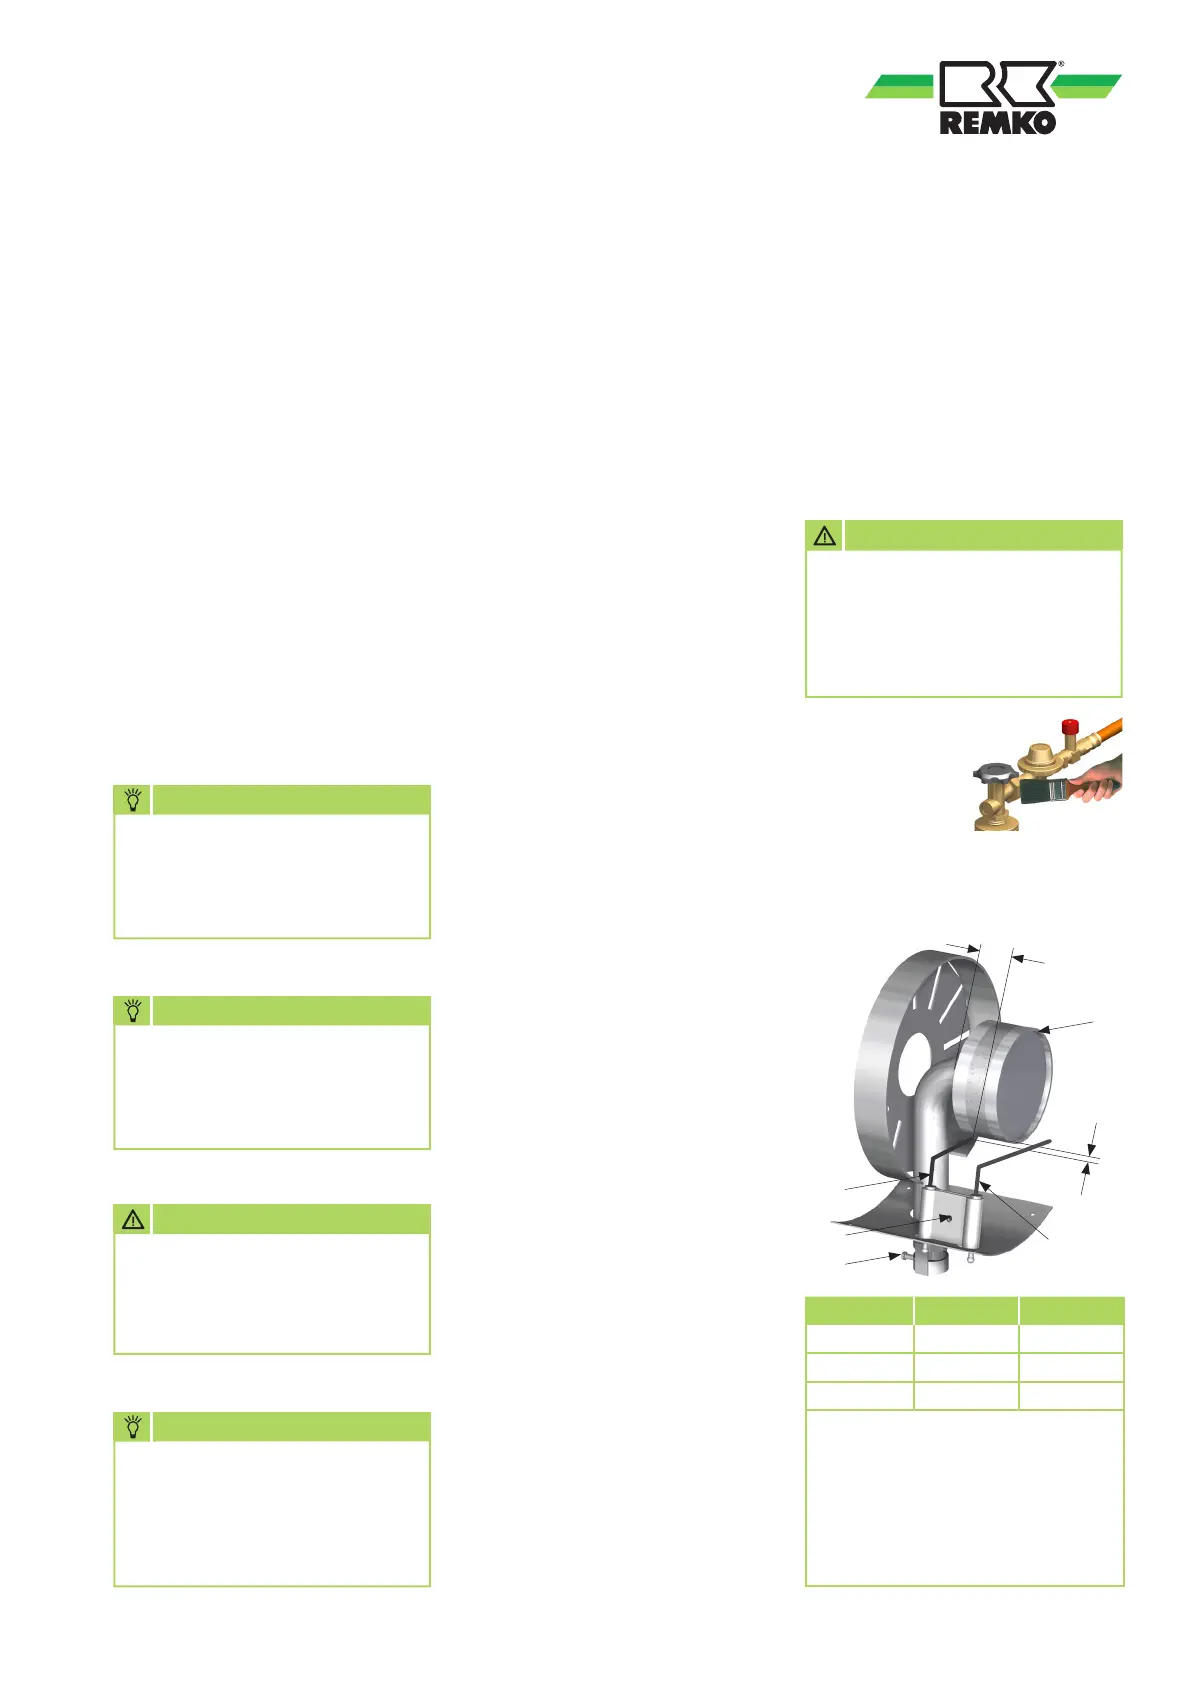
14. Adjust the ignition and ionisation
electrode in accordance
with the sketch and tighten
the clamping screw 4 of
the electrode bracket.
The tip of the ionisation
electrode must be
in the vicinity of the flame.
15. Carefully refit all parts
of the unit in reverse order.
Disassembling and cleaning
the gas burner
1. Switch off the gas supply to
the unit and unplug the power
plug from the mains socket.
2. Remove the protective outlet
grille, exterior cladding and
inspection cover.
3. Undo the clamping screw 5 of
the nozzle holder.
4. Remove the ignition cable from
the ignition electrode.
5. Detach the ionisation cable from
the ionisation electrode. Be
aware of the cap nut and spring
washer!
6. Loosen the clamping screw 4
on the electrode bracket and
carefully draw out the ignition
and ionisation electrode.
7. Carefully remove any adhered
deposits from the ignition and
ionisation electrode.
8. Detach the fastening screws
of the gas burner and remove
the complete gas burner from
the unit.
9. Carefully clean the gas burner
with a suitable brush and
possibly compressed air.
10. Clean the gas nozzle if
necessary.
Do not use any sharp-edged
objects!
11. Carefully remove deposits
or soiling in the unit base.
12. After all cleaning work on
the gas burner, carefully refit
all parts in reverse order.
13. After using the gas nozzle,
tighten the clamping screw
5 again.
Unit type A B
PGT 30
approx. 3 mm approx. 15 mm
PGT 60
approx. 3 mm approx. 15 mm
PGT 100
approx. 3-4 mm
approx. 30 mm
Legend:
1 = Gas burner
2 = Ionisation electrode
3 = Ignition electrode
4 = Clamping screw (electrodes)
5 = Clamping screw (gas nozzle)
1
4
2
3
5
A
B
Gas burner
for example with:
Soap solution
or leak detection
spray.
■
Check the inlet and outlet grille
for contamination on a regular
basis
■
Check hoses and seals
for damage on a regular basis
■
Replace damaged hoses, seals,
etc. immediately
■
Clean the gas burner,
gas nozzle and the combustion
air openings regularly
■
Check ignition and ionisation
electrodes regularly and adjust
and clean if necessary
NOTE
Adjustment and maintenance
work may only be carried out
by authorised and qualified
technicians.
CAUTION
An electrical safety check must
be carried out in accordance
with VDE 0701 after any work
on the units.
NOTE
Replace defective or damaged
parts immediately
and exclusively with original
spare parts.
NOTE
A strongly yellowy flame
indicates an inadequate
fresh air supply or dirt inside
the unit.
CAUTION
A functional inspection
of the entire unit including
leak testing of all gas-
conveying connections must
be conducted
 Loading...