PREPARATION
Ŷ6XSSOLHGDFFHVVRULHV
The following accessories are supplied:
Ŷ7UDQVFHLYHUPRXQWLQJ
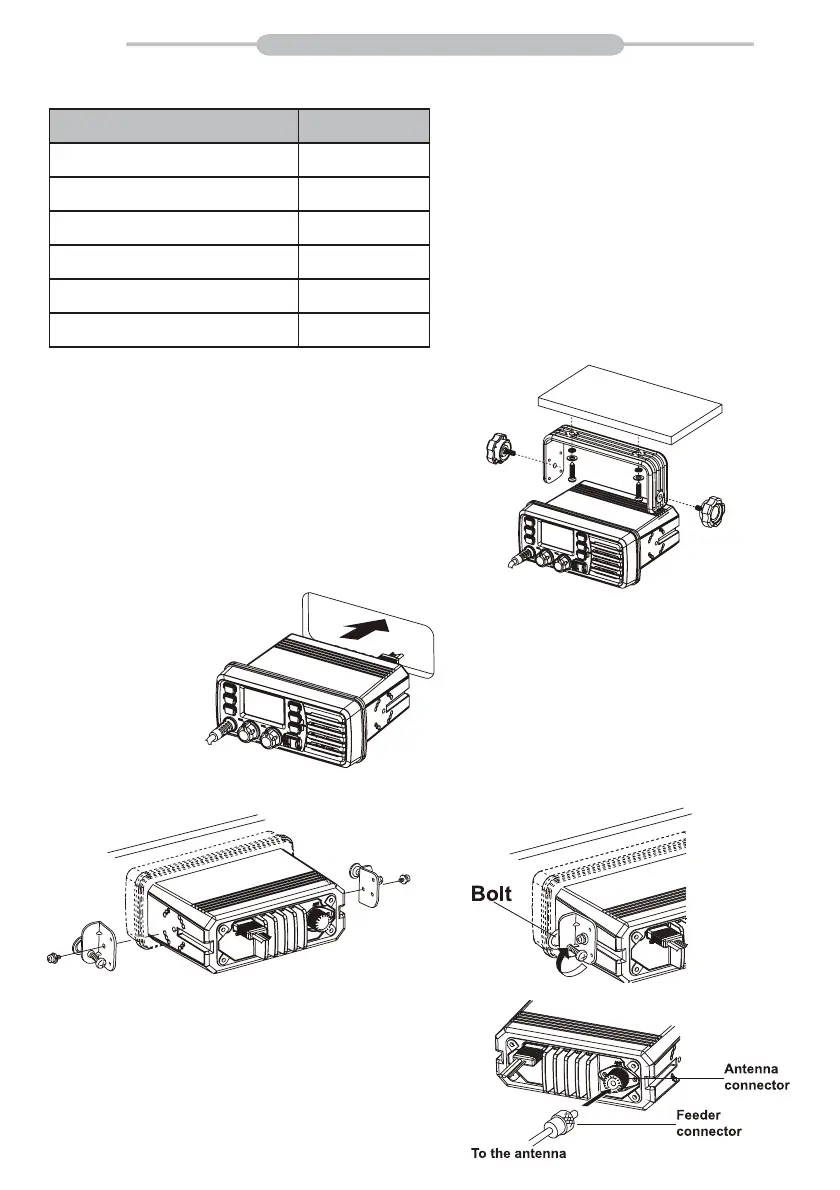
Ƈ8VLQJWKHVXSSOLHGPRXQWLQJEUDFNHW
The universal mounting bracket supplied with your transceiver allows
overhead or dashboard mounting.
1.Fix the mounting bracket to shelf or dashboard with the supplied screws
and mount the transceiver to the mounting bracket with the knob bolts.
2.Mount the transceiver so that the face of the transceiver is at 90"to your
line of sight when operating it and tighten the knob bolts so that the
transceiver Is securely mounted.
• You may use a spongy cushion between the transceiver and
mounting bracket to reduce the vibration.
Ƈ(PEHGGHGPRXQWLQJ
1. Cut a hole into the instrument panel (or wherever you plan to mount the
transceiver).
2. Slide the transceiver through the holes
as shown below.
3. Attach the clamps on either side of the transceiver with 2 supplied bolts.(Image1)
4. Tighten the end bolts on the clamps so that the clamps press firmly against the Inside of the Instrument control panel.(Image2)
Ŷ$QWHQQDFRQQHFWLRQ
Please connect an antenna before transmitting. Select the antenna with the relative
frequency and connect on the ANT antenna connector. Use the antenna and low
loss concentric with the same natural impedance 50Q
• Transmitting without an antenna may damage the transceiver.
ITEM QTY
DC power cable
Spare fuse
Mounting bracket
Screws for mounting bracket
Microphone hanger
Instruction manual
1
1
1
1
1
1
(Image1) (Image2)
01