EasyManua.ls Logo

Rev-A-Shelf Closet User Manual

Default Icon
2 pages
To Next Page IconTo Next Page
Page #1 background imageLoading...
Page #1 background image
Fan Pants Rack
1. Position Pants Rack where desired.
2. Use (2) Euro Screws to mount in closet system holes.
3. Complete installation by using #8 x ½” screws in remaining 4 holes.
Note: Mounting bracket may be reversed for right or left handed installation.
Wood Shoe and Purse Organizers
The wood shoe and purse organizers are designed to be used in closet systems with 24”,
30” and 36” between partitions. They can be stacked in two manners, one allows for large
openings suitable for purses, and boots. The other is suitable for shoes, and smaller items.
When stacking in either direction use the supplied dowel pins to align the organizer
partitions both vertically, and horizontally. See Figures 1 and 2.
Figure 1 Figure 2
Another Great Closet Product By
The Pull-Out Ironing Board!
Rev-A-Shelfs unique
Pull-Out Ironing Board can be
retro tted and folds away
neatly into the space of a drawer.
Simply open, unfold,
and the board rises
automatically with a
locking device that
keeps the board in
place and even with
the counter top.
Figure 1
Figure 2
Figure 3
Closet Wire Baskets
Top Mounting Bracket
Assembly
1. Align top mounting bracket with basket
slides as shown in Figure 1. Attach using
the 8 included at head machine screws.
Installation
2.
Position mounting bracket/slide assembly
under xed shelf as shown in Figure 2.
Attach to the bottom side of
the closet shelf using #8 x ½ screws.
Figure 1
Figure 2
1. Position ball bearing slide where
desired in closet
2. Align front of slide with front of closet
panel as shown in Figure 1.
If the system holes align properly with
holes in the slide, use Euro screws to
attach the slide, if not, use #8 x ½”
at head screws.
3. Position and install other slide.
4. Place back wire of basket into hook on
left and right slide as shown in Figure 2.
5. Pivot the basket down so that the tabs
on the basket are inserted into the slots
in the slides as shown in Figure 3.
CLOSET
INSTALLATION
INSTRUCTIONS
For more information about these products and many
of our other innovative storage solutions,
visit www.rev-a-shelf.com or call (800) 626-1126.
I-CLOSET 10/06
Question and Answer IconNeed help?

Do you have a question about the Rev-A-Shelf Closet and is the answer not in the manual?

Rev-A-Shelf Closet Specifications

General IconGeneral
Adjustable ShelvesYes
Weight CapacityVaries by model
MaterialWood, Metal
Installation TypeWall Mounted
CategoryCloset Organizer
FinishVaries by model (Chrome, White, Wood)

Summary

Closet Wire Baskets Installation

Position Ball Bearing Slide

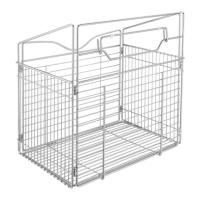
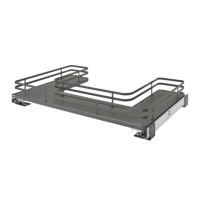
Positions the ball bearing slide within the closet space for wire baskets.

Align Front of Slide

Aligns the front of the wire basket slide with the closet panel's front edge.

Install Other Slide

Installs the second ball bearing slide on the opposite side for the wire basket.

Hook Basket onto Slides

Hooks the back of the wire basket onto the installed slides.

Pivot Basket Down

Pivots the wire basket down to engage its tabs into the slide slots.

Wood Shoe and Purse Organizers

Organizer Design

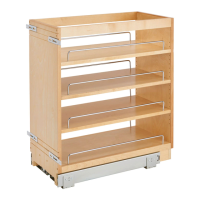
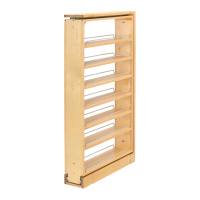
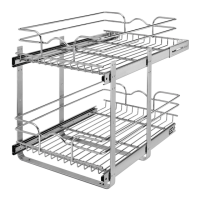
Organizers designed for closet systems with specific partition widths.

Stacking Configurations

Organizers can be stacked for large openings or for shoes.

Alignment with Dowel Pins

Uses dowel pins to align organizer partitions vertically and horizontally.

Top Mounting Bracket Installation

Attach Bracket to Slides

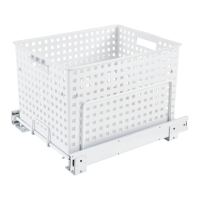
Attaches the top mounting bracket to the basket slides using machine screws.

Mount Assembly Under Shelf

Mounts the bracket/slide assembly under a fixed shelf using screws.

Fan Pants Rack Installation

Position Pants Rack

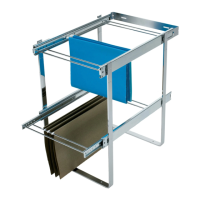
Places the pants rack in the desired location within the closet.

Mount Using Euro Screws

Secures the pants rack using Euro screws in system holes.

Complete Installation

Finishes the pants rack installation with screws in remaining holes.

Closet Rod Pulldown System

Insert Wooden Dowels

Inserts wooden dowels into the pulldown system's positioner block.

Position Pulldown Mechanism

Places the pulldown system's positioner block into the closet panel holes.

Install Right Side Mechanism

Uses a guide to position the right-side mechanism and attach it with screws.

Install Left Side Mechanism

Repeats the mechanism positioning and attachment for the left side.

Assemble Hanging Pole

Assembles the hanging pole using a screw and secures it with a hex bolt.

Attach Handle

Attaches the handle to the pulldown system using a provided screw.

Attach Plastic Brackets and Rod

Attaches plastic brackets to the unit's arms and inserts the telescopic rod.

Adjust Hanging Rod Length

Adjusts the length of the hanging rod by twisting it.

Reverse Mounting Bracket

Attach Tie or Belt Rack

Attaches a tie or belt rack to the reverse mounting bracket using machine screws.

Mount Bracket to Closet Panel

Mounts the bracket to the closet panel using Euro screws or sheet metal screws.

Chrome Wire Shoe Rail Installation

Drill Holes for Shoe Rail

Drills three specific holes in the shelf for the chrome wire shoe rail.

Insert Shoe Rail

Inserts the chrome wire shoe rail into the prepared shelf.

Wood Pants and Tie Rack Installation

Determine Mounting Height

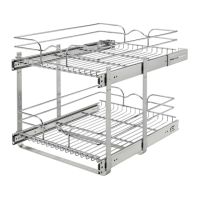
Marks the mounting height for the rack, ensuring clearance below the next shelf.

Remove Slides from Rack

Detaches the slides from the wood rack by pressing a release lever.

Attach Slide to Partition

Mounts the cabinet side of the slide to the closet partition using screws.

Insert Rack into Slides

Slides the assembled rack into the mounted cabinet slides.

Test Operation

Tests the operation by closing and opening the installed rack.

Jewelry Drawer with Insert Installation

Mount Slides in Cabinet

Mounts the drawer slides into the closet opening using system holes as a guide.

Engage Drawer into Slides

Engages the jewelry drawer mechanism into the installed slides.

Test Drawer Operation

Tests the operation by closing and opening the installed jewelry drawer.

Place Insert into Drawer

Places the accessory insert into the jewelry drawer.

Related product manuals