Commissioning
The operating instructions are subdivided into 3 major chapters:
1. The integration of an A100 into the home network via WLAN / LAN
2. The connection of an A100 via cable or radio (pairing) with other STUDIOART products
3. The basic functions of the STUDIOART app incl. multiroom with several STUDIOART products
Speaker placement
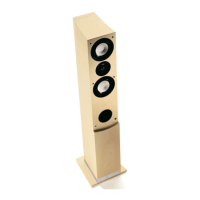
The STUDIOART A100 and P100 speakers are loudspeakers that you can install anywhere. The prerequisite is that a good Wi-Fi
coverage or a LAN connection is available at the installation site of the A100. When operating in the bathroom, please be aware
that the A100 or P100 is moisture resistant but not waterproof. Therefore, do not bring it near water and do not expose it to
rain when it is operated outdoors. Excessive sunlight can also damage the A100 / P100.
If you have decided on a stereo constellation (A100 + A100 or A100 + P100), you will achieve the best audio reproduction if the
loudspeakers with your preferred listening position form a triangle with roughly equal sides. In doing so, the speakers should
radiate from an acoustically hard, reflective environment into the more heavily damped part of the listening room.
The sound “path” should not be obstructed by objects, i.e. you should be able to see the
speakers. "Aligning" the loudspeakers to the listening position can have an acoustically
advantageous effect since reflections on the adjacent room walls are thereby reduced.
Wall mounting
In case the A100 or P100 is to be fixed to a wall, there is a special STUDIOART wall
bracket kit; Article no .: 141 020 101. The kit contains two (2x) wall brackets made
of high-alloy zinc casting including fixing materials. The wall bracket itself has a
horizontal adjustment angle of +/- 90 ° and a vertical adjustment angle of -16 ° to +
48 °. Combined with an A100 / P100 on a flat wall, this results in an adjustable
beam angle of horizontal + 6 ° or - 45 ° and vertical +/- 75 ° - see diagram below.
A100 with wall bracket A100 with wall bracket
Orientation up/ down Orientation left/ right
Care
The real glass surface of the A100 can be cleaned with a mild window cleaning agent. In contrast, the painted housing surfaces
should only be cleaned with a damp cloth and then rubbed dry with a soft cloth. Never use cleaning agents with grinding
additives.

 Loading...