Integr a Sun K VM Switch
7
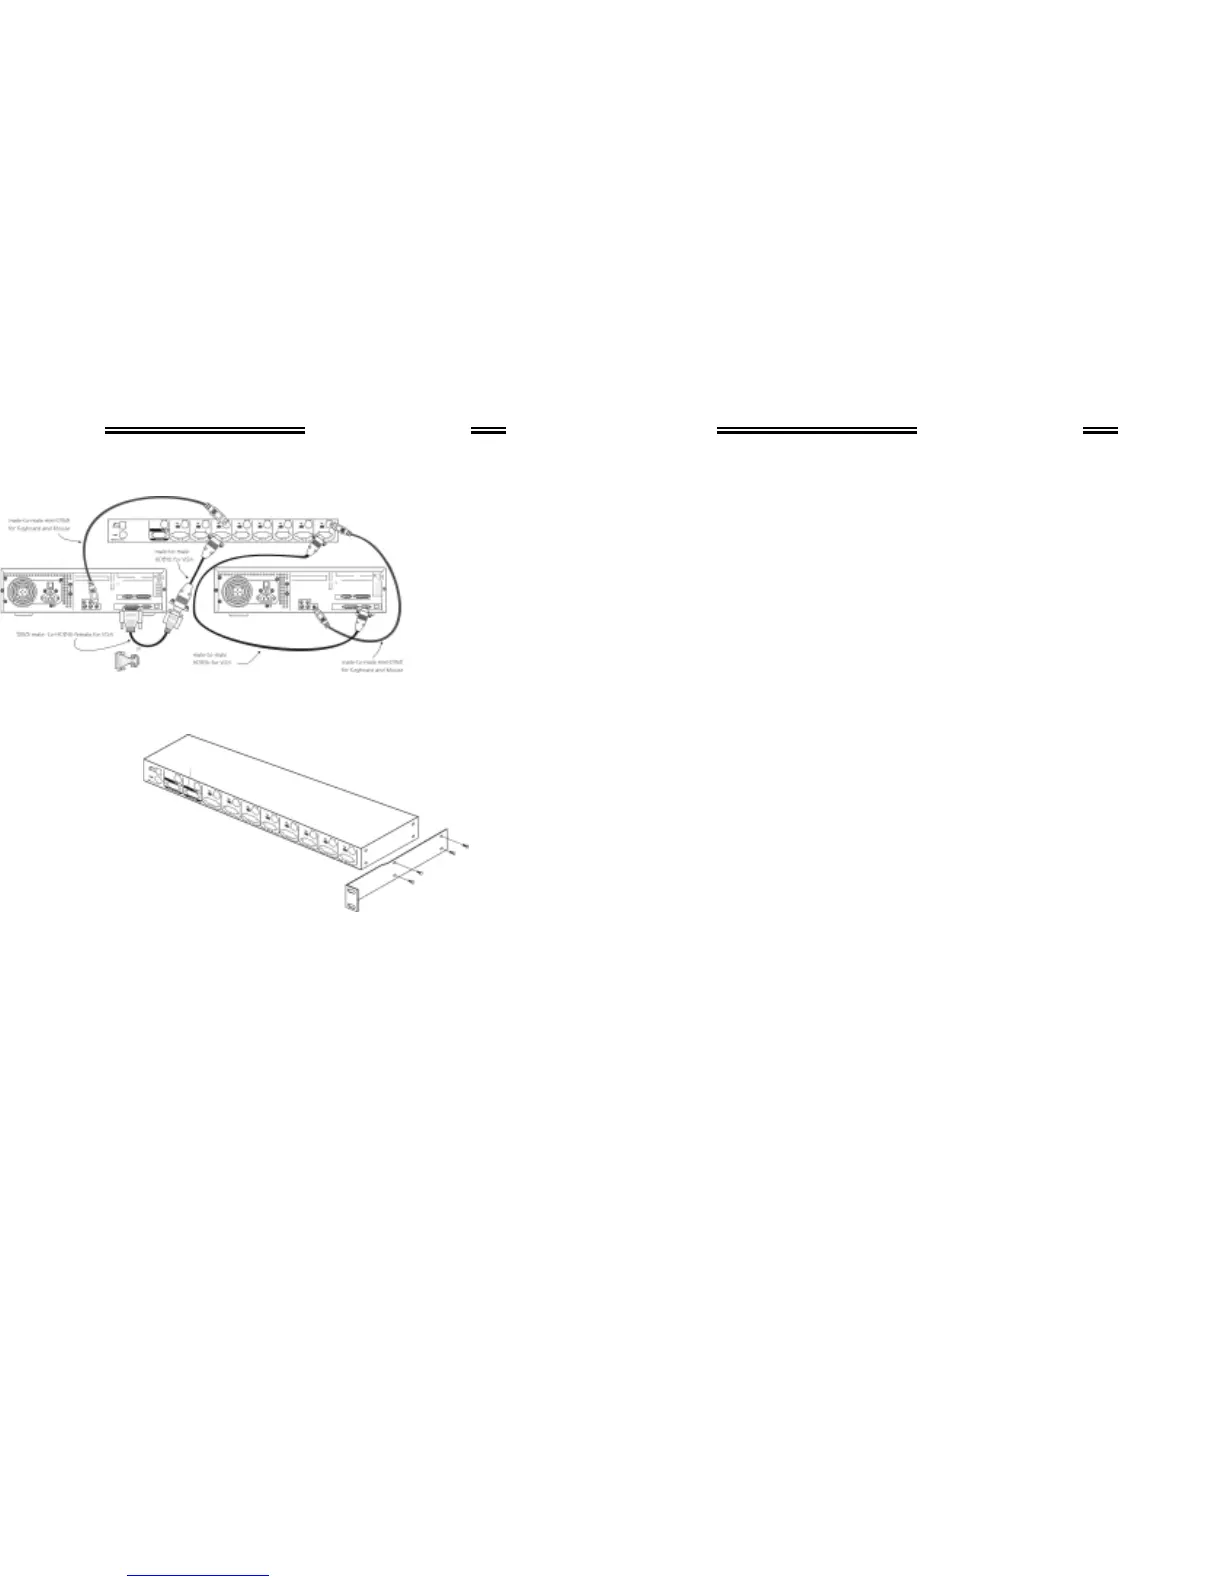
For Sun serv ers with 13W3 v ideo output, a 13W3-to-HDB15 adapter
is required for such server's video port as shown in figure 6.
Figure 6:
Adapter and
monitor
connection
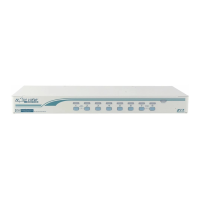
A Sun KVM
Switch may be
mounted to the
rear v ertical
poles inside a
rack cabinet by the rear brackets with key board, mouse, monitor
connectors facing out, as figure 7.
Figure 7: Rear-mount bracket attachment
The keyboard/mouse connector at the Local port on the rear of the
KVM module is not applicable when the module is connected to the
drawer by the C-36 connector. When its C-36 connector is not
connected to the drawer, the KVM module acts as a rear-mount
stand-alone KVM switch. The VGA signal at the Local port is the
same as the LCD panel.
Initial Power-Up
Make sure all servers and the Integra Sun KVM module are
powered down during installation. You must power up the
Integr a Sun K VM Switch
8
Master Integra system before turning on any other devices.
For single Integra Sun KVM Switch:
1) Apply a power adapter to the Master.
2) Turn on servers.
For cascaded Sun KVM Switches:
1) Apply a power adapter to the Master.
2) Apply power adapters to all Slaves.
3) Turn on servers.
Note: You may hot plug additional powered-down server or a slave
Sun KVM Switch without turning any existing Sun KVM Switch or
server off after initial power up.
-----------------------
----------------------------------------------
-----------------------
Operati on
Operati onOperati on
Operati on
Hot- Key Commands