and find what IP was assigned to the TXMOD. You will be able to access the TXMOD interface by
typing the IP in a web browser.
Advanced users
The module must be set up by:
- Choosing ‘Station’ in ‘Wi-Fi Mode’
- Setting the correct SSID (in StationSSID) and password of the network in “Station Password”.
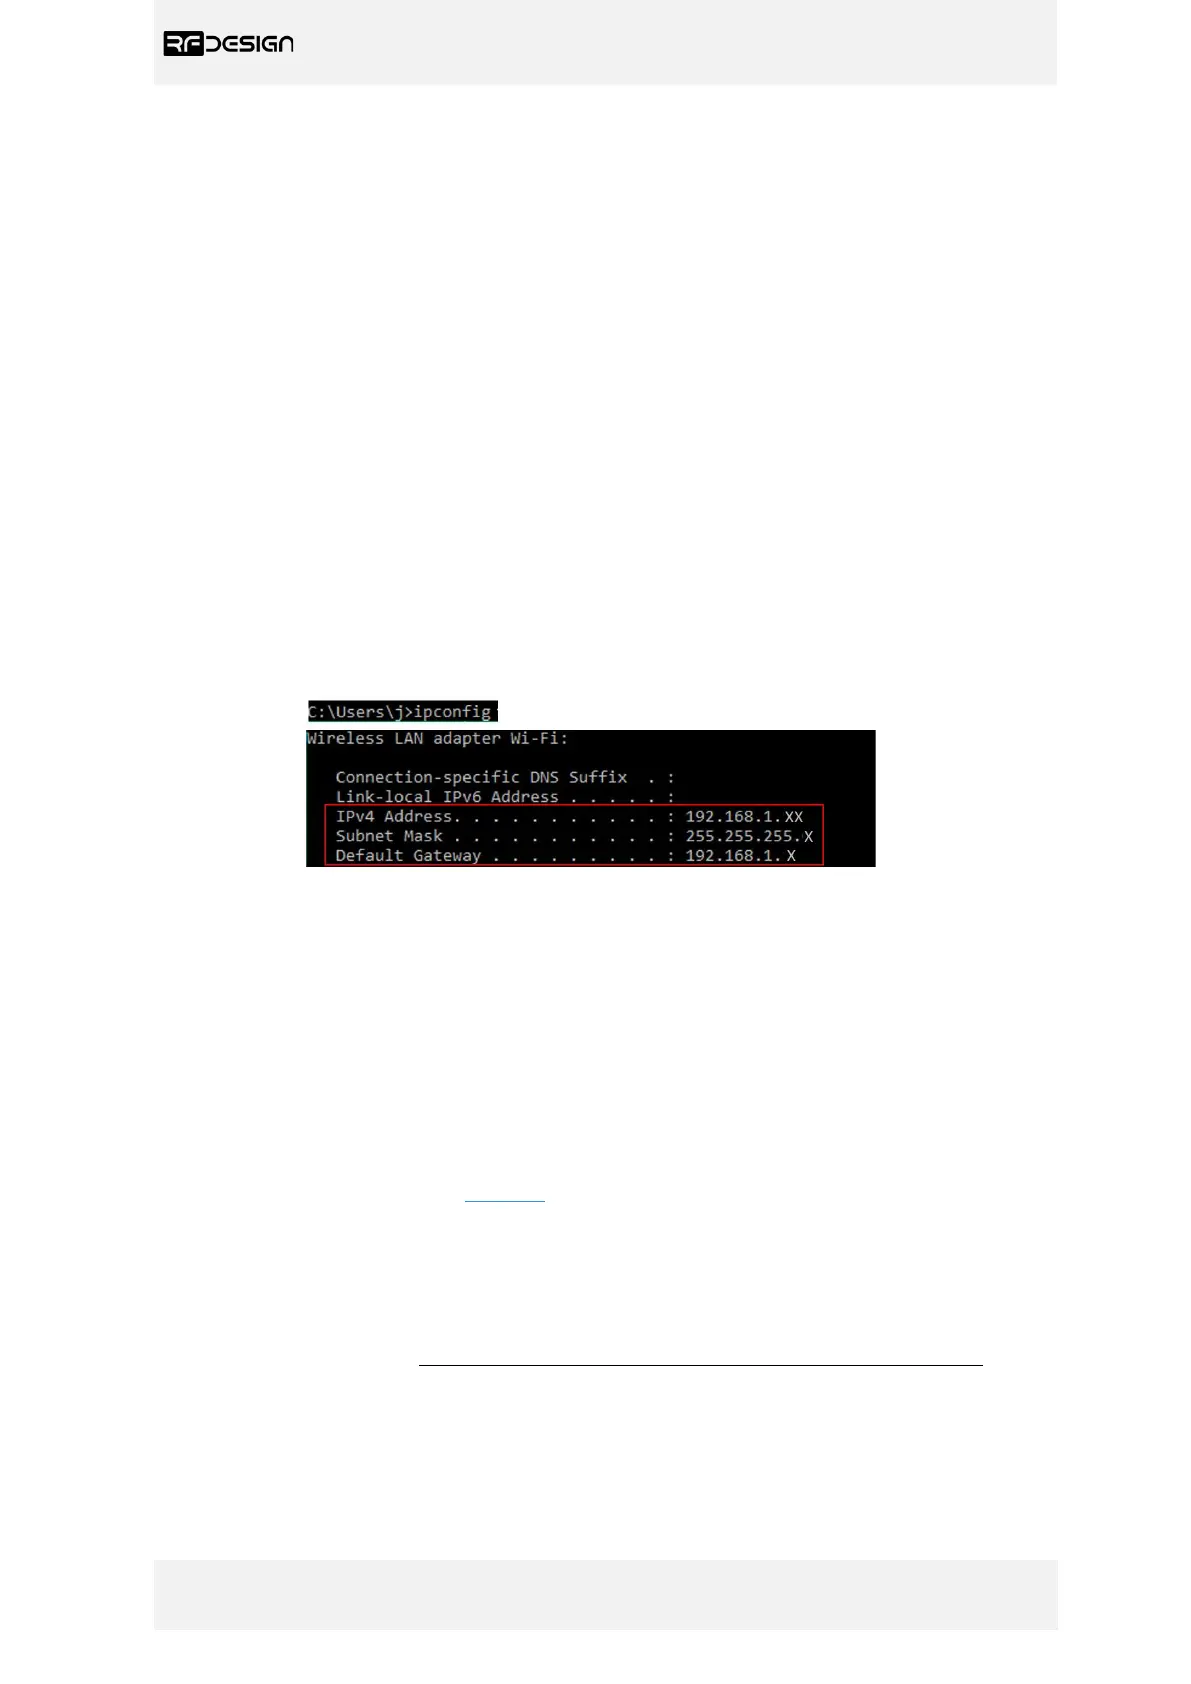
- Find the Gateway and Subnet mask of the network then to write the appropriate values in ‘Station
Gateway’, ‘Station Subnet’. Network information such as the Subnet Mask and Gateway address can
be found on a network connected device. For instance, in windows launch a command prompt, type
‘ipconfig’ and press enter. Information similar to figure 10 will be shown. In Linux based devices
typing ‘ifconfig’ to the terminal should give similar results.
Note: Assigning the ‘Station IP’ will require that a static IP is set on the DHCP server, normally the
network router, this is to ensure the device will be at a known address on the network. This new
address will replace the default 192.168.4.1 of access point mode.
Figure 10 – Command Prompt.
Default Gateway ->‘Station Gateway’
Subnet Mask ->‘Station Subnet’
e) Firmware Update:
Updating the TXMOD requires two different files; the ‘firmware.bin’ and the ‘spiffs.bin’ files.
- Download files. Follow the links in section 7
- On the browser configuration landing page shown in figure 6, select ‘Update Firmware’ and follow
the on-screen commands to flash them onto the device.
- The firmware.bin should be uploaded first
- Second upload the spiffs.bin. These files must not be uploaded and flashed simultaneously.
- Power-cycle the device, this will automatically update firmware on the RFD900x modem if
required.