mini+ User Manual
5.2.8 Logo Overlay
5.3 Upgrade
Firmware ZIP upgrade package
XTOOL (V1.0.1.10 or higher) -packaged in the ZIP
Computer with network connection
o Windows (minimum Win 7, Win 10 recommended)
o macOS (minimum 10.13 High Sierra)
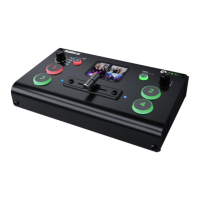
If it is your first time to use Logo Over lay, please connect
mini+ to your computer, and make sure that IP address of
both are in the same network segment.
1. Select a picture as the Logo.
2. Click “ColorPicker” and select color you want to filter in
the LOGO picture,and current color can be seen below.
3. Turn on”Transparent Switch”,the filtered color will
disappear in the LOGO picture.
4. Click “Logo Generated”,”upgrading”will be seen in the
TFT screen of mini+,and the Logo picture will be imported in.
5. Turn on”On-Off”,and slide to set camera
“X” and “Y” position. Click Set and confirm.
Note: The format of the LOGO image should be BMP 24 bits, and the image size should be within 256*128
pixels.