RHINO SHELF
®
UNIVERSAL KIT
Installation Guide
Page
12
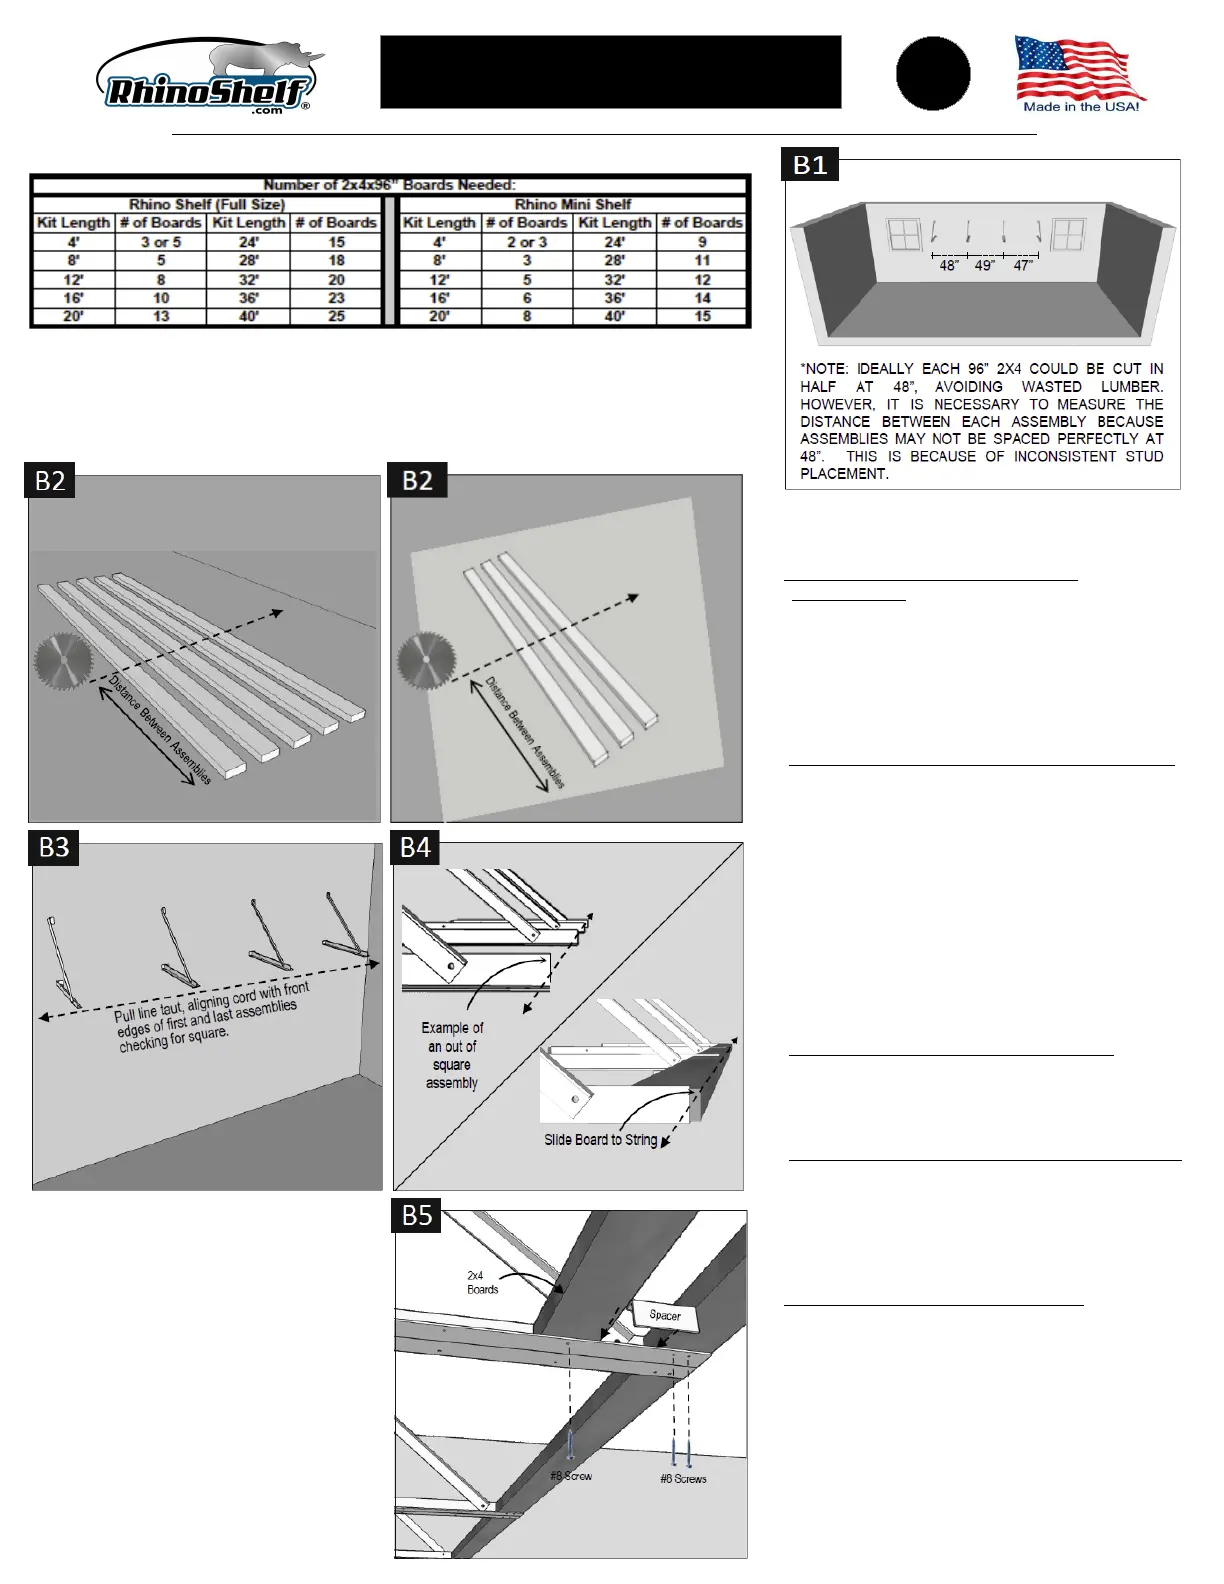
You will need at least the number of boards indicated. If your actual stud spacing
consistently exceeds 16” (or 24”) on center, you will require extra boards due to
having too many sections that exceed 48”.
CUT AND INSTALL 2X4 BOARDS
B1. MEASURE DISTANCES BETWEEN
ASSEMBLIES. Beginning at the back of each of
the shelf sections, measure the distance between
assemblies. (IMPORTANT to always measure next
to wall for each section.) Write down the
measurements of each section. (Measure twice,
cut once!) Repeat until each distance between
assemblies has been measured and written down.
B2. CUT BOARDS TO PRE-MEASURED LENGTHS.
Mark exact measurements on 2x4x96” boards. Cut
five boards per section for the full-size Rhino Shelf
and three boards per section for the Rhino Mini
Shelf and set aside, ensuring each section's
boards are kept together and separate from the
boards of other sections.
Note: Steps B3 and B4 are designed to ensure that the
front boards in all shelf sections are straight and
look nice - you may be able to just "eyeball" the
front boards to make sure they line up. Either way,
line up all front boards before screwing in place.
B3. PULL A LINE TO CHECK FOR SQUARE. Using
construction line or string, pull a line taut from one
“end” assembly to the other “end” assembly and
check for square.
B4. EXAMPLE OF AN OUT OF SQUARE ASSEMBLY.
To make adjustments, place 2 x 4 cross member
on assembly, slide board forward until it just
touches the string. Repeat for all front boards
before screwing in place, making sure you have a
straight line across all shelf sections.
B5. ATTACH BOARDS TO ASSEMBLIES. Starting at
the front of the first assembly you installed, use a
1/4” socket or driver to attach #8 screws through
the holes on the bottom of the assembly into the
bottom of the board. Continue attaching screws
through each hole until the front board is secure.
Repeat until each front board is secure along the
front of the shelf. You may remove the
construction line/string now if using. Use the
included ‘spacer guide’ to position next row of
boards. Continue adding boards until all sections
are filled.
This completes your installation.
NUMBER OF BOARDS TO PURCHASE
Rhino Shelf
®
and Rhino Shelves
®
are trademarks of
Innovative Design Technologies, LLC
© 2012 – 2019 IDTLLC
Rhino Shelves
®
are
manufactured and sold by RhinoShelf.com
a wholly owned subsidiary of
Innovative Design Technologies, LLC
PO Box 2296, 475 S. Raleigh St.
Angier, NC 27501
919-331-0204
RHINO SHELF
®
(Full Size)
RHINO MINI SHELF
®
 Loading...