RHINO SHELF
®
UNIVERSAL KIT
Installation Guide
Page
3
The first step in installing your shelves is to draw a level construction line on your garage wall at your chosen shelf height,
and identify the studs you will attach to. Rhino Shelves are designed to be attached to studs that are closest to 48” apart.
Standard construction locates studs every 16” or every 24”, so the closest to 48” will be every third stud or every second
stud, respectively. In most cases, your chosen studs will not be exactly 48” apart due to inconsistent stud placement – this is
not a problem since you will be cutting your boards to fit the exact spacing in your wall (see Page 12).
A Note on Shelf Height: 84” is the most commonly used
shelf height. This height allows the doors of large vehicles to
open without hitting the shelves, and plenty of headroom for
most people to walk under the shelves. If you have lower
than normal ceiling height or a need to store bigger objects on
the shelf, you may want to decrease this number, or increase
it if you have an exceptionally large vehicle or need more
under-shelf clearance.
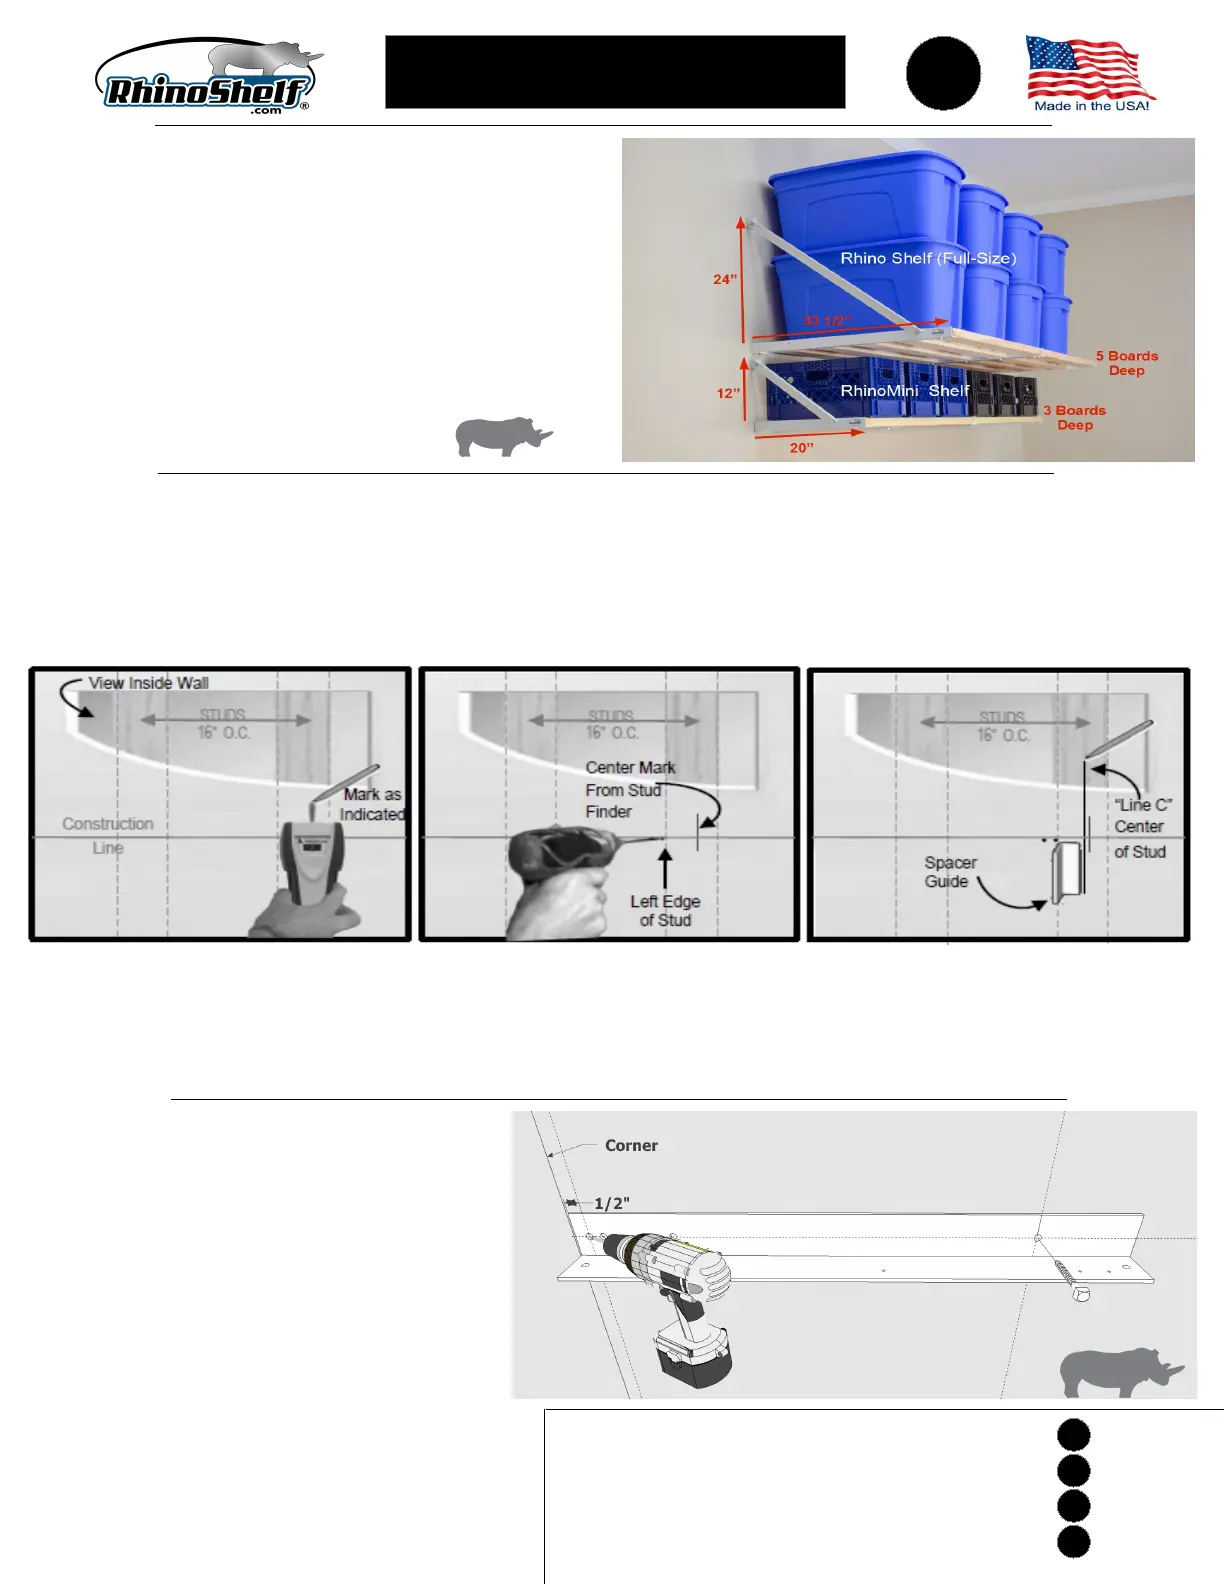
In any event, the full-size Rhino Shelves require 24” between
the top of the shelf and the ceiling for clearance for the top
bracket of the assemblies.
Rhino Mini Shelves require 12” clearance.
Finding the exact center of a stud. We recommend not simply relying on a stud finder to find the center of a stud. Here's how
trim carpenters do it:
Using a stud finder, locate and mark
the approximate center of the stud.
*NOTE: The shelf may fail to support
the weight of items if not fastened to
the center of the stud.
Starting about 3/4” from the center
mark, drill multiple small holes until
contact is made with left edge of stud.
Use a 1/8” drill bit or smaller to mini-
mize sheetrock damage. This checks
the accuracy of the stud finder.
Use the included spacer guide to
measure ¾” from the left edge of the
stud. Draw a line along the right edge
of the spacer guide and extend it with
a level. This should be the “exact”
center of stud.
For: MID-WALL Installation:
LEFT-WALL START:
RIGHT-WALL START:
WALL-TO-WALL:
Go to Page 4
Go to Page 6
Go to Page 8
Go to Page 10
MINI
Special Instruction for Rhino Mini Shelf:
When installing the Mini Shelf in either Left or
Right Wall Start or Wall to Wall configurations,
you will find that there is almost always only one
stud located within 20” of the corner. You will
install one lag bolt as shown in the instructions,
but it will be necessary to drive your second lag
bolt diagonally back into the corner stud. To do
this:
1. Drill hole for 1
st
lag bolt at shown in
instructions.
2. Drill a new 1/4” hole approximately ½” from the
corner end of the 20” Wall Start part.
3. Place and hold the part in the proper position
on the wall.
4. Using a 3/16” drill bit, hold your drill at a 30
degree angle and drill through the new hole into
the corner stud.
5. Fasten part to the wall using two lag bolts.
MINI
20” Rhino Mini Right Wall Start (from Right End Assembly)
(Left Wall Start is mirror image from Left End Assy)
1
st
Lag Bolt into
Wall Stud
Wall Stud
Diagonal
hole into
Corner Stud
for 2
nd
Lag Bolt
 Loading...