1.1.4 Front Right Cover
1. Open the front cover and pull out the paper trays.
2. All models except A153/A157: Swing open the optional LCT unit [A].
3. Remove the front right cover [B] (1 screw).
1.1.5 Rear Right Cover
1. Remove the rear cover.
2. All models except A153/A157: Remove the LCT harness cover [C] (1
screw) and the LCT rear cover (2 screws).
3. Remove the rear right cover [D] (1 screw).
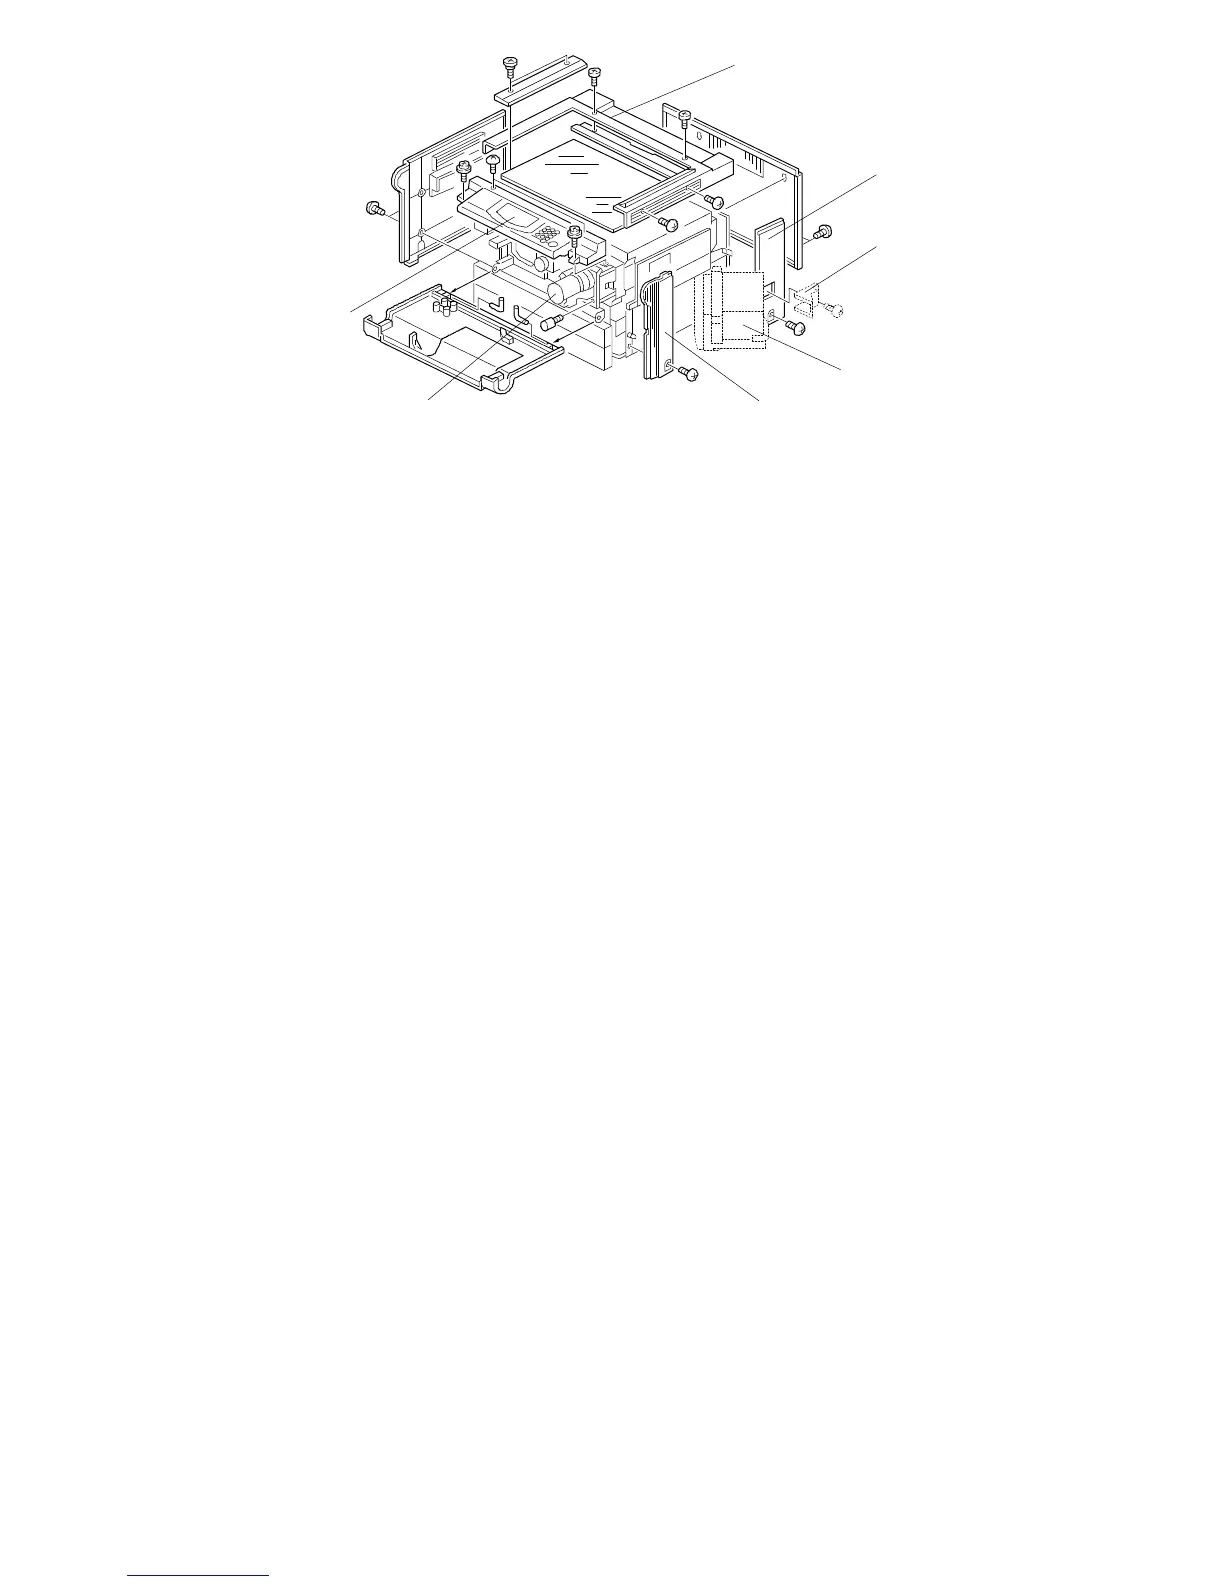
1.1.6 Top Cover
1. Remove the optional platen cover or the optional DF.
2. Remove the top cover [E] (6 screws).
1.1.7 Operation Panel
1. Lift up the optional platen cover or the optional DF.
2. Open the front cover and slide out the toner bottle holder assembly [F]
(1 screw and 1 knob screw).
3. Remove the operation panel [G] (4 screws and 2 connectors).
NOTE: For the A156 copier, remove 5 screws and 3 connectors.
[D]
[C]
[G]
[A]
[B][F]
FT5535/4527/4522 5-2 FSM
 Loading...