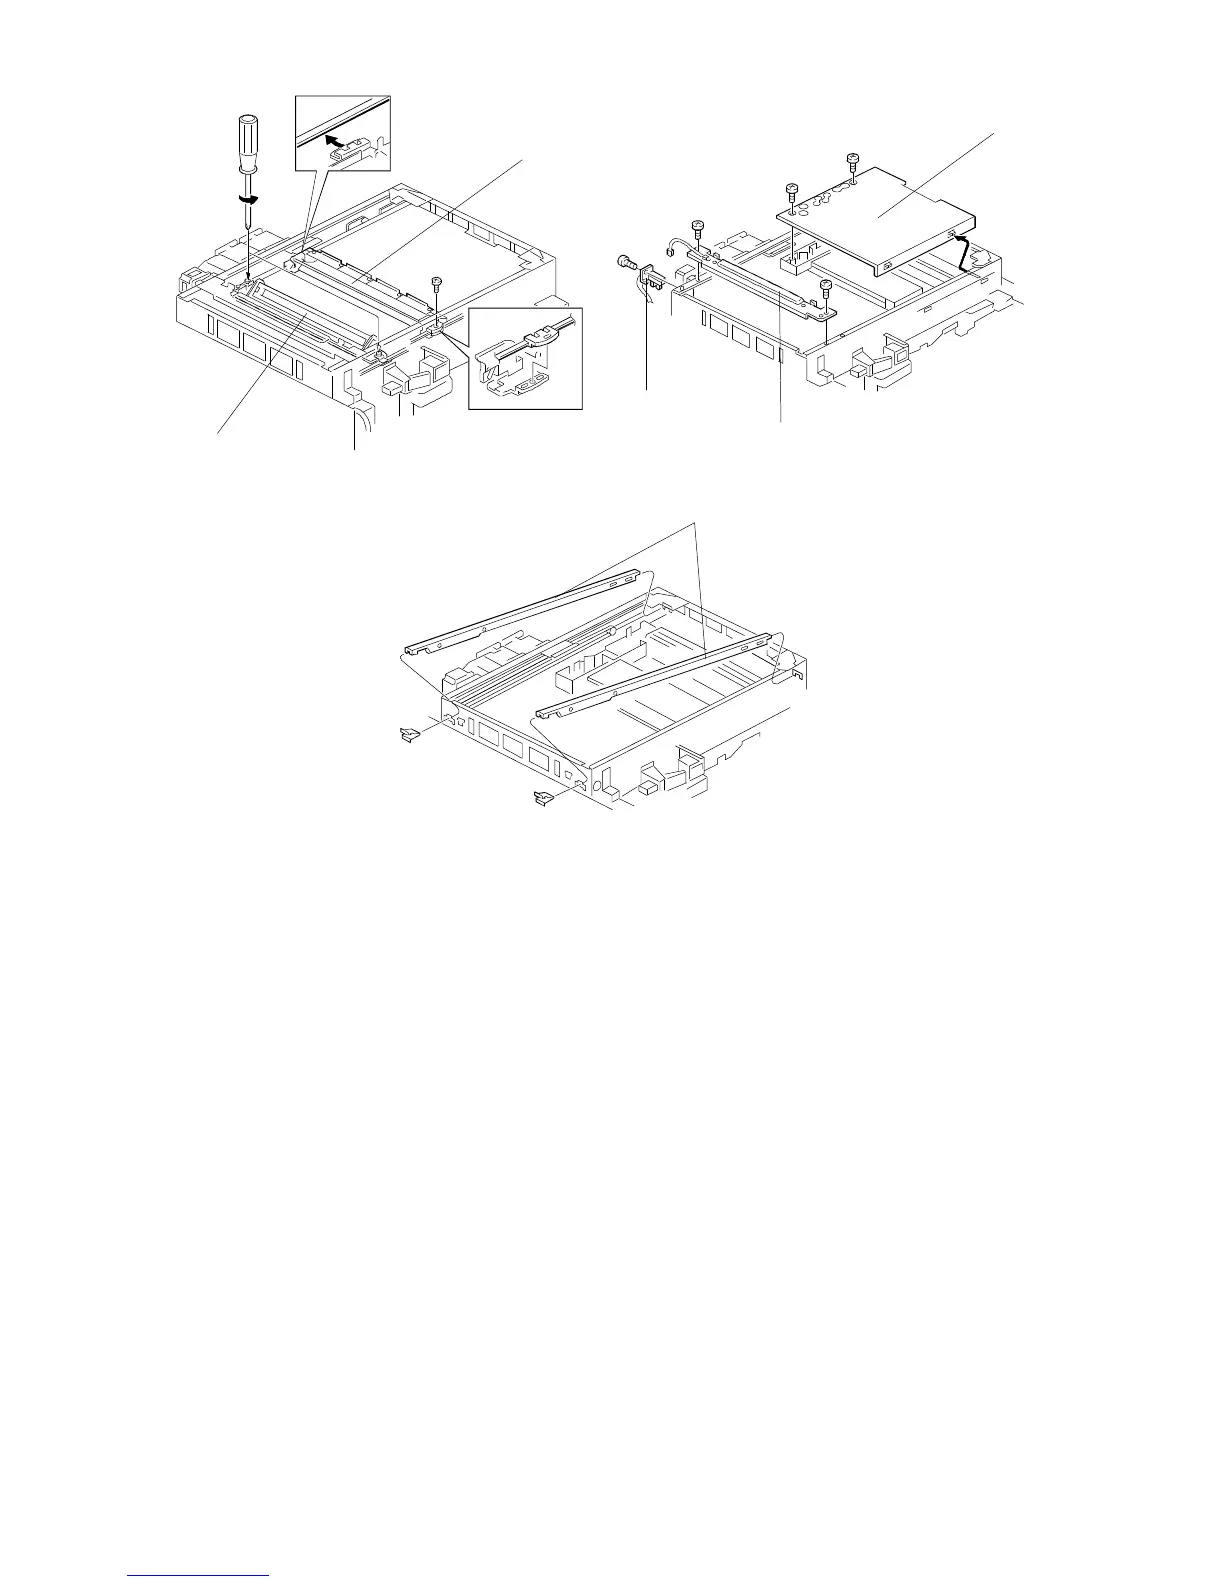
5. Remove the 1st scanner [A] from the scanner drive belt (1 screw).
6. Remove the 2nd scanner [B] from the scanner drive belt by loosening the 2
screws as shown.
7. Remove the left scale bracket [C] with the optics thermistor (2 screws and 1
connector).
8. Remove the scanner home position sensor bracket [D] (1 screw and
1 connector).
9. Remove the lens housing cover [E] (2 screws).
10. Remove both scanner guide rails [F] (1 spring plate each).
[A]
[D]
[C]
[E]
[F]
FSM 5-7 FT5535/4527/4522
 Loading...