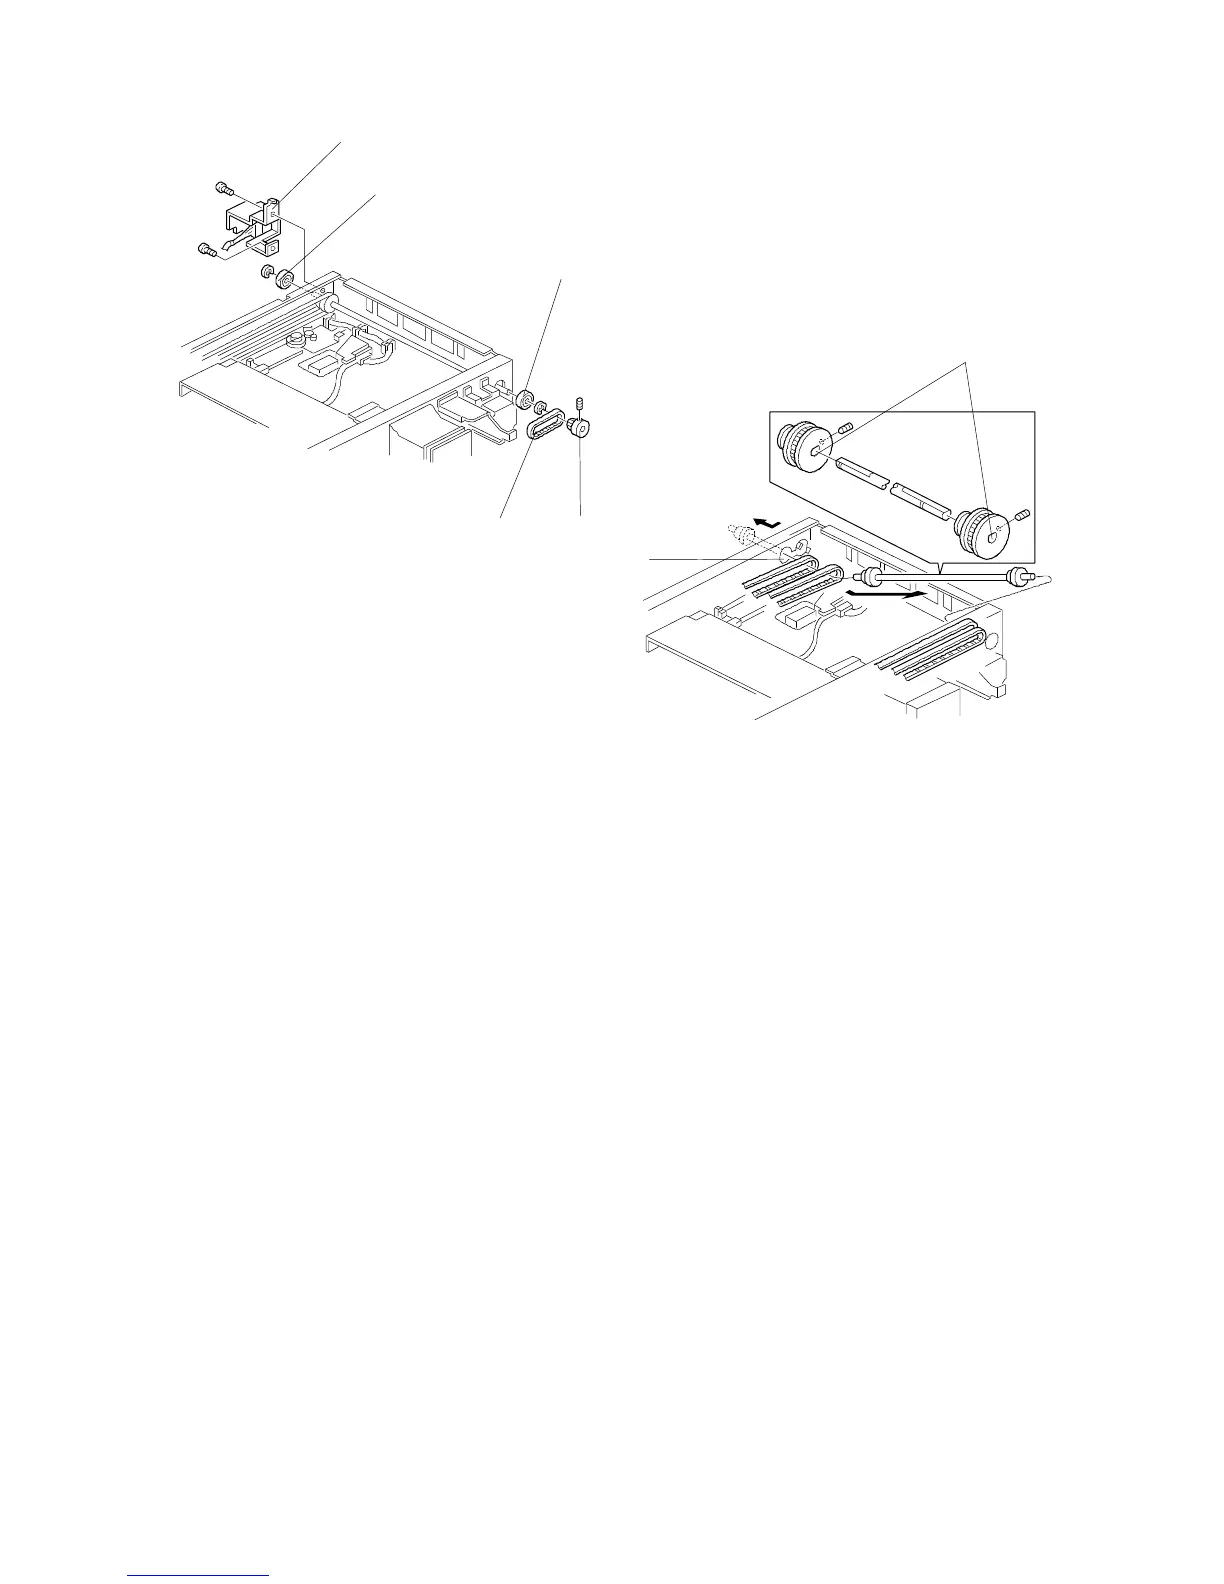
11. Remove the scanner motor belt [A] by
removing the pulley [B] (1 Allen screw).
12. Remove both bearings [C] (1 E-ring each).
13. Remove the left cover and swing the main switch bracket [D] out of the way.
14. Slide the front pulley to the cutout [E] of the front frame and remove all four
scanner drive belts.
NOTE: When reinstalling, make sure of the following points:
•
If the pulleys [F] have been removed, make sure that they face the
same direction as shown when you put them back.
•
The belt tension bracket should be tightened after all the belt tension
springs have been installed.
•
Adjust the position of the 1st and 2nd scanner by using the positioning
bracket kit. (See Scanner Positioning Adjustment.)
[D]
[C]
[C]
[A]
[B]
[E]
[F]
FT5535/4527/4522 5-8 FSM
 Loading...