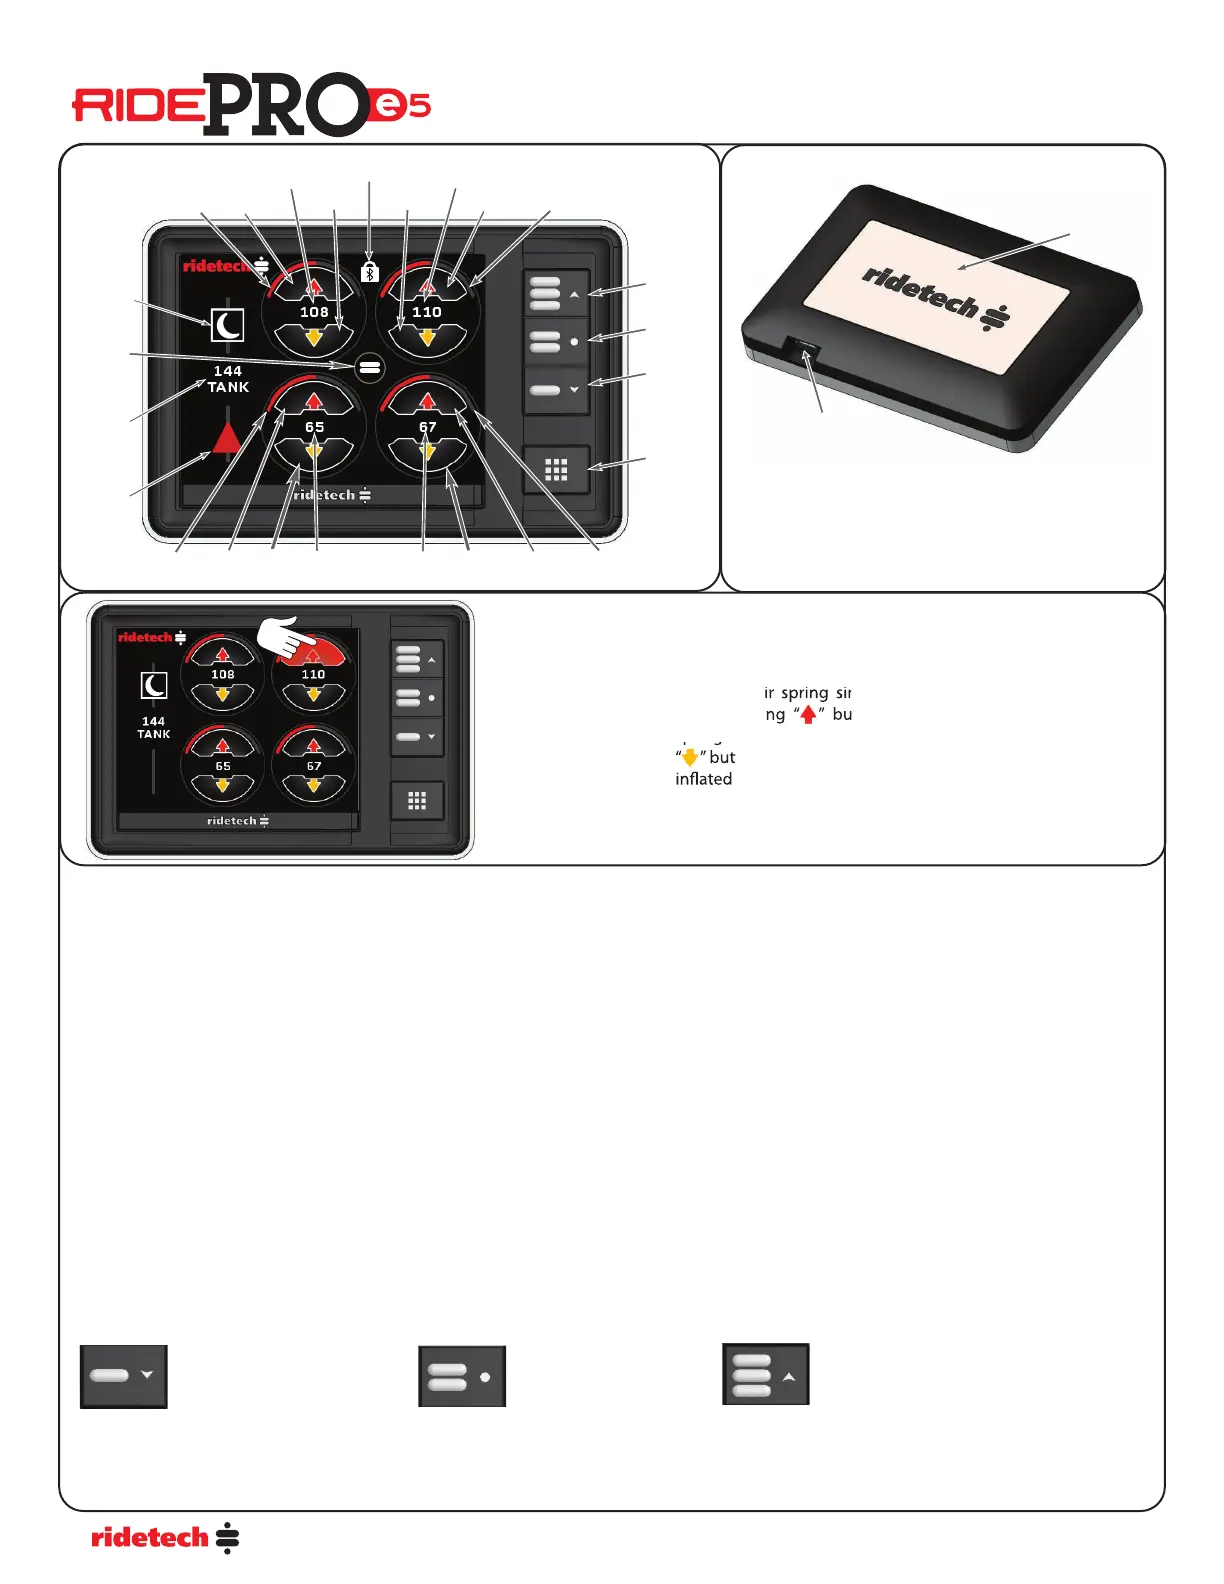
4
Back Plate
Display
Cable Port
INFLATE & DEFLATE BUTTONS
You have full manual control at any time. To
in ate an air spring simply press and hold the
corresponding “ ” button. To de ate an air
spring simply press and hold the corresponding
“ ” button. The corresponding air spring will be
in ated OR de ated until the button is released.
Control Panel Features
MAIN CONTROL SCREEN
The Main Control Screen displays information about the pneumatic suspension system including:
-individual pressure for each corner of the vehicle
-tank pressure
-preset indication
-bar graph for each corner. If the system is running in pressure only, the bar graph re ects the air pressure. If the system is equipped with optional
ride height sensors, the bar graphs re ect the ride height sensor position.
The Main Control screen also allows adjustment of the following:
-manual control of individual corner air pressure/vehicle height
-preset selection
-system parameters and additional information via the Menu system
MANUAL CONTROL
The user has full manual control of in ating and de ating the system at all times.
Press a Red up arrow button to in ate the corresponding corner.
Press a Yellow down arrow button to de ate the corresponding corner.
Multiple buttons can be pressed simultaneously on the Display or Mobile APP.
In ate and de ate buttons can be pressed simultaneously.
PRESETS
There are three user con gurable Presets. The Presets can be saved to whatever vehicle height you wish. Typically Preset 1 is de ated vehicle
height, Preset 2 is Ride Height, and Preset 3 is High Height.
= De ated Setting = Ride Height = In ated Setting
Presets are disabled until Calibration has been successfully completed.
After Calibration, presets can be saved by manually in ating or de ating the vehicle to the desired height, then pressing and holding a preset
button for 5 seconds. A dialog screen will be displayed stating which preset has been saved.
Preset #1
Preset #2
Preset #3
Tank
Pressure
Menu
Button
Left Rear
Inate
Left Rear
Deate
Left Rear
Bar Graph
Left Rear
Air Pressure
Right Rear
Air Pressure
Right Rear
Deate
Right Rear
Inate
Right Rear
Bar Graph
Left Front
Inate
Left Front
Deate
Left Front
Bar Graph
Left Front
Air Pressure
Right Front
Deate
Right Front
Inate
Right Front
Bar Graph
Right Front
Air Pressure
Display
Brightness
Mode
Display
Lock
Preset
Position
Icon
!
Error
Indicator
The rear back plate of the display can be used with a
magnetic dash mount.