EasyManua.ls Logo

RIDGID MS1290LZA User Manual

RIDGID MS1290LZA
40 pages
To Next Page IconTo Next Page
Page #1 background imageLoading...
Page #1 background image
OPERATOR’S MANUAL
12 in. SLIDING COMPOUND MITER
SAW WITH LASER
Double Insulated
MS1290LZA
Your miter saw has been engineered and manufactured to our high standard for dependability, ease of operation, and
operator safety. When properly cared for, it will give you years of rugged, trouble-free performance.
WARNING:
To reduce the risk of injury, the user must read and understand the operator’s manual before using this product.
Thank you for buying a RIDGID® product.
SAVE THIS MANUAL FOR FUTURE REFERENCE
®
Question and Answer IconNeed help?

Do you have a question about the RIDGID MS1290LZA and is the answer not in the manual?

RIDGID MS1290LZA Specifications

General IconGeneral
TypeSliding Compound Miter Saw
Blade Diameter12 inches
Amperage15 amps
No Load Speed4, 000 RPM
Laser GuideYes
Weight65 lbs
Voltage120V
Arbor Size1 inch
Max Cut Depth at 90 Degrees4 inches
Power SourceCorded Electric

Summary

Introduction to the Miter Saw

General Safety Rules

Specific Safety Rules

Understanding Safety Symbols

Service and Repair Information

Electrical Information

Double Insulation

Explains the safety concept of double insulation in electric power tools.

Extension Cord Guidelines

Provides guidance on selecting and using extension cords for power tools.

Glossary of Terms

Product Features Overview

Product Specifications

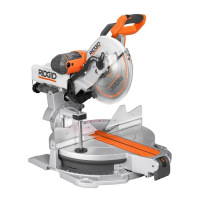
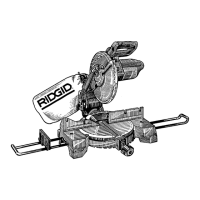
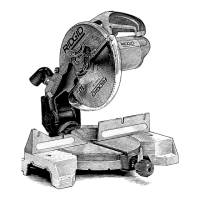
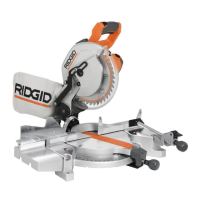
Lists key specifications such as blade diameter, motor, and capacity.

Saw Components and Controls

Saw Operation Features

Details features like the electric brake, depth guide, and laser guide for operation.

Miter and Slide Adjustments

Safety and Repetitive Cut Features

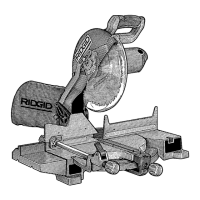
Covers the lower blade guard, spindle lock, switch trigger, and Repeat-A-Cut.

Tools Needed for Adjustments

Included Loose Parts

Assembly Instructions

Unpacking the Miter Saw

Provides instructions for safely removing the saw from its packaging.

Mounting Surface Requirements

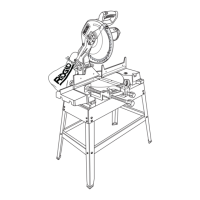
Details how to securely mount the saw to a workbench or stand.

Locking and Unlocking the Saw Arm

Using the Depth Guide for Cuts

Describes how to use the depth guide to control cut depth for dadoes.

Installing the Dust Bag

Installing the Work Clamp

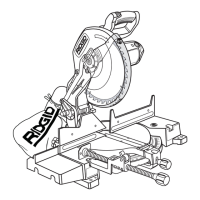
Details the process of installing the work clamp for workpiece security.

Installing and Replacing the Blade

Aligning the Laser Guide Line

Zero Clearance Throat Plate

Centering Blade Between Slide Bars

Explains how to center the saw blade within the slide bars for proper operation.

Adjusting the Miter Lock Lever

Squaring Blade to Fence

Procedure for ensuring the saw blade is square to the fence.

Fence Alignment Adjustment

Adjusting the Bevel Lock Lever

Adjusting the Bevel Pivot

How to adjust the bevel pivot for smooth and precise movement.

Travel Pivot Adjustment

Describes how the saw arm should rise freely and when to seek service.

Squaring Blade to Miter Table

Operation Guide

Permitted Cutting Applications

Lists the types of materials and cuts the tool is designed for.

General Operation Safety

Crucial safety warnings before starting any cutting operation.

Performing Slide Cuts

Non-Sliding Cuts

Miter and Cross Cuts

Detailed procedure for making miter and cross cuts.

Performing Bevel Cuts

Performing Compound Miter Cuts

Supporting Long Workpieces

Clamping Wide Workpieces

Instructions for securely clamping wide workpieces, like 2x12 boards.

Rough Cutting a Dado

Using an Auxiliary Fence

Instructions for attaching and using an auxiliary fence for specific cuts.

Compound Miter Angle Settings

Cutting Crown Molding

Laying Molding Flat on Miter Table

Method for positioning crown molding flat on the miter table for accurate cuts.

Making a Crown Molding Support Jig

Using a Crown Molding Support Jig

How to use the support jig for cutting crown molding, including angle settings.

Cutting Warped Material

Adjustments and Calibration

Covers procedures for adjustments and calibration of the saw.

Adjusting the Laser Guide

Maintenance and Care

General Maintenance Procedures

Advice on cleaning plastic parts and avoiding damaging solvents.

Lubrication Requirements

Information on which parts require lubrication and how often.

Brush Replacement

Instructions for checking and replacing motor brushes.

Motor Belt Tension Check and Adjustment

Changing Laser Batteries

Steps for replacing the button cell batteries for the laser guide.

Available Accessories

Warranty Information

3 Year Limited Service Warranty

Details the 3-year limited service warranty coverage for the tool.

90-Day Satisfaction Guarantee

Explains the 90-day satisfaction guarantee policy for the tool.

How to Obtain Service

Provides instructions on how to get service or repairs for the tool.

What is Not Covered

Lists items and conditions not covered by the product warranty.

Customer Service Information

Related product manuals