Do you have a question about the RIDGID MS1050 and is the answer not in the manual?
Explains the meaning of danger, warning, and caution labels for safe operation and hazard identification.
Details necessary checks, assembly completion, and understanding of the tool before operating the miter saw.
Provides guidelines for safely moving, lifting, and positioning the miter saw to prevent injury and damage.
Outlines critical measures to prevent workpiece jams, slips, or thrown pieces during cutting operations.
Lists critical inspections and checks to perform before each use of the saw, including guards and parts.
Provides specific actions to mitigate risks from jams, slips, or thrown workpiece pieces, including blade and clamp checks.
Emphasizes planning cuts, understanding limitations, and protecting personal safety zones from saw hazards.
Instructions on checking the workpiece for foreign objects and planning cuts to avoid thrown pieces and hazards.
Guidelines on appropriate clothing, footwear, and hearing protection for safe operation to prevent entanglement.
Rules against freehand cutting, emphasizing workpiece bracing against the fence and proper support.
Advisories on operating the saw safely while it is running, including noise and unattended operation.
Procedures for safely shutting down and securing the miter saw before leaving it unattended.
Overview of fundamental safe operating procedures for the miter saw, including blade brake use.
Details on voltage, amperage, phase, RPM, and brake type for the saw's motor.
Safety warnings and instructions regarding electrical connections, servicing, and usage environment.
Information on double insulation, polarized plug, and voltage compatibility for the tool.
Guidance on preventing motor damage, including ventilation, circuit protection, and troubleshooting motor issues.
Lists the tools required for assembly and alignment of the miter saw.
Instructions on how to safely remove the miter saw from its packaging and initial inspection.
Inventory of included parts with descriptions and quantities, and instructions for missing items.
Step-by-step instructions for safely removing and installing the saw blade, including arbor screw tightening.
Procedure for attaching workpiece support extensions and the adjustable stop block to the saw.
Instructions for connecting the dust collection components, including the dust elbow and bag.
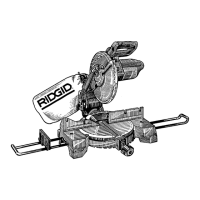
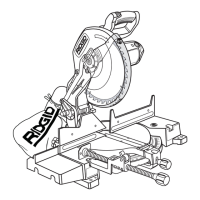
Identifies key controls like trigger switch, lock-off button, safety labels, guards, and stop shaft.
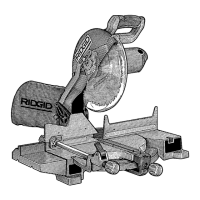
Details miter and bevel lock knobs, index pins, and stops for setting cutting angles accurately.
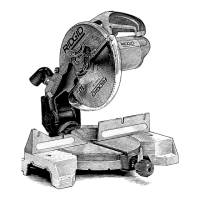
Describes essential parts like carry handle, wrench, fence, extensions, stop block, and base for operation.
Procedure to check and adjust the blade's squareness to the fence for accurate miter cuts.
Instructions on how to reposition and tighten the miter scale indicator for correct angle readings.
Procedure for checking and adjusting the 0° and 45° bevel stops for accurate bevel angle settings.
Instructions for adjusting the pivot mechanism to ensure smooth and precise bevel movements.
Steps to install the throat plate into the saw base using provided screws.
Procedure to cut a kerf into the throat plate at 0° and 45° bevel for proper blade clearance.
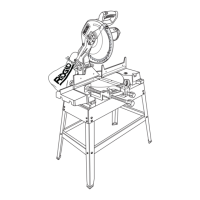
Guidance on mounting the saw to a plywood base for portability, using screws or bolts.
Instructions for securely mounting the saw to a workbench, considering workpiece clearances.
Ensures the saw is assembled, mounted, and that the operator understands controls before first use.
Critical pre-operation checks including inspection of parts, guards, and electrical connections.
Measures to prevent workpiece jams, slips, or thrown pieces, including accessory use and alignment.
Emphasizes planning work, using the right tool, and understanding potential hazards for personal safety.
Checking workpiece for foreign objects and planning cuts to avoid binding, pinching, or workpiece ejection.
Guidelines on wearing safety goggles, appropriate clothing, footwear, and hair restraints to prevent injury.
Prohibits freehand cutting; stresses solid workpiece bracing against fence and table for stability.
Safety advice for operating the saw, including avoiding familiarity-induced mistakes and keeping bystanders clear.
Procedures for safely stopping and securing the saw before leaving it unattended, including unplugging.
Guidance on safe cutting practices, including hand position, dry runs, and not forcing the tool.
Instructions on setting the miter angle using the lock knob and index spring for performing miter cuts.
Procedure for setting the bevel angle using the lock knob and tilting the power head for bevel cuts.
Method for adjusting bevel angles slightly beyond standard stops by pulling the index pin.
Guidance on setting both bevel and miter angles simultaneously for compound cuts.
Instructions for properly positioning and cutting bowed workpieces to prevent blade pinching or ejection.
Methods for supporting long or large workpieces using table extensions and ensuring proper lay flat.
Instructions for attaching and using an auxiliary fence for supporting workpieces and creating blade slots.
Guidance on using stop blocks and extension bars for precise length cuts and performing dry runs.
Explanation of compound miter cuts for frames/boxes and the relationship between miter and bevel settings.
Advice on using the miter saw for cutting moldings precisely, especially for achieving perfect fits.
Methods for accurately cutting crown molding, including flat on table and angled to fence techniques.
Procedure for cutting crown molding with the saw positioned flat on the table without bevel adjustments.
Warnings and instructions for safely using carbide tipped blades, including handling and inspection.
General maintenance advice, including cleaning and avoiding lubricants on spinning blades.
Instructions for inspecting and replacing worn carbon brushes to maintain motor performance.
Guidance on lubricating pivot points and mechanisms for smooth operation, avoiding excess oil.
List of recommended accessories like clamp kits and legsets, with SKU numbers.
Information on accessories and cutting tools that are prohibited for use with this saw.
Troubleshooting for motor-related issues like brake failure, non-starting, and brush sparking.
Troubleshooting for general saw problems such as blade alignment, angle accuracy, and power-head issues.
Diagram and exploded view of the main saw assembly, identifying various components by number.
Detailed list of parts for Figure 1, including part numbers, descriptions, and key numbers.
Exploded view diagram of the motor assembly, showing its components and their arrangement.
Diagram of the pivot assembly, illustrating the components and their relationships.
Exploded view diagram of the blade guard and related components, showing assembly details.
Detailed list of parts for Figure 4, including part numbers, descriptions, and safety cautions.
Information on what is covered, coverage duration, and the process for repair or replacement.
How to obtain service, contact information, and what to do regarding questions or comments.
Details on what is not covered, limitations on damages, and how local laws affect the warranty.