10
Assembly (continued)
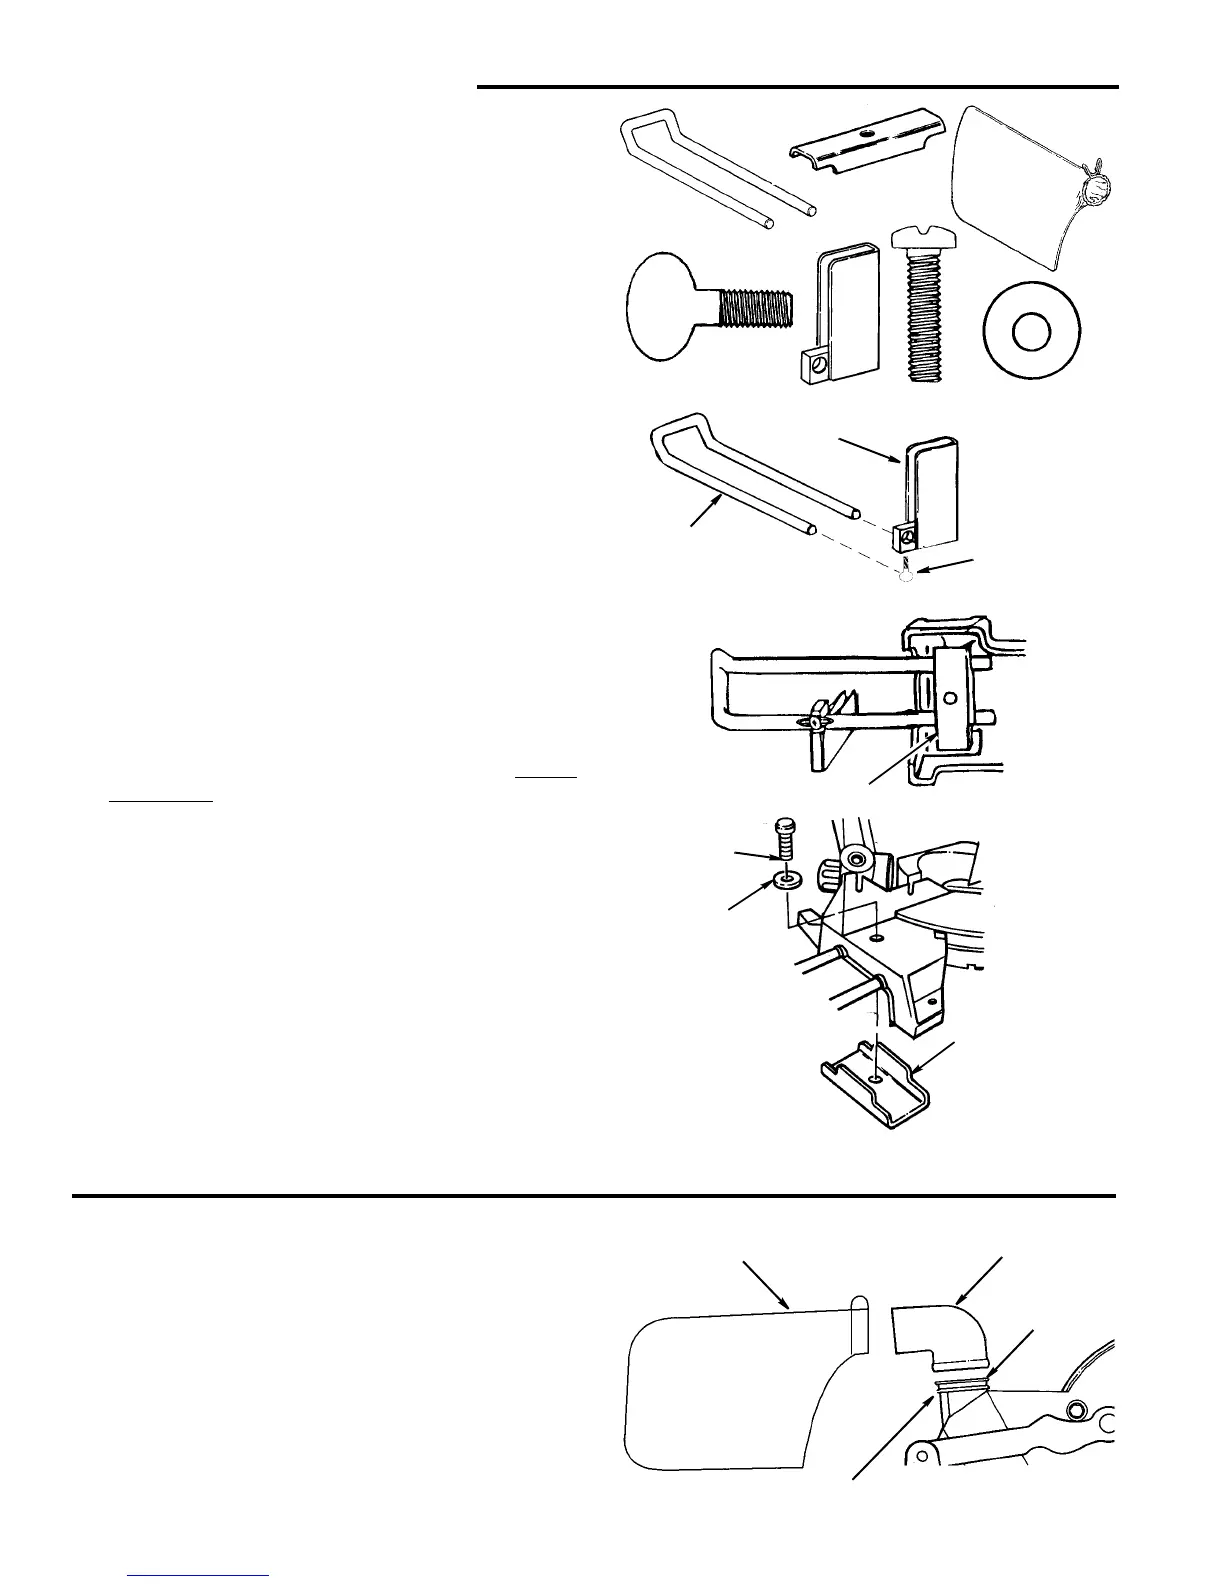
Assembling Extensions and Stop Block
Find the following parts:
Item
No. Description Qty.
A Extension Arm..........................................................2
B Clamp Bracket..........................................................2
C Dust Bag...................................................................1
D Thumb Screw 1/4 x 20 x 1/2.....................................1
E Adjustable Stop Block...............................................1
F Phillips Screw 5/16-18x1-1/4....................................2
G Washer 21/64 x 5/8 x 1/16........................................2
1. Place saw in the 0° miter position.
2. Lock the miter saw power head in the lowered posi-
tion.
3. Tilt saw back on its rear legs to expose underneath of
base. Secure saw so it does not tip or fall off bench.
4. Slide adjustable stop block over the back of side
extension arm. Thread the 1/4-20 thumb screw into
the back of stop block.
5. Find the second pair of grooves underneath miter
saw base. Place clamp bracket over extension arm.
NOTE: Each extension arm must pass completely
through both grooves in the saw base before the
clamp bracket is secured.
6. Secure extension arm in place with a 5/16-18 x 1-1/4
Phillips screw and a flat washer as shown. Do not
overtighten. Overtightening may damage the saw.
7. Repeat steps 1-8 for the other side of the miter saw,
omitting step 4 if already performed.
8. Set the saw back down.
9. Set the stop block at the desired location and tighten
thumb screw.
Assembling Dust Elbow and Dust Bag
1. Locate the dust elbow.
2. Unplug power cord.
3. With the miter arm locked in the down position, start
the dust elbow onto the dust nozzle at an angle to
retaining lip.
4. Firmly press the dust elbow the rest of the way onto
the second retaining lip.
NOTE: At first time installation, or if assembled in a cool
or cold climate, the rubber is not as flexible and will be
more difficult to assemble.
A
B
D
C
E
F
G
Stop
Block
1/4-20
Thumb Screw
Extension
Arm
Clamp Bracket
Flat
Washer
1-1/4" Phillips
Clamp
Bracket
Top View
Pull bars up into base grooves with
clamp using screw
Screw
Dust Elbow
Dust Nozzle
Second
Retaining Lip
Dust Bag
 Loading...