11
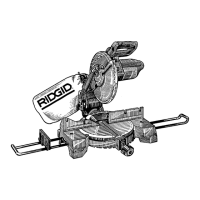
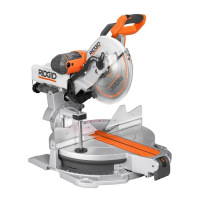
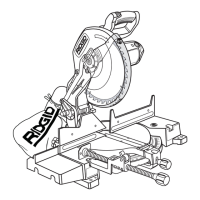
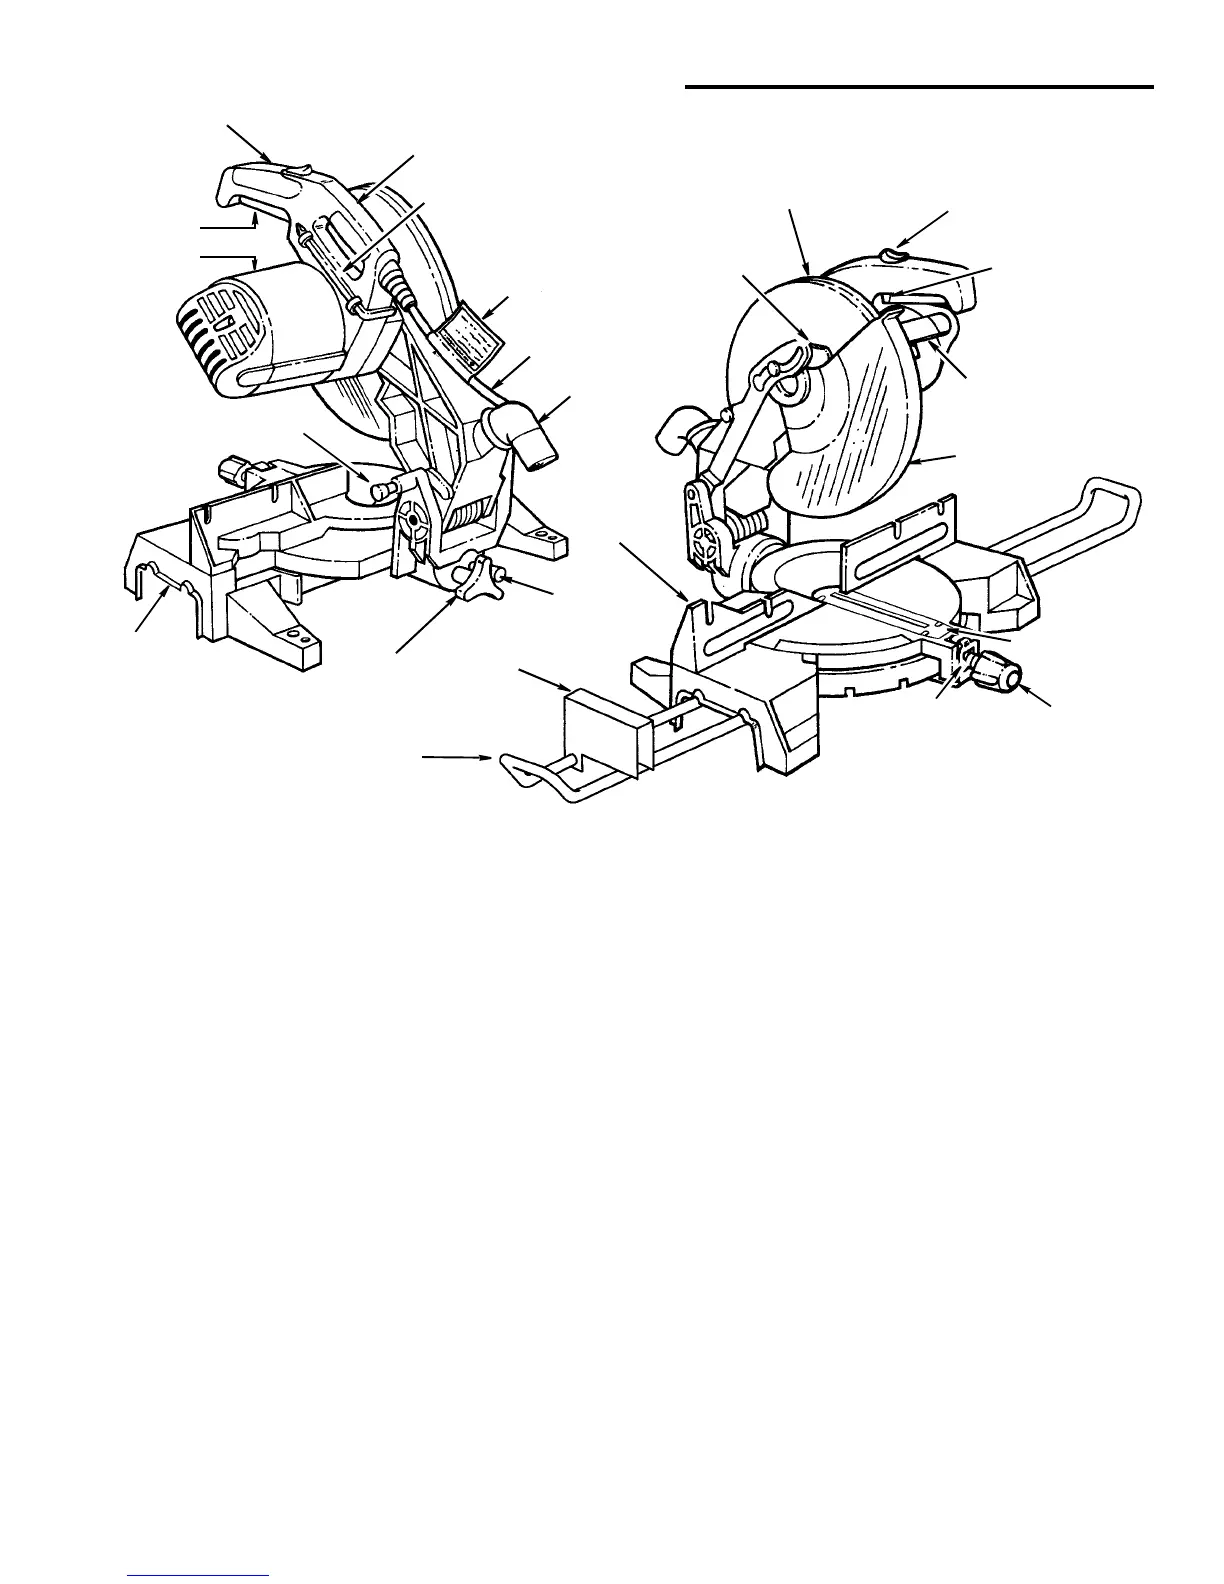
Getting to Know Your Miter Saw
1. Warning label (Also on Cord) - Do not remove label.
2. On-Off Trigger Switch - To prevent the trigger from
being accidentally engaged, a lock-off button is pro-
vided. To start the tool, push the lock-off button
downward and squeeze the trigger. Release the trig-
ger to stop the miter saw.
3. Miter Saw Switch Handle - The saw handle con-
tains the switch trigger with a lock-off button. The
blade is lowered into the workpiece by pushing down
on the handle. The saw will return to its upright posi-
tion when the handle is released.
4. Miter Saw Carry Handle - After locking the power
head in the lowered position with the stop shaft, the
saw is conveniently carried using this handle.
5. Combination Wrench - Used for 1/4” hex and phil-
lips head screw adjustments. Storage is provided as
shown.
6. Cover Plate Stop Screw - When this screw is loos-
ened, the cover plate can be rotated to the rear,
allowing for blade removal/replacement.
7. Padlock Hole - A hole in the switch trigger and han-
dle has been provided so that a padlock (not sup-
plied) can be attached to prevent unauthorized use.
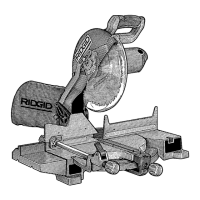
8. Arbor Lock - Allows the user to keep the blade from
rotating while tightening or loosening the arbor screw
during blade replacement or removal.
9. Lower Blade Guard - The blade guard helps protect
your hands from the blade in the raised position. To
avoid binding on the workpiece, it retracts as the
blade is lowered.
10. Throat Plate - Supports workpieces during cutting.
11. Miter Lock Knob - The miter lock knob securely locks
the miter saw at a desired miter angle. Index points
have been provided at 0, 15°, 22.5° R/L, crown mold-
ing (CM) and 45° R/L.
12. Miter Index Spring - Loosen Miter Lock Knob and
depress the index spring to move out of 0, 15°, 22.5°,
crown molding (CM) and 45° indexes.
13. Extensions - Supports long stock during cut.
14. Stop Block - Provide a quick adjustment stop for
repeated cut off work.
15. Fence - Supports workpiece. The Repeat-A-Cut sur-
face allows pencil marks to be made and easily
erased.
16. Bevel Index Pin - This pin allows for quick 0° and 45°
bevel settings. The pin may also be pulled out far
enough to override the stops.
17. Bevel Lock Knob - The bevel lock knob locks the
miter saw at a desired bevel angle.
18. Base - Supports table, holds accessories and allows
for workbench or legset mounting.
19. Stop Shaft -Themitersawcanbelockedinthelow-
ered position for compact storage. To release miter saw,
push down lightly on handle and pull stop shaft out.
3 Miter Saw
Switch Handle
1 Warning
2 Trigger
4 Miter Saw
Carry Handle
5 Combination
Wrench
Power Cord
Dust Elbow
Upper Blade
Guard
Lock-Off
Button
15 Fence with
9 Lower Blade
Guard
6 Cover Plate
Stop Screw
Base
19 Stop Shaft
18
8 Arbor
Lock
11 Miter
Lock Knob
1 Warning Label
Repeat-A-Cut
16 Bevel
Label
Switch
Index Pin
14 Stop
Block
13 Extension
7 Padlock
Hole
12 Miter
Index Spring
17 Bevel
Lock Knob
10 Throat Plate
 Loading...