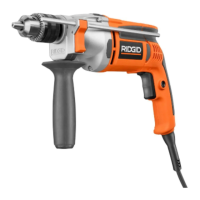
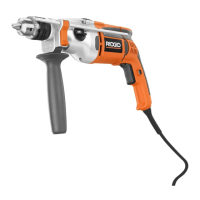
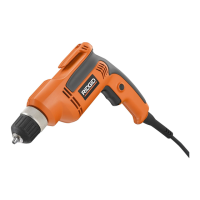
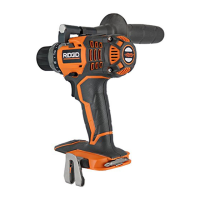
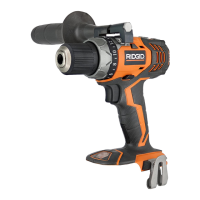
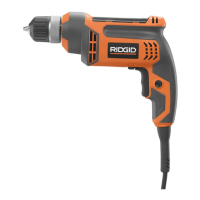
This document is an operator's manual for a RIDGID 1/2 inch Hammer Drill, model R5013, which is double insulated.
The hammer drill is designed for various drilling tasks, including hammer drilling in concrete, brick, or other masonry, as well as drilling in wood, ceramics, plastics, fiberglass, laminates, and metals. It can also be used for mixing paint.
Technical Specifications:
- Chuck Capacity: 1/2 inch
- Input: 120 V, 60 Hz, AC only, 7.5 A
- Switch: Variable Speed
- Hammer Speed: 0-51,000 BPM (Blows Per Minute)
- No Load Speed: 0-2,700 r/min. (RPM)
- Net Weight: 5 lbs.
Usage Features:
- Variable Speed Switch Trigger: Delivers higher speed with increased trigger pressure and lower speed with decreased trigger pressure. The manual notes that a whistling or ringing noise from the switch during use is normal.
- Direction of Rotation Selector (Forward/Reverse): Located above the switch trigger, it allows changing the direction of bit rotation. For forward drilling, it should be positioned to the left of the switch trigger. For reverse drilling, it should be to the right. A caution is provided to allow the chuck to come to a complete stop before changing direction to prevent gear damage.
- Lock-On Button: Convenient for continuous drilling for extended periods. To engage, depress the switch trigger, push and hold the lock-on button, then release the switch trigger. To release, depress and release the switch trigger. Users are warned to disengage the lock-on feature immediately if the drill becomes disconnected from the power supply during use.
- Drilling/Hammer Mode Selector: A slide selector on top of the motor housing allows switching between hammer mode (for hard materials like brick, tile, concrete with carbide-tipped bits) and normal drill mode (for soft materials with twist drills, hole saws). The hammer drill is not designed for reverse hammering.
- Auxiliary Handle Assembly: The drill is equipped with an auxiliary handle for ease of operation and to prevent loss of control. It can be rotated 360° and mounted on either side for left-hand use. It is tightened by turning clockwise and loosened by turning counterclockwise.
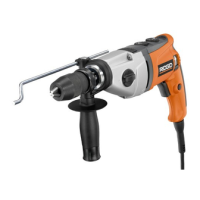
- Depth Stop Rod: Supplied to assist in controlling the depth of drilled holes. It is adjusted by depressing a button and sliding the rod. The desired hole depth is reached when the end of the rod contacts the workpiece surface. The teeth on the depth stop rod should be aligned with the teeth indicator on the depth stop clamp.
- Lighted Plug: A lighted plug with a tool icon helps easily identify live tools.
- Chuck Key and Strap: A chuck key is provided for installing or removing bits and can be stored in the chuck key holder when not in use.
The manual emphasizes reading all instructions to reduce the risk of injury, electric shock, fire, or serious injury. Key safety rules include:
- Keeping the work area clean and well lit.
- Not operating power tools in explosive atmospheres.
- Keeping children and bystanders away.
- Ensuring power tool plugs match the outlet and avoiding adapter plugs with earthed (grounded) tools.
- Avoiding body contact with earthed or grounded surfaces.
- Not exposing power tools to rain or wet conditions.
- Not abusing the cord and keeping it away from heat, oil, sharp edges, or moving parts.
- Using an extension cord suitable for outdoor use when operating outdoors.
- Staying alert, watching what you are doing, and using common sense.
- Always wearing eye protection (safety goggles or glasses with side shields, or a full face shield).
- Using safety equipment like dust masks, non-skid safety shoes, hard hats, or hearing protection as appropriate.
- Avoiding accidental starting by ensuring the switch is in the off-position before plugging in.
- Removing any adjusting key or wrench before turning the power tool on.
- Not overreaching and maintaining proper footing and balance.
- Dressing properly, keeping hair, clothing, and gloves away from moving parts.
- Using dust extraction and collection facilities if provided.
- Not forcing the power tool and using the correct tool for the application.
- Not using a power tool if the switch does not turn it on and off.
- Disconnecting the plug before making adjustments, changing accessories, or storing tools.
- Storing idle power tools out of reach of children.
- Maintaining power tools and checking for misalignment, binding, or breakage of parts.
- Keeping cutting tools sharp and clean.
- Using the power tool, accessories, and tool bits in accordance with instructions and intended use.
- Wearing ear protectors with impact drills to prevent hearing loss.
- Using auxiliary handles supplied with the tool.
- Holding power tools by insulated gripping surfaces when cutting tools may contact hidden wiring or the tool's own cord.
- Knowing the power tool and its potential hazards.
- Protecting lungs by wearing a face or dust mask if operations are dusty.
- Protecting hearing during extended periods of operation.
- Inspecting tool cords periodically and having them repaired if damaged.
- Checking damaged parts before further use.
- Ensuring extension cords are in good condition and of adequate wire gauge (AWG) for the current drawn.
- Inspecting for and removing all nails from lumber before use.
- Replacing damaged power supply cords only by the manufacturer or an authorized service center.
- Being aware of chemicals in dust created by power sanding, sawing, grinding, drilling, and other construction activities, and working in well-ventilated areas with approved safety equipment.
- Not allowing familiarity with products to cause carelessness.
- Not using attachments or accessories not recommended by the manufacturer.
- Being prepared for binding at bit breakthrough, as the drill may grab and kick, causing loss of control.
- Not letting brake fluids, gasoline, petroleum-based products, penetrating oils, etc., come into contact with plastic parts, as chemicals can damage or destroy plastic.
- Avoiding extended work on fiberglass material, wallboard, spackling compounds, or plaster, as these materials can cause accelerated wear. If such work is done, cleaning the product with compressed air is important.
Operating Instructions:
- Installing Bits: Unplug the drill, insert the chuck key and twist counterclockwise to open jaws, insert the bit straight, tighten jaws securely with the chuck key, and remove the chuck key.
- Removing Bits: Unplug the drill, loosen chuck jaws with the chuck key, remove the drill bit, and remove the chuck key.
- Drilling: Ensure the drill is in the OFF position before plugging in. Check the direction of rotation selector. Secure the material in a vise or with clamps. Hold the drill firmly, place the bit at the drilling point, depress the switch trigger, and apply enough pressure to keep the bit cutting without forcing the drill.
- Wood Drilling: Use high-speed steel bits. Select normal drilling mode. Begin at a very low speed, increasing as the bit bites. Place a block of wood behind the workpiece for through holes to prevent ragged edges.
- Metal Drilling: Use high-speed steel bits. Select normal drilling mode. Begin at a very low speed. Maintain speed and pressure to allow cutting without overheating. Use light oil on the drill bit. For large holes, start with a small bit and finish with a larger one.
- Masonry Drilling: Use carbide-tipped masonry impact bits. Slide the adjustment button to hammer mode. Apply light pressure and medium speed for brick, and additional pressure for concrete. Practice on a scrap piece for tile.
Maintenance Features:
- General Maintenance: Avoid using solvents when cleaning plastic parts. Use clean cloths to remove dirt, dust, oil, grease, etc.
- Lubrication: All bearings are lubricated with a high-grade lubricant for the life of the unit; no further lubrication is required.
- Chuck Removal: Unplug the drill. Open chuck jaws with the chuck key. Insert a 5/16 inch or larger hex key into the chuck and tighten the jaws. Tap the hex key sharply with a mallet in a clockwise direction to loosen the chuck screw (which has left-hand threads). Remove the hex key, remove the chuck screw with a screwdriver (turning clockwise). Insert the hex key into the chuck, tighten jaws, tap sharply with a mallet in a counterclockwise direction to loosen the chuck on the spindle, then unscrew by hand.
- Retightening a Loose Chuck: Unplug the drill. Open chuck jaws. Insert the hex key into the chuck and tighten jaws securely. Tap the hex key sharply with a mallet in a clockwise direction to tighten the chuck on the spindle. Open chuck jaws, remove the hex key, and tighten the chuck screw with a screwdriver.
Service and Warranty:
The product is covered by a RIDGID 3-Year Limited Service Warranty for hand-held and stationary power tools purchased on or after 2/1/04. This warranty covers defects in workmanship or materials and normal wear items (brushes, chucks, motors, switches, cords, gears, and cordless batteries). It does not cover misuse, abuse, neglect, alteration, modification, or repair by unauthorized service centers, nor consumable accessories like blades, bits, or sandpaper. Servicing requires identical replacement parts and should be performed by a qualified service technician. For service, contact an authorized RIDGID service center or call 1-866-539-1710. Proof of purchase is required for warranty service. A 90-Day Satisfaction Guarantee Policy allows for a full refund or exchange within 90 days of purchase.