24
INSTALLATION
ENGLISH
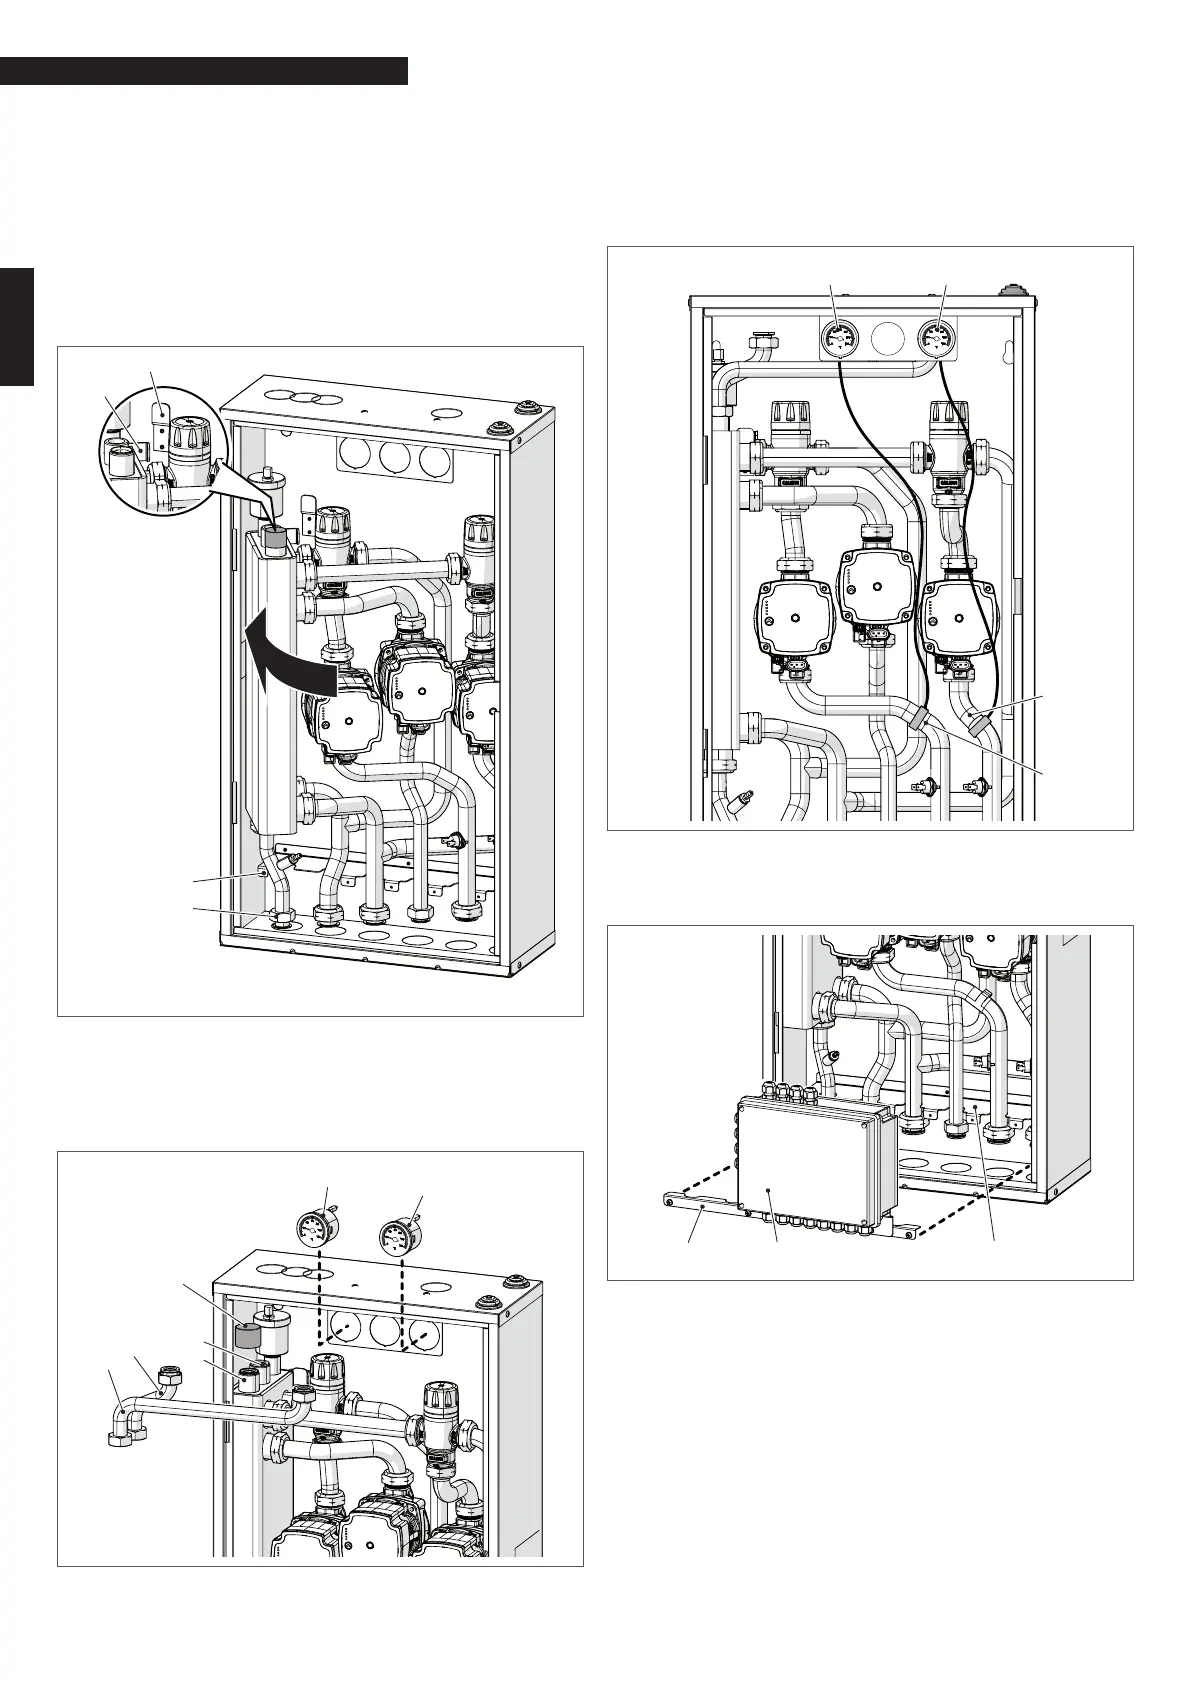
To install BAG
3
inside the box, proceed as follows:
− Insert the right side of the BAG
3
inside the box and ro-
tate the left side until the BAG
3
enters completely making
sure that the insulator covering the mixing bottle is not
damaged
− Insert the hook (2) of the mixing bottle and attach to the
hook (3) on the back of the box
− Position the system delivery and return pipes into the
seats positioned on the rack (4) making sure that the nuts
(5) are positioned below the rack itself
−
4
5
2
Remove the protective plug (1) on the mixing bottle
− Fit the pipes (6) and (7) on the couplings (6a) and (7A),
located on the mixing bottle and positioning the desig-
nated seals supplied
− Insert the thermometer/s (T1-T2) inside the seat
1
T2
6
6a
7a
− Using the designated clips, secure the thermometer bulbs
following the sequence (from left to right): thermometer
(T1) to the ramp (C1) located below the BT1 system circula-
tion unit and the thermometer (T2) to the ramp (C2) locat-
ed below the BT2 system circulation unit
−
C2
C1
T2T1
Place the bracket (8) together with the electrical connec-
tion box (9), on the rack (4) and secure it with the desig-
nated screws supplied.
9
4
9
The hydraulic module is supplied already wired to the driv-
ers of the module itself. For other connections, please refer
to the wiring diagrams in this document (see
“1.9 Wiring di-
agram” page 21
).