RIGOL Chapter 5 To Trigger the Oscilloscope
5-54 MSO8000 User Guide
press Err Type to select the error type.
➢ Sync Error: triggers when an invalid sync pulse is found.
➢ Check Error: triggers when the parity bit is incorrect for the data in the
word.
Level Selection and Adjustment of Trigger Level:
After the trigger condition setting is completed, you need to adjust the trigger level
to correctly trigger the signal and obtain a stable waveform. Press Level Select
(when "Data" is selected for the trigger condition, press More → Level Select),
then rotate the multifunction knob to select the desired level type for adjustment,
and then press down the knob to select the type. You can also press Level Select
continuously or enable the touch screen to tap the desired level type and select it.
➢ Level A: only adjusts the upper limit of the trigger level, and the lower limit of
the trigger level remains unchanged.
➢ Level B: only adjusts the lower limit of the trigger level, and the upper limit of
the trigger level remains unchanged.
➢ Level AB: adjusts the upper and lower limits of the trigger level at the same time,
and the trigger level deviation (the difference between the upper limit and lower
limit of the trigger level) remains unchanged.
Note: In MIL-STD-1553 trigger, pressing Trigger LEVEL can quickly switch the
current level adjustment type.
Rotate the Trigger LEVEL knob to adjust the corresponding trigger level.
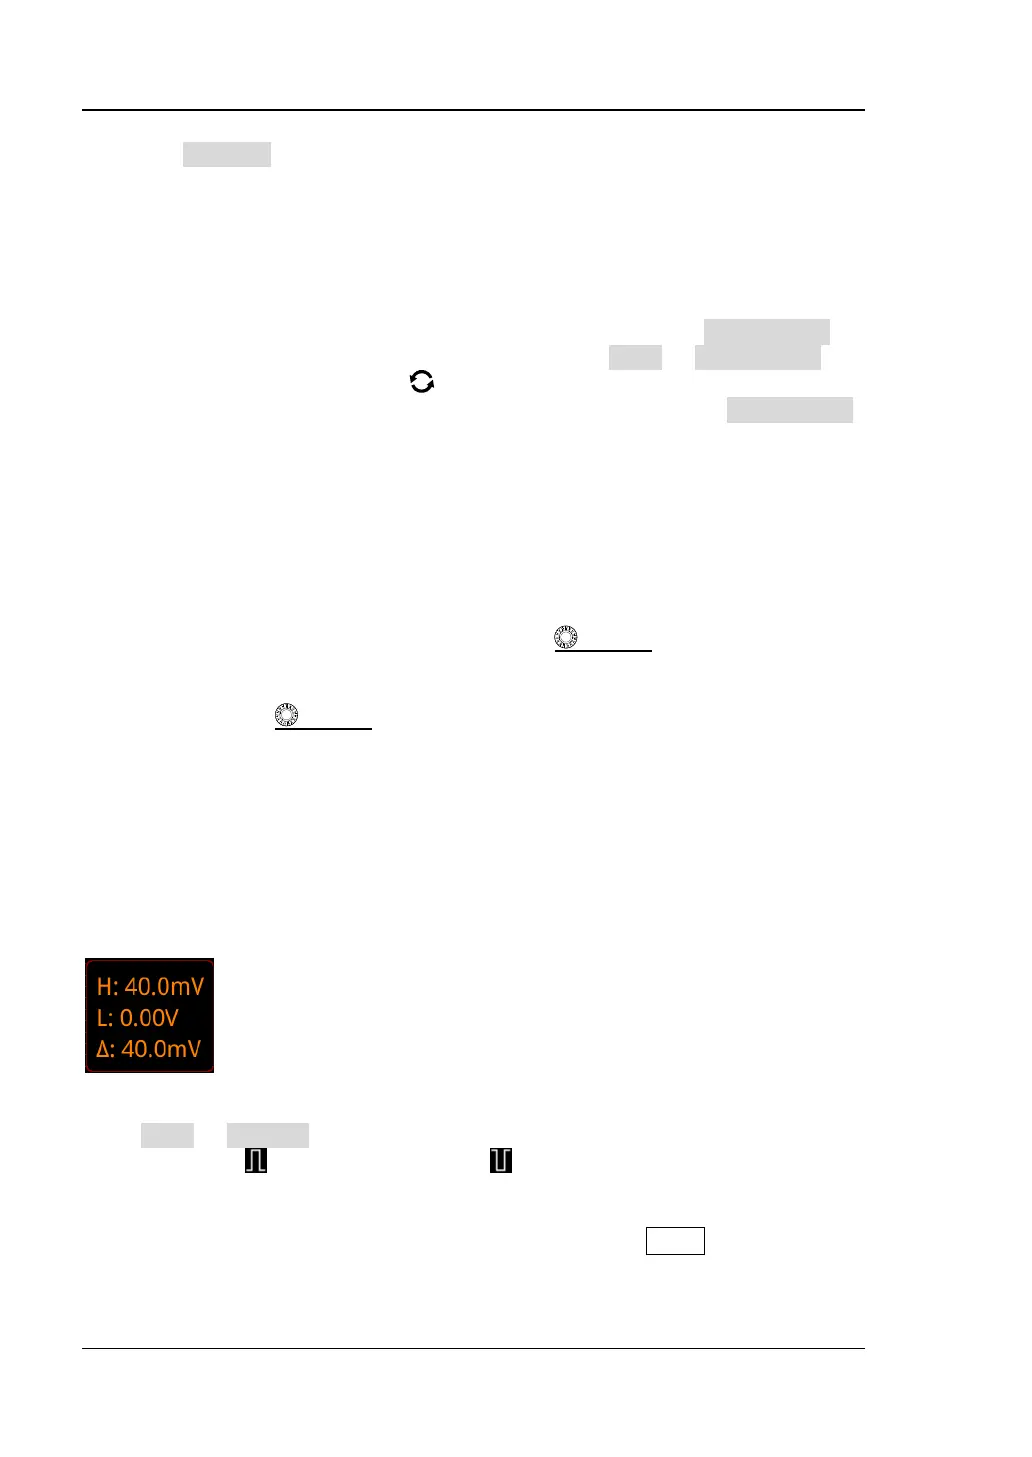
During the adjustment of trigger level, two trigger level lines appear on the screen,
and they move up and down with the change of the trigger level. At the same time,
the real-time trigger level and slope information is displayed at the lower-left corner
of the screen (as shown in the figure below, H indicates the upper limit of the trigger
level, L indicates the lower limit of the trigger level, and △ indicates the trigger level
deviation). When you stopping modifying the trigger level, the trigger level line and
the trigger level information at the lower-left corner of the screen disappear in about
2 s. The current trigger level deviation is displayed at the upper-right corner of the
screen.
Polarity:
Press More → Polarity to select the desired polarity. The polarities available are
positive polarity ( ) and negative polarity ( ).
Trigger Mode:
In the trigger control area (Trigger) on the front panel, press Mode to quickly switch
the current trigger mode. For details, refer to descriptions in "Trigger Mode".
 Loading...