Do you have a question about the ring Retrofit Alarm Kit and is the answer not in the manual?
Details essential parts like alarm box, panel, battery backup, and power supply.
Explains contact sensor zones, end-of-line resistors, and connection terminals.
Recommends wired contact sensors and notes limitations for sirens/detectors.
Emphasizes the need for a pre-existing Ring Alarm Base Station.
Details resistance requirements for zone compatibility with the Retrofit Alarm Kit.
Explains the limit of zones per Retrofit Alarm Kit.
Advises documenting setup for faster Ring Support assistance.
States the device is for residential, not commercial, use.
Lists essential and recommended tools and supplies for the installation process.
Accessing the panel, taking photos, and identifying zone labels.
Labeling wires, inspecting integrity, locating power components, and disconnecting power.
Choosing a setup location and addressing professional monitoring status.
Step-by-step guide for app integration, including QR code scanning.
Powering on the device, positioning it, and running a communication test.
Critical safety step to cut power and instructions for physically attaching the device.
Procedure to test zone integrity using a multimeter for compatibility.
Wiring zones individually, ensuring wire length, and connecting wires to terminals.
Handling zone setup test failures, mislabeling, and the main configuration steps.
Guidance on choosing placement options like 'door' or 'window' to reduce false alarms.
How to arm/disarm, test, enable/disable zones, and bypass sensors.
Verifying wiring security and inspecting sensors for damage.
Steps to remove a zone from the kit and contact customer support.
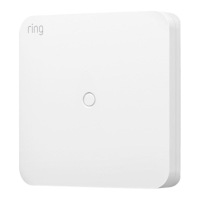
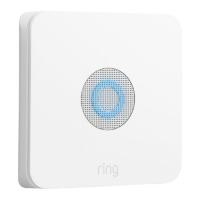
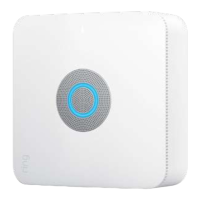
The Ring Retrofit Alarm Kit is an advanced DIY project designed to integrate existing wired contact sensor zones into a Ring Alarm system. This kit allows homeowners to upgrade their traditional wired alarm systems by connecting them to the Ring ecosystem, providing modern smart home security features without replacing all existing wired sensors. It is intended for residential use and is not suitable for large commercial security systems.
Before beginning installation, users are strongly advised to read all instructions thoroughly. The installation process is considered advanced, and consulting a professional alarm installer or licensed electrician is recommended, especially for individuals inexperienced with wiring projects, multimeters, or interpreting electrical schematics. A critical warning is issued regarding hardwired smoke, CO, or heat detectors, and other life safety devices: disconnecting power to the wired alarm panel will deactivate these devices, and users are explicitly cautioned against attempting to install the Retrofit Alarm Kit themselves if such devices are present. The manual emphasizes that working with electricity can be dangerous and proper safety precautions must be taken. Users are responsible for ensuring no existing contractual obligations with their current alarm system and for any changes or damage to it.
The manual provides a detailed overview of common wired alarm components to help users understand their existing setup. These components typically include an alarm box or cabinet, which houses the equipment; an alarm panel, the circuit board acting as the system's "brains" where all device, zone, electrical, and battery backup wires connect; a battery backup for temporary power during outages; and a transformer/power supply that plugs into a wall outlet. Other components include contact sensor zones, which are closed wired loops containing one or more sensors; end-of-line resistors, small wires with resistors that indicate the end of a zone; and terminals, connection points that secure wires with screws or clips. Wire nuts or connectors, though not shown in illustrations, are also mentioned as small plastic pieces used for safety over wire connections. The manual notes that alarm panels vary in appearance based on brand, model, and home size, but generally share these core components and functionality.
Optional wired alarm components that may be connected to a wired alarm panel include motion detectors, carbon monoxide detectors, smoke detectors, glass break sensors, indoor or outdoor sirens, and keypads. It is crucial to note that all these optional items require an external power source. The Ring Retrofit Alarm Kit specifically supports wired door and window contact sensor zones. Ring Alarm cannot activate wired indoor/outdoor sirens or wired smoke/CO detectors, and users are advised not to attempt to add these to the Retrofit Alarm Kit. Traditional wired alarm systems often group multiple door and window contact sensors into a single zone, meaning that customized settings applied to a wired zone in Ring Alarm will affect all sensors within that zone.
Several important considerations are highlighted before installation. A Ring Alarm Base Station must be set up and connected to the internet (via Wi-Fi or Ethernet, not cellular backup during installation) before adding the Retrofit Alarm Kit. Compatibility is key; users must verify the resistance on their existing zones, as the Retrofit Alarm Kit supports a maximum resistance of up to 5200 ohms, tolerating common 4.7K, 1K, or 2K end-of-line resistors. Each Retrofit Alarm Kit can wire up to 8 zones, and additional kits can be added if more zones are needed. Documenting the existing setup with photographs and notes is strongly recommended to assist Ring Support if issues arise.
The necessary tools and supplies for installation include the Ring Retrofit Alarm Kit with its included #1 Phillips head screwdriver, a screwdriver compatible with the existing alarm panel terminals, and a continuity tester or multimeter. Optional supplies include a wire stripping tool, extra 20 or 22 gauge wire, twist-on wire nuts or connectors, a cleaning cloth or alcohol for wall preparation, screws and anchors for mounting (if preferred over tape), a drill bit, masking tape and a pen for labeling wires, and a rubber grommet if wiring through a metal alarm box.
Preparation for installation involves locating the wired alarm panel, typically in a basement or closet, and familiarizing oneself with its components. Users should open the panel (keys are often nearby), take comprehensive photos of the open panel, wiring diagrams, schematics, and any other relevant information. Identifying and photographing written labels or zone descriptions is also crucial for mapping zones to specific sensors. Wires should be labeled for each zone to track them during the wiring process. A visual inspection of all wiring is necessary to check for damage, corrosion, frayed wires, or cracks, as damaged zones may not work with the Retrofit Alarm Kit. Users must also identify the transformer/power supply and backup battery, as power must be properly disconnected before wiring.
When choosing a location for the Retrofit Alarm Kit, it should be mounted on a wall near the wired alarm panel, but not inside the metal box, as this could block communication signals to the Ring Alarm. The existing wired alarm system should not be actively professionally monitored during installation; users should call their monitoring center to put the system in "Test Mode" to avoid false alarms.
The setup instructions guide users through adding the Retrofit Alarm Kit to the Ring app. This involves opening the app, navigating to "Set Up a Device," selecting "Security Devices," then "Retrofit Alarm Kit," and following the in-app prompts, including scanning a QR code located on the device's cover or an included card. After pulling the battery tab to power on the device, users configure it in the app by naming it and assigning it to a room. A communication test must be run in the app to ensure the Retrofit Alarm Kit can signal the Ring Alarm Base Station. A green light flash indicates success, while a red flash signifies failure. If the test fails, users can repeat it, add a Range Extender, or move the Base Station closer. Once the test passes, all zones will appear as "Available" or "Ready to Test" in the app.
Wiring involves disconnecting power to the alarm panel by unplugging the AC power supply (unscrewing any safety screws) and disconnecting the battery backup. If AC power cannot be unplugged, the breaker at the fuse box should be switched off. The Retrofit Alarm Kit should be mounted on the wall next to the wired alarm panel using the included double-sided tape or screws and anchors.
Testing wired zones is a critical step to ensure their integrity. All doors and windows must be closed. Users identify contact sensor zones from the alarm diagram, remove one 2-wire contact zone from the panel, and use a multimeter set to measure resistance. One exposed zone wire is wrapped around each testing probe. A successful test will show a resistance between 0 and 5200 ohms, indicating compatibility. Resistance above 5200 ohms or an "OL" (Open Loop) reading means the zone is open or has too much resistance. An "OL" reading requires checking that all doors and windows are closed and inspecting for visible damage. If the issue persists, professional repair is needed, or the zone cannot be added. If zones are mislabeled or unlabeled, trial and error with the Ring app, opening and closing doors/windows, helps identify which sensors belong to which zone.
If wires are too short, they must be lengthened using extra wire and connectors. All doors and windows in wired zones must remain closed during rewiring. Zones are wired one at a time: one wire from each 2-wire zone goes into a numbered terminal on the Retrofit Alarm Kit, and the other wire goes into a "Common" terminal (each "C" terminal can hold up to two wires). Screws in the terminals are tightened just enough to secure the wires. After wiring a zone, the Ring app should show it as "Ready to Test." If it still says "Available," opening and closing a door/window might wake it up. The Zone Setup Test is completed by opening and closing a door or window within that zone while monitoring the Ring app.
Upon successful completion of the Zone Setup Test, users configure zone settings in the Ring app by choosing a name, assigning it to a room, and setting its "Placement." For frequently used doors, "Primary Door" allows customization of Entry and Exit Delays. For zones with only windows or rarely used doors, "Window" is selected. "Secondary Door" is an option for wired contact sensors on interior doors. If a zone includes both doors and windows, choosing "door" as the placement option is recommended to reduce false alarms. These steps are repeated for all zones. Once finished, the cover is slid back onto the Retrofit Alarm Kit.
After setup, the Retrofit Alarm Kit functions similarly to Ring Contact Sensors. Users can arm and disarm their Ring Alarm as usual and adjust entry/exit delays in the app. Customized settings apply to all wired sensors within a zone. For testing the Ring Alarm, temporarily switching from professional monitoring to self-monitored mode is advised to avoid dispatching emergency services. Zones can be enabled or disabled in the Ring app. To temporarily bypass a door or window in a wired contact sensor zone, all zones on the Retrofit Alarm Kit must be bypassed, or the specific zone can be disabled in the app.
Troubleshooting tips are provided for zones that stop working. Users should check the Retrofit Alarm Kit for loose or fallen wires and reinstall them securely. A visual inspection of all wiring and wired contact sensor hardware is recommended to look for damage, especially after construction or repairs. To remove a wired zone, users navigate to the device settings in the Ring app, select the zone, and follow prompts to reset the device. After confirmation, the zone will read "Ready to Test," and the wires can be removed from the Retrofit Alarm Kit. For additional support, a dedicated support line is provided.
| Connectivity | Z-Wave |
|---|---|
| Operating Conditions | 32°F to 120°F (0°C to 49°C) |
| Mobile App | Ring App (iOS and Android) |
| Voice Control | Works with Alexa |
| Color | White |
| Compatibility | Works with Ring Alarm security system |
| Power Source | Hardwired |
| Battery Backup | Requires Ring Alarm Base Station (sold separately) |