Rinnai Tankless Water Heater Installaon and Operaon Manual 45
Isolaon valves (included with water heater) provide the ability to isolate the water heater from the structure’s
plumbing and allow quick and easy access to ush the heat exchanger. The supplied isolaon valves meet American
Naonal Standard (ANSI Z21.10.3) / Canadian Standard (CSA 4.3) and are ANSI/NSF 61 approved for potable water.
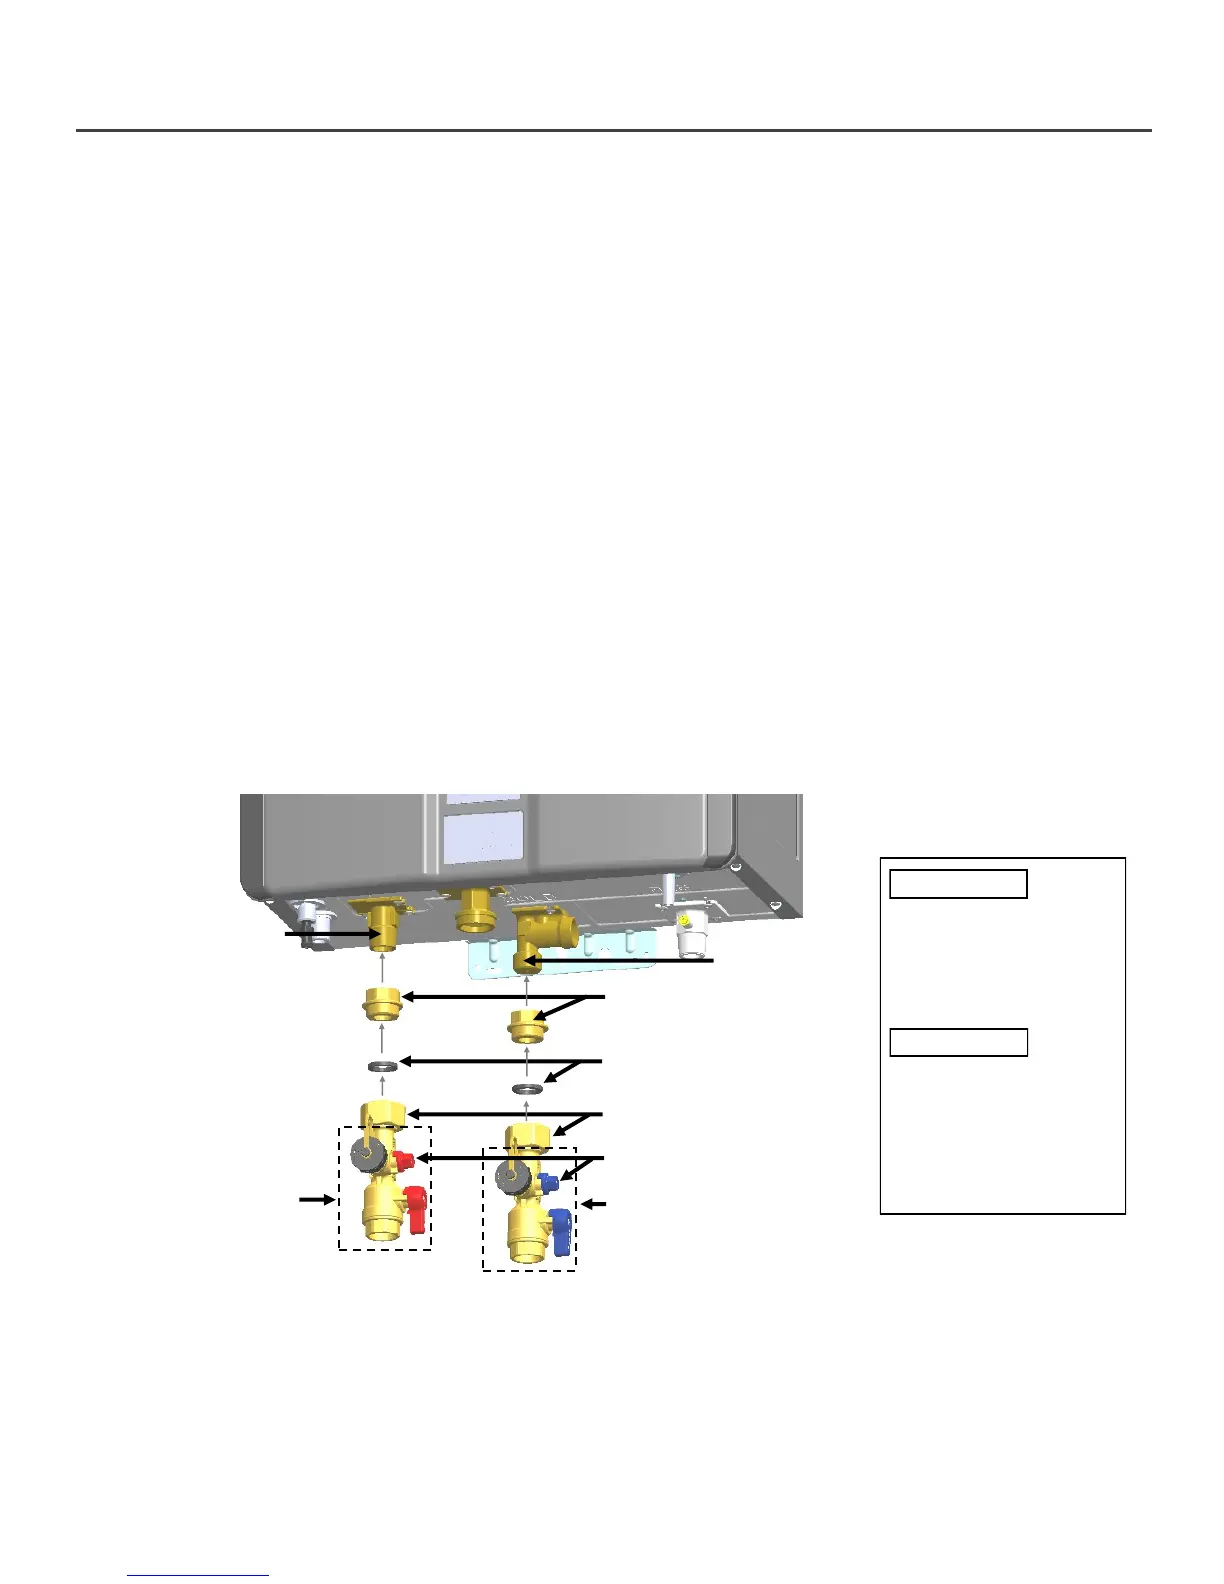
To install isolaon valves:
1. Apply thread sealant to the exposed threads of the Cold Inlet and Hot Outlet of the water heater.
2. Hand ghten the Union Fing to the Cold Inlet and Hot Outlet of the water heater.
3. With a wrench, ghten the Union Fings. Do not ght more than 2 turns past hand ght.
4. Posion the Hot Isolaon Valve (Red) and Gasket below the Union Fing on the Hot Outlet side of the water
heater.
5. Hand ghten the Union Nut of the Hot Isolaon Valve (Red) to the Union Fing.
6. Rotate the Drain Valve to an accessible posion. With a wrench, ghten the Union Nut to the Union Fing.
7. Repeat steps 4 - 6 for the Cold Isolaon Valve (Blue).
8. Connect the Cold Isolaon Valve (Blue) to the Cold Water Supply Line.
9. Connect the Hot Isolaon Valve (Red) to the Hot Water Supply Line.
10. Ensure that both Drain Valves are in the closed posion before turning on water supply.
DO NOT use pipe dope
or thread sealant on
union ng with
gasket.
NOTICE:
NOTICE:
When unscrewing the
union ng, be careful
not to lose the gasket.
3.7 Install the Isolaon Valves
Hot Outlet
Hot Isolaon Valve
(Red)
Cold Isolaon Valve
(Blue)
Cold Inlet
Union Fing
Gasket
Union Nut
Drain Valve
3.7 Install the Isolaon Valves