DO NOTPL[DQ\VXEVWDQFHRWKHUWKDQWKHVSHFL¿HGUHIULJHUDQW5LQWRUHIULJHUDQWV\VWHP
When refrigerant gas leaks occur, ventilate the room immediately.
R32, as well as other refrigerants, should always be recovered and never be released directly into
the environment.
8VHDYDFXXPSXPSIRU5H[FOXVLYHO\8VLQJWKHVDPHYDFXXPSXPSIRUGLႇHUHQWUHIULJHUDQWV
may damage the vacuum pump or the unit.
It is necessary to purge air and check for gas leakage after piping work is completed.
If using additional refrigerant, perform air purging from the refrigerant pipes and indoor unit
using a vacuum pump, then charge additional refrigerant.
Use a hex socket (3/16") to operate the service valves.
$OOUHIULJHUDQWSLSHMRLQWVWREHWLJKWHQHGZLWKDWRUTXHZUHQFKDWWKHVSHFL¿HGWRUTXH
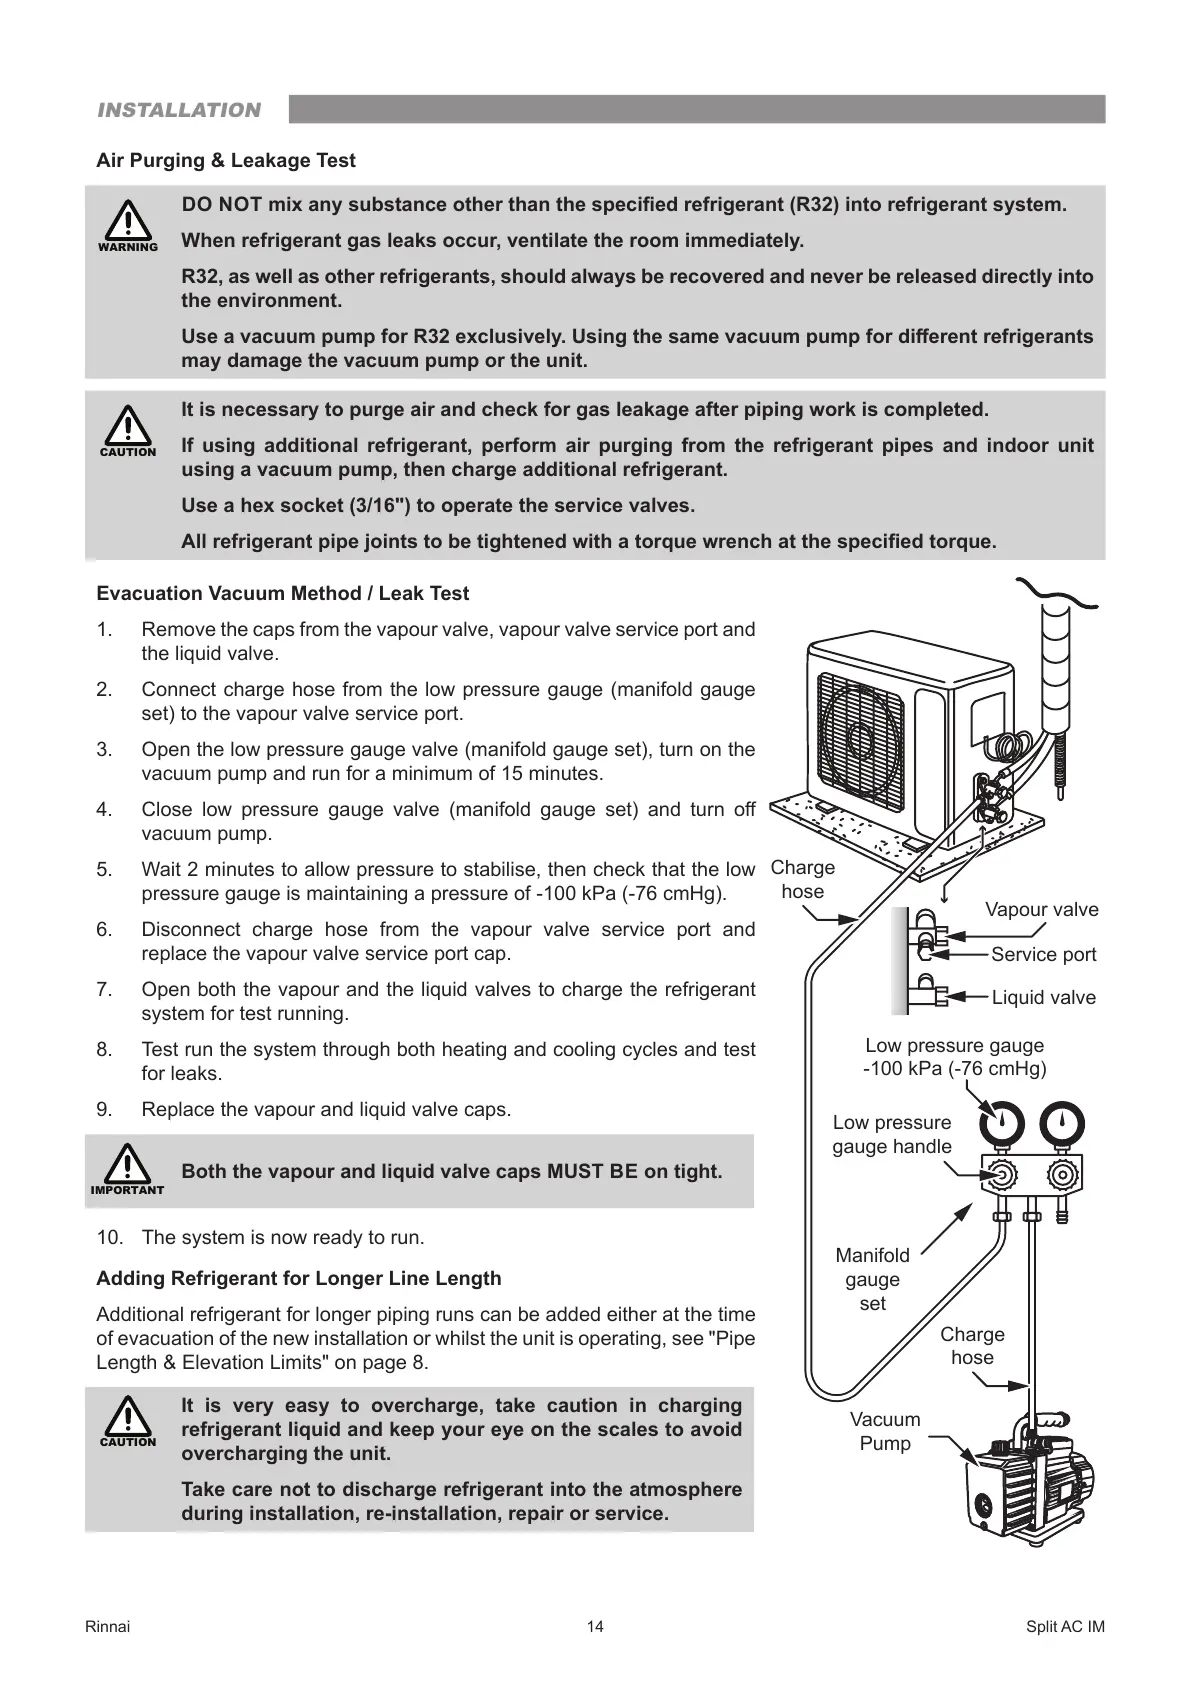
Evacuation Vacuum Method / Leak Test
1. Remove the caps from the vapour valve, vapour valve service port and
WKHOLTXLGYDOYH
2. Connect charge hose from the low pressure gauge (manifold gauge
set) to the vapour valve service port.
3. Open the low pressure gauge valve (manifold gauge set), turn on the
vacuum pump and run for a minimum of 15 minutes.
4. &ORVH ORZ SUHVVXUH JDXJH YDOYH PDQLIROG JDXJH VHW DQG WXUQ Rႇ
vacuum pump.
5. Wait 2 minutes to allow pressure to stabilise, then check that the low
pressure gauge is maintaining a pressure of -100 kPa (-76 cmHg).
6. Disconnect charge hose from the vapour valve service port and
replace the vapour valve service port cap.
7. 2SHQERWKWKHYDSRXUDQGWKHOLTXLGYDOYHVWRFKDUJHWKHUHIULJHUDQW
system for test running.
8. Test run the system through both heating and cooling cycles and test
for leaks.
9. 5HSODFHWKHYDSRXUDQGOLTXLGYDOYHFDSV
Both the vapour and liquid valve caps MUST BE on tight.
10. The system is now ready to run.
Adding Refrigerant for Longer Line Length
Additional refrigerant for longer piping runs can be added either at the time
of evacuation of the new installation or whilst the unit is operating, see "Pipe
Length & Elevation Limits" on page 8.
It is very easy to overcharge, take caution in charging
refrigerant liquid and keep your eye on the scales to avoid
overcharging the unit.
Take care not to discharge refrigerant into the atmosphere
during installation, re-installation, repair or service.
Low pressure gauge
-100 kPa (-76 cmHg)
Low pressure
gauge handle
Vacuum
Pump
Charge
hose
Manifold
gauge
set
Charge
hose
Vapour valve
Service port
Liquid valve
INSTALLATIONINSTALLATION
 Loading...