Installation and Programming Manual 2-7
Wiring the Utility Output Expansion Module
CONNECTIONS COMMENTS
DIP Switches
each Utility Output Module must be given a unique I.D. number identifying
it to the system; use the table on page 2-4 to set the DIP switches
Bus Terminals
AUX (Red) COM (Blk)
BUS (Yel) BUS (Grn)
the first four terminals at the left of the board are for the connection to the
Expansion Bus (see Figure 2-5 on page 2-11)
additional Utility Output Modules may be connected to the system at any
available point on the Expansion Bus
the maximum wire run permitted is 1000 feet for all legs of the BUS (see
page 2-7 for additional information)
depending on the cabinet housing the panel, it may be possible to mount
one or more Expansion Modules within (see Figure 2-1 on page 2-9)
Tamper
TAMP COM
if the Utility Output Module is enclosed in a metal cabinet and it’s desired
to "tamper" the cabinet, connect one (or more) appropriate normally-open
(its contacts are closed when the cabinet is secured) momentary-action
pushbutton switch(es), in series, between the TAMP and COM terminals
it is NOT necessary to use a tamper switch if another module sharing the
same metal cabinet if so equipped
do NOT use an End-of-Line Resistor in the Tamper Switch circuit
if a tamper switch is NOT used, connect a wire jumper between the two
terminals
Relay Connections
4 Relay Module
U01 U02 U03 U04
for instructions on wiring devices to the relays and programming their
operation, refer to page 2-3, and to the Utility Output section which begins
on page 3-38
Triggers
8 Open-Collector Outputs
UO1 through UO8
for instructions on wiring devices to the triggers and programming
their operation, refer to the Utility Output section which begins on page 3-
38
O
O
t
t
h
h
e
e
r
r
M
M
o
o
d
d
u
u
l
l
e
e
s
s
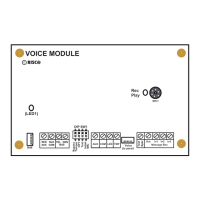
All other Pro-24 modules not discussed in these pages are equipped with their own wiring and operating
instructions.
W
W
i
i
r
r
i
i
n
n
g
g
G
G
u
u
i
i
d
d
e
e
l
l
i
i
n
n
e
e
s
s
One of the necessary factors required in making for a successful installation is the proper use of wire and cable.
Like all hardwired security systems, the Pro-24 relies on wire to carry power and data to the Keypads, Expansion
Modules, detectors, and any external sounder(s) which may be part of the installation. If the wire is too long or not
thick enough for the quantity and types of components in use, excessive voltage drops could develop and deprive
such devices of sufficient power–resulting in unreliable system operation and weak-sounding annunciators.
A
A
W
W
o
o
r
r
d
d
A
A
b
b
o
o
u
u
t
t
W
W
i
i
r
r
e
e
If the proper wire thicknesses are selected before beginning, power losses can be minimized. By taking into
account an installation’s current requirements and the wiring distances involved, Tables 2-2 through 2-5 provides
useful information to help make your installation trouble-free.
Table 2-1 is offered for reference. As it indicates, a wire’s diameter is assigned a numeric size, or gauge–a number
which is based on AWG (American Wire Gauge) designations. Note that as a wire’s diameter increases, however,
its AWG size gets numerically lower.
Wire Diameter Resistance: Feet Resistance: Meters AWG Gauge
Size
Inches millimeters
Ω per foot Ω per 1000 ft Ω per meter Ω per 100 m
24 0.020 0.50 0.026 26.0 0.085 8.5
22 0.025 0.64 0.016 16.0 0.052 5.2
20 0.031 0.80 0.010 10.0 0.032 3.2
19 0.035 0.90 0.008 8.0 0.026 2.6
18 0.040 1.00 0.006 6.0 0.020 2.0
16 0.050 1.27 0.004 4.0 0.013 1.3
14 0.064 1.63 0.0025 2.5 0.008 0.82
Table 2-1: Wire Facts