Copyright © 2020 River Systems - All rights reserved
- 29 -
6. HATCHING OF THE CHICK
The following operation is very delicate and should be executed quickly to prevent the eggs from cooling. We
suggest that two people perform it in order to reduce the time as much as possible.
Three days before the expected hatching date:
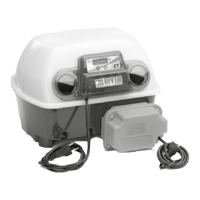
a) – Semiautomatic incubator: remove the metal handle from the front of the incubator (photo L);
– Incubator with egg turning unit OVOMATIC: stop the egg turning unit by unplugging it when the eggs are
in a vertical position: this will facilitate the removal of the egg tray after the eggs have been taken out.
b) Remove the eggs from the swinging tray and place them gently on a blanket or on a specic egg tray.
c) Remove the egg tray (photo M). For the incubator with egg turning unit, to remove the egg tray simply lift
it, pulling it out from the metal tongue of the egg turning unit.
d) Pour 2 or 3 glasses of water into the base of the incubator.
e) Put the supplied hatching oor (removed before the beginning of the incubation) into the base of the
incubator, ensuring that its two plastic tongues cover the internal side of the water openings (photo N) so
that the chicks will not fall into them and drown.
f) Distribute the eggs on the hatching oor (photo O) grouping them in the centre and close the lid.
g) Fill both basins with lukewarm demineralized water. Once the rst egg hatches, the humidity level in the
incubator will rise to over 70%. This is normal.
h) Set the temperature to 37,2°C (see instructions on 4C).
Attention: make sure to reinsert egg tray correctly for the next incubation cycle. Note for the incubator with
egg turning unit: if after several cycles you notice that the slot in which the unit metal tongue is inserted is too
wide, swap the row with another in the tray.
IMPORTANT
• During the last 3 days do not turn the eggs.
• During the last 3 days do not unnecessarily open the incubator as this would let out the humidity and heat
necessary for the hatching.
• During the hatching phase, keep the machine in a room as dark as possible. This will ensure that the
chicks dget as little as possible, avoiding internal trauma.
• It is recommended to open the incubator only after having unplugged it, maximum once a day to extract
the dried off chicks.
• Keep the newborn chicks in the incubator for about 12 hours. They can stay inside the incubator for 1 or
2 days without drinking or eating without damage.
• Once the scheduled incubation days are over, let the incubator work for 2 or 3 days longer to allow any
late chick to hatch, keeping in mind that these animals will be potentially weak.
7. FIRST DAYS OF LIFE
Put the chicks in a draught-free room provided with the necessary heat and light where they can be fed and watered.
TIPS: you can use a carton box big enough to contain a drinker and a feeder (min.50x50 cm). Cover its
bottom with wood shavings or with newspaper sheets, to be changed often in order to prevent the chicks from
being in contact with their own excrements. For heating it is possible to use a heating plate, or you can hang a
reector with an infrared bulb at about 20-25 cm from the oor, taking care that it is rmly xed in order to avoid
accidents. Adjust the temperature by changing the height of the reector. Regarding the nutrition of the chicks,
please note that sometimes they start eating and drinking from the second / third day of life. When placing
the chick in the breeding box, wet its beak and then place it on top of the feeder: to dry its beak the chick will
rub it on the feed and it will start eating. Make sure that the drinker is no higher than 3-4 cm, to avoid the risk
of drowning. Pebbles on the bottom of the tray will prevent risks and attract the chick to the water to drink.
EN