EasyManua.ls Logo

RiverRidge Ashland User Manual

RiverRidge Ashland
24 pages
To Next Page IconTo Next Page
Page #1 background imageLoading...
Page #1 background image
ASSEMBLY INSTRUCTIONS
RiverRidge
®
Ashland Tall Cabinet
ITEM# 06-082 White
ITEM# 06-083 Gray
ADULT ASSEMBLY REQUIRED
This product requires assembly by an adult because of small parts. Care should be taken in
unpacking and assembling this item to keep small parts away from children.
WARNING SEE FULL WARNING ON PAGE 2
Young children can be seriously injured or killed if furniture tips over. Don’t use
this item for a TV stand or place heavy objects on top of item. Always use
angle-braces or anchors to secure furniture to the wall.
Question and Answer IconNeed help?

Do you have a question about the RiverRidge Ashland and is the answer not in the manual?

RiverRidge Ashland Specifications

General IconGeneral
BrandRiverRidge
ModelAshland
CategoryIndoor Furnishing
LanguageEnglish

Summary

Assembly Instructions Overview

Product Identification

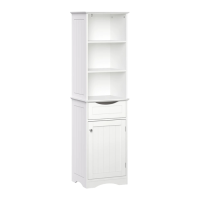
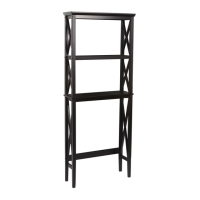
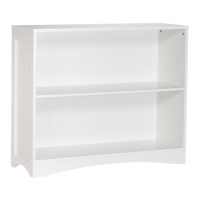
Identifies the specific product being assembled, RiverRidge Ashland Tall Cabinet.

Adult Assembly Requirement

Highlights the need for adult supervision due to small parts.

Important Safety Information

Furniture Tip-Over Prevention

Provides critical instructions to prevent furniture tip-over and associated injuries.

Parts and Tools Listing

Parts Identification

Lists all components required for assembly with their quantities and descriptions.

Required Tools for Assembly

Specifies the tools required for assembling the cabinet, noting recommendations.

Step-by-Step Assembly Guide

Step 1: Panel Preparation

Details initial preparation of side panels with cam bolts.

Step 2: Upper Shelf Assembly

Guides on attaching upper shelves using dowels and cam locks.

Step 3: Top Board Attachment

Instructions for attaching the top board to the upper section.

Step 4: Middle Connection Board

Details attachment of the middle connection board.

Step 5: Drawer Holder & Magnet Installation

Instructions for attaching drawer holders, screws, and magnets.

Step 6: Base Structure Assembly

Guides connecting side panels to cross bar, bottom board, and decorative panel.

Step 7: Unit Connection

Instructions for joining upper and lower sections.

Step 8: Back Panel Attachment

Details attaching upper and lower back panels using screws.

Step 9: Drawer Construction

Instructions for assembling drawer components.

Step 10: Door and Shelf Fittings

Guides attaching door hardware and door to cabinet.

Step 11: Wall Bracket Installation

Instructions on attaching metal brackets to cabinet and wall.

Step 12: Final Wall Securing

Details using a plastic lock strip to secure cabinet to wall.

Conclusion and Support

Product Enjoyment Message

Concludes with a message of enjoyment and encourages further purchases.

Customer Support Information

Provides contact details for replacement parts and support.

Related product manuals