EasyManua.ls Logo

RiverRidge Ellsworth 3-Shelf Corner Cabinet User Manual

RiverRidge Ellsworth 3-Shelf Corner Cabinet
11 pages
To Next Page IconTo Next Page
Page #1 background imageLoading...
Page #1 background image
ASSEMBLY INSTRUCTIONS
Ellsworth 3-Shelf Corner Cabinet
ADULT ASSEMBLY REQUIRED
This product requires assembly by an adult because of small parts. Care should be taken
in unpacking and assembling this item to keep small parts away from children. During assembly
children should be kept away from the product due to possible risk of injury.
WARNING SEE FULL WARNING ON PAGE 2
Young children can be seriously injured or killed if furniture tips over. Don’t use
this item for a TV stand or place heavy objects on top of item. Always use
angle-braces or anchors to secure furniture to the wall.
Question and Answer IconNeed help?

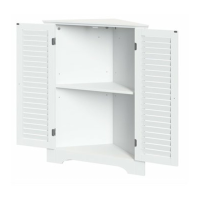
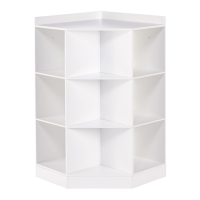
Do you have a question about the RiverRidge Ellsworth 3-Shelf Corner Cabinet and is the answer not in the manual?

RiverRidge Ellsworth 3-Shelf Corner Cabinet Specifications

General IconGeneral
Product NameRiverRidge Ellsworth 3-Shelf Corner Cabinet
CategoryIndoor Furnishing
TypeCorner Cabinet
Number of Shelves3
ColorWhite
FinishPainted
Assembly RequiredYes

Summary

Assembly Instructions

Step 1: Door Hinge and Magnet Plate Assembly

Assemble magnet plates and hinges onto the right and left side doors using screws.

Step 2: Base Frame Construction

Attach the left and right side support boards to the lower cross bar with wood dowels.

Step 3: Connecting Doors to Frame

Attach the assembled doors to the side support boards using hinges and screws.

Step 4: Installing Bottom Shelf

Secure the bottom shelf to the side support boards using screws and wood dowels.

Step 5: Attaching Left Side Panel

Attach the left side panel to the bottom shelf and left side support board using screws.

Step 6: Attaching Right Side Panel

Attach the right side panel to the bottom shelf and right side support board using screws.

Step 7: Top Board Preparation

Screw cam bolts into the top board and attach the magnet using screws.

Step 8: Connecting Top Board to Cabinet

Attach the top board to the side panels using wood dowels and cam bolts.

Step 9: Finalizing Doors and Shelf Holders

Insert cam locks, shelf holders, and attach door knobs using screws.

Step 10: Shelf Placement and Wall Anchoring

Place the adjustable shelf and secure the cabinet to the wall using anchors or screws.

Parts List

Related product manuals