Order No.
8194
Profi-Home-Charger
3.1 FUNCTION OF THE OPERATING CONTROLS
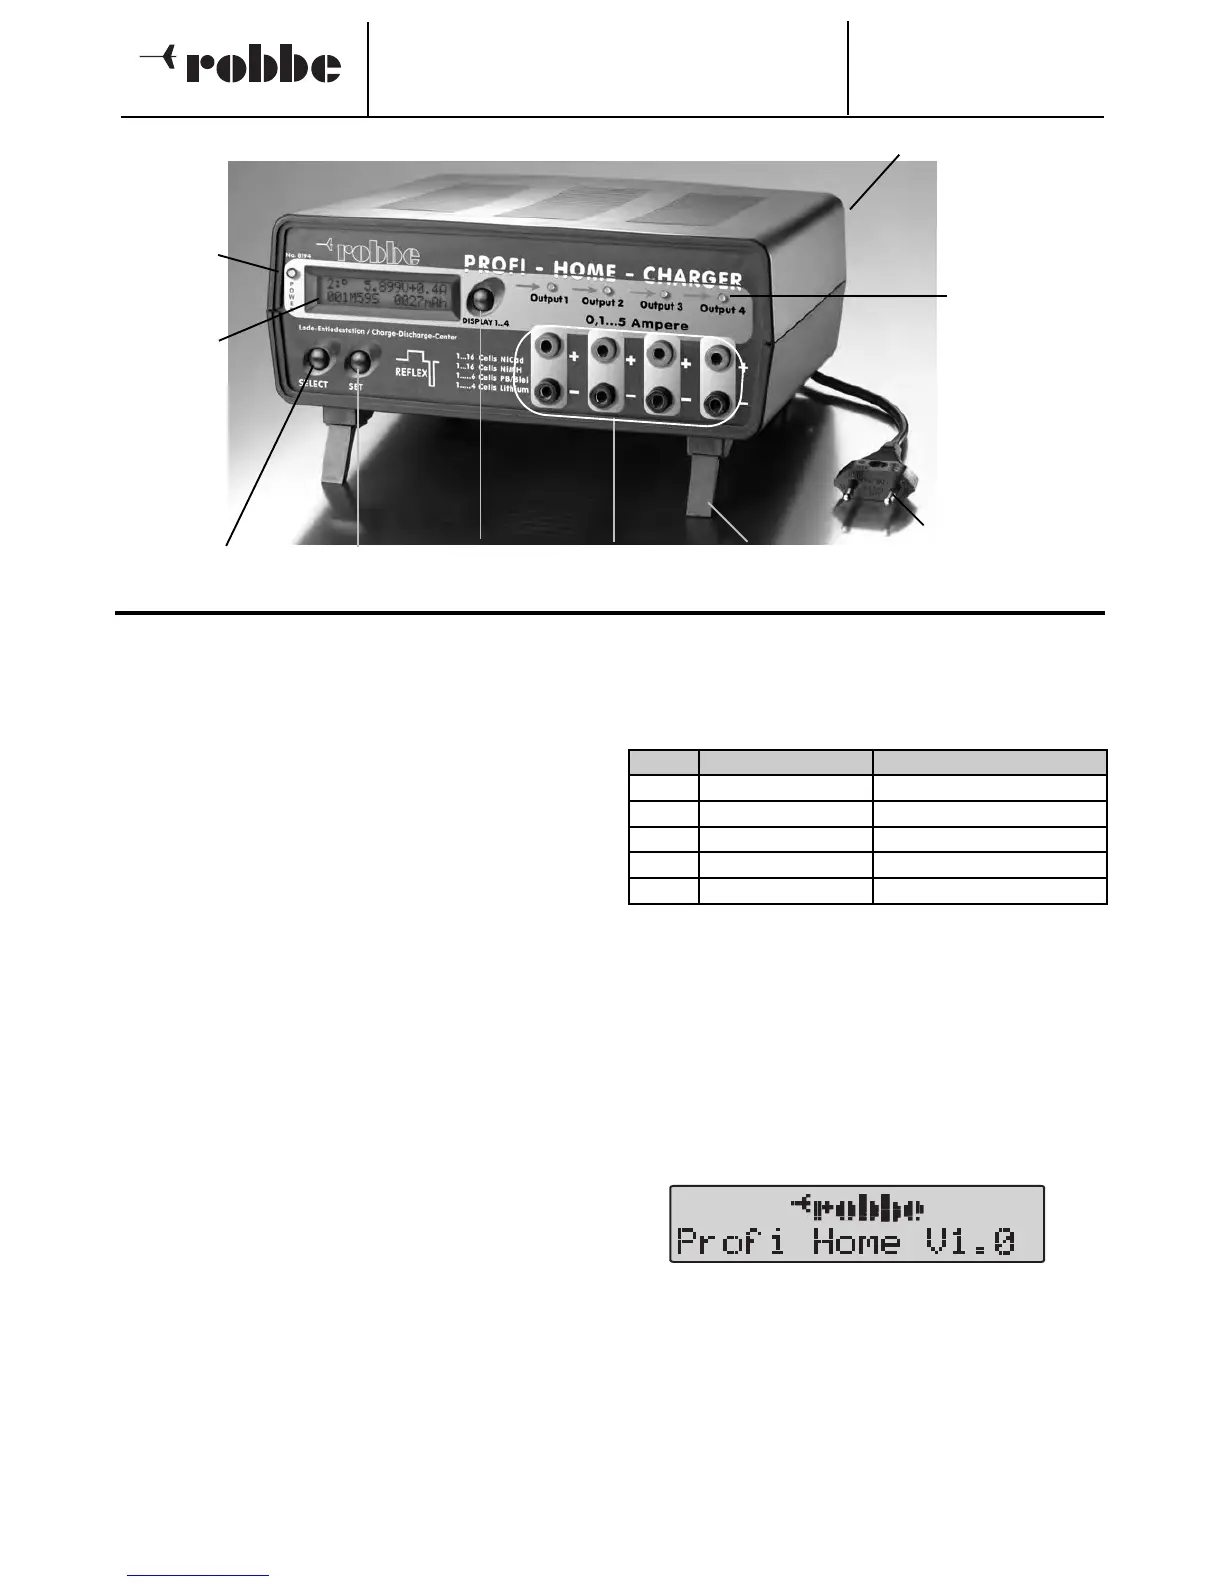
POWER LED
- Lights up if the charger is switched on.
DISPLAY key
- By repeatedly pressing this key you can switch between the
output working displays for Outputs 1...4.
- From Output 4 you get back to the Output 1, the displays
are arranged in an endless loop.
SELECT key
- This key changes from the “working” display to the “set-
ting” display where the preset positions are carried out for
the charge program of the appropriate Output.
- If the Output has been selected, then SELECT also serves
to navigate the cursor to the individual menu points in the
“setting” display. These menu points are also arranged in
an endless loop.
SET key
- This key changes the values in the “setting” display.
The values are also arranged in an endless loop and incre-
ase by one step each time the key is pr
essed.
Once the highest value has been reached the loop begins
again with the smallest value.
All keys have an auto-repeat function; holding the key down
causes the same effect as repeatedly pressing.
INTEGRATED ACOUSTIC SENSOR
- The internal piezo buzzer acknowledges each time a key is
pressed and signals the end of charging or discharging, as
well as any errors occurring.
LEDs (OUTPUT 1...4)
- Each charger Output (Output 1...4) has a status LED, which
clearly shows the status of the appropriate Output.
Explanation of the LED Status
4. START-UP OF CHARGING STATION
Connect the supply cable on the back of the Pr
ofi
Homecharger and link with a 230 V/50-60Hz mains supply
socket.
Afterwards, turn the equipment on with the switch on the
back.
4.1
DISPLA
YS AFTER SWITCHING ON
The blue ‘POWER’ LED and a short sound signalize that it is
switched on and the following appears in the illuminated dis-
play:
The software version is displayed next to the company symbol
and the device name. A short self-test will be carried out as is
usual with micr
ocomputer contr
olled devices. If no battery is
connected then the device will continue showing this display.
Now there are two navigation alternatives:
1.
Without changing the language go dir
ectly to the “working”
display -> then press the DISPLAY key.
2. Select the language in which for example the error messa-
ge should be displayed, then:
- Press ‘SELECT’ key; the set language will be displayed.
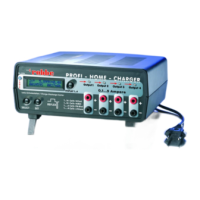
4
4 Output LEDs to
display the char
ge
status
Mains lead connection and mains switch (on the back)
Folding set-
up foot
Display key
Set key
Select key
POWER-ON
LED
Illuminated
LC display
Charge
Outputs 1 to 4
3. OPERATING CONTROLS
LED Anzeige Bedeutung
Red Steady light Charging process running
Red Flashing Ready for start
Red
Flashing + warning noise
Error, process not correct
Green Steady light Discharging process running
Green Flashing Process finished
Plug-in mains supply cable